VMware Cloud Foundation Offline Bundle
Recently I was assigined to a project within my company to deploy VMware Cloud Foundation 4.x within one of our dark sites. The team started researching updating VMware Cloud Foundation when deployed within dark site. We came across VMware doc that went over the process. Over the weekend I decided to deploy nested VMware Cloud Foudation within my home lab using Intel NUCs. Another blog post will go over in detail on how to deploy nested VMware Cloud Foundation on Intel NUCs.
This walkthrough will go over how to download lcm-tools, manifest file, and offline bundles needed to upgrade your dark site/disconnected VMware Cloud Foundation enviroment.
Table of Contents
- Prerequisites
- Download the Bundle Transfer Utility
- Downloading the LCM Manifest and Offline Bundles
- Uploading the Bundle Transfer Utility to SDDC Manager
- Uploading and Importing the LCM mainfest on the SDDC Manager
- Uploading and Importing the offline bundles on the SDDC Manager
Prerequisites
You will need the following before continuing:
- VMware Customer Connect account with an entitlement for VMware Cloud Foundation.
- A endpoint (Linux or Windows) that has internet connectivity.
- For this demo, I will be using a Windows workstation.
- Java Runtime Environment Installed
- Can be downloaded here
- WinSCP Installed
- Can be downloaded here
- To upload the manifest file from a Windows computer, you must have OpenSSL installed and configured.
- A process worked out with the security team in order to bring JSON and MD5 outside of your enviroment.
Download the Bundle Transfer Utility
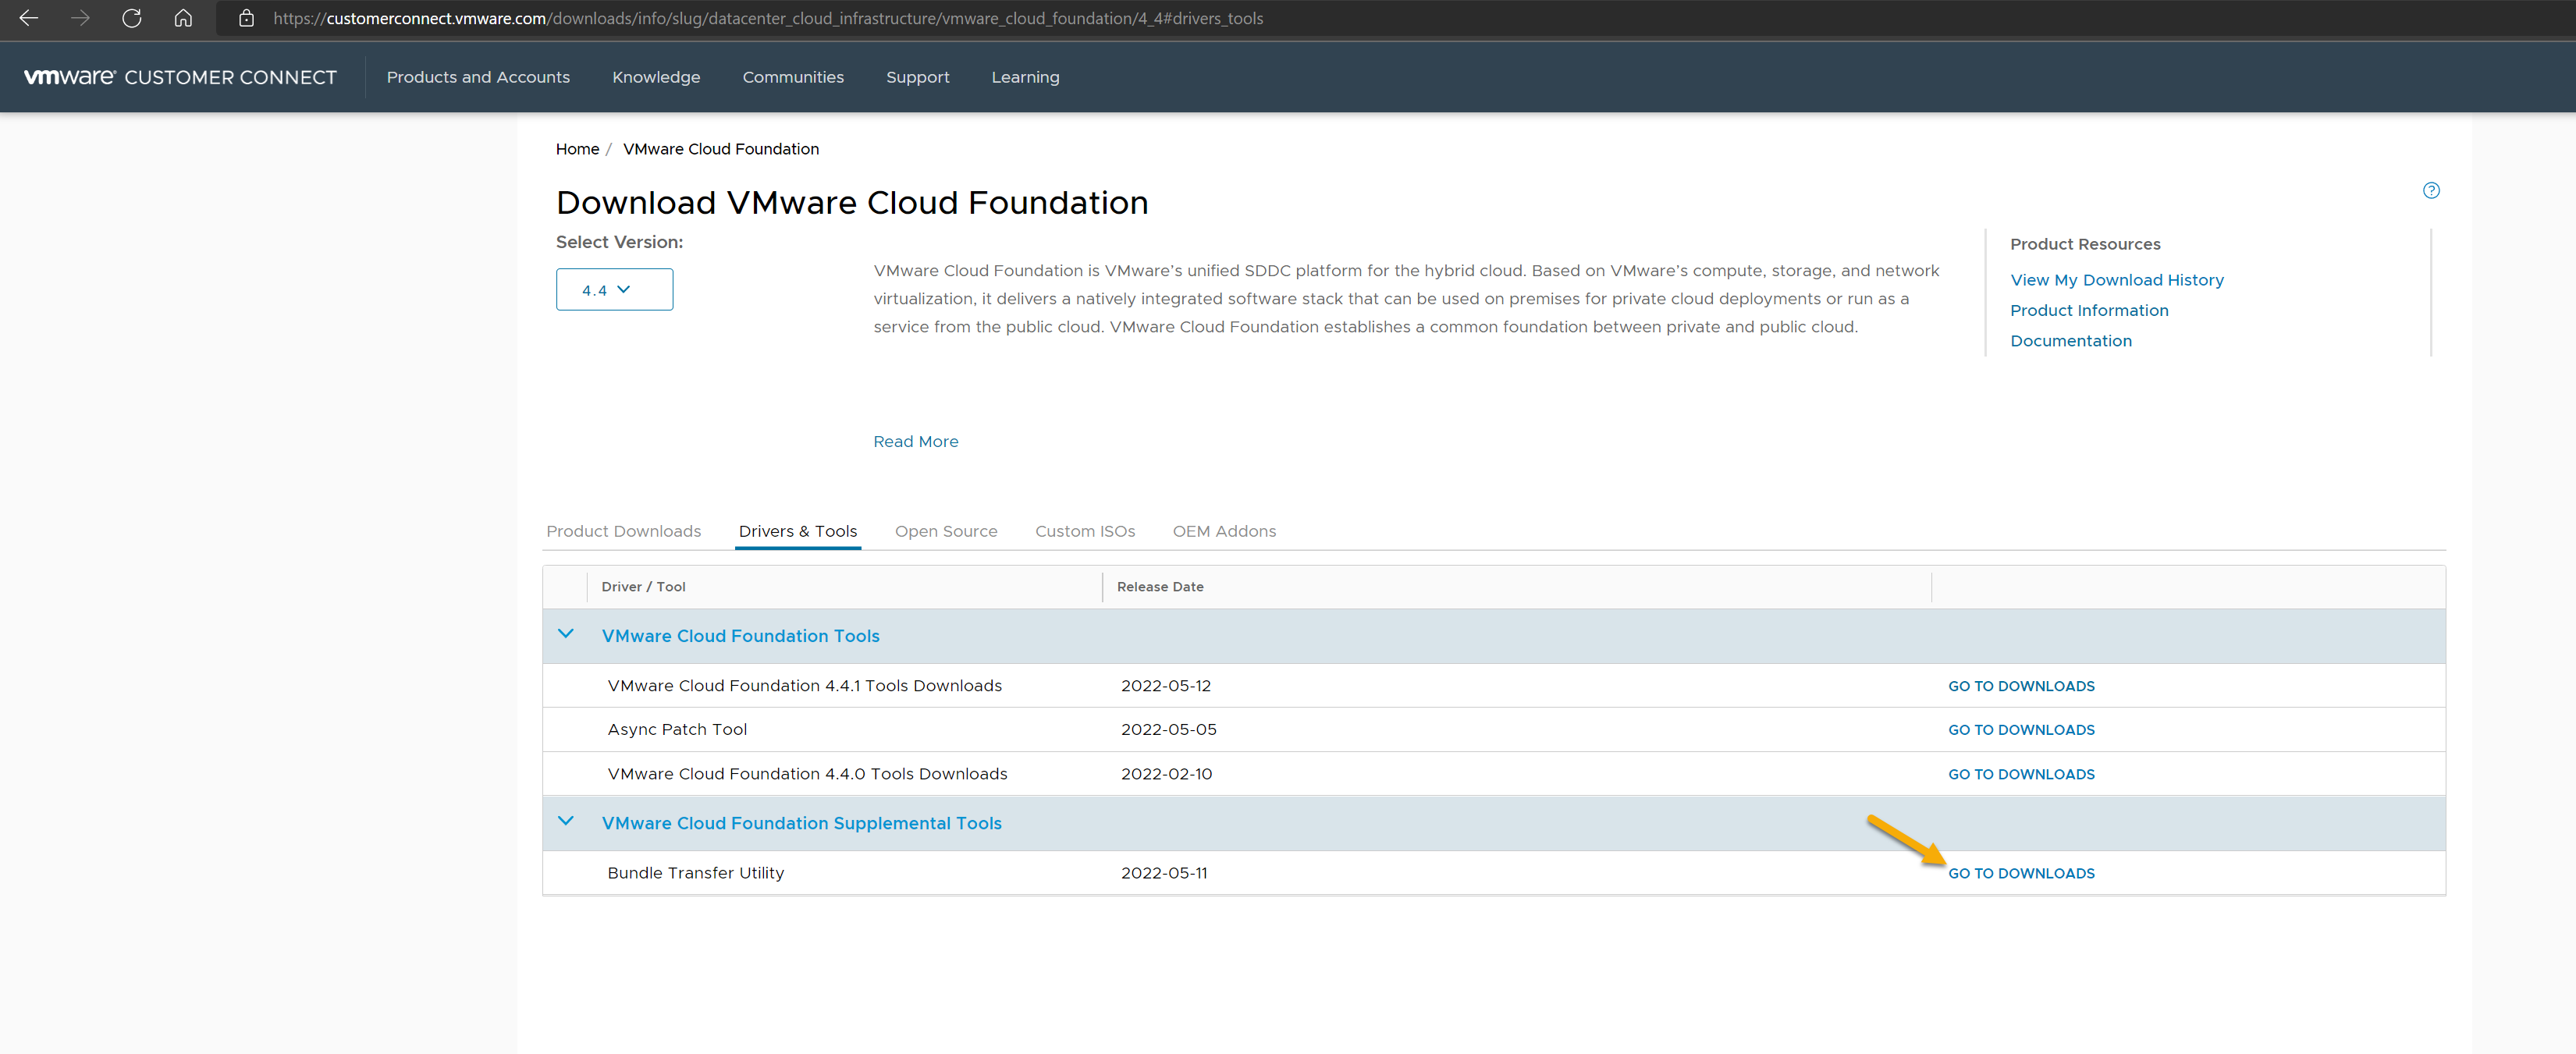
- Download the Bundle Transfer Utility on a computer with internet access.
- Log in to VMware Customer Connect and browse to the Download VMware Cloud Foundation page.
- In the Select Version field, select the version to which you are upgrading.
- Click Drivers & Tools
- Expand VMware Cloud Foundation Tools and click Go To Downloads.
- Click Download Now for the Bundle Transfer Utility.
- Extract lcm-tools-prod.tar.gz on workstation connected to the internet
Downloading the LCM Manifest and Offline Bundles
Downloading the mainfest file on the interent connected workstation
This is a structured metadata file that contains information about the VMware product versions included in the release Bill of Materials.
-
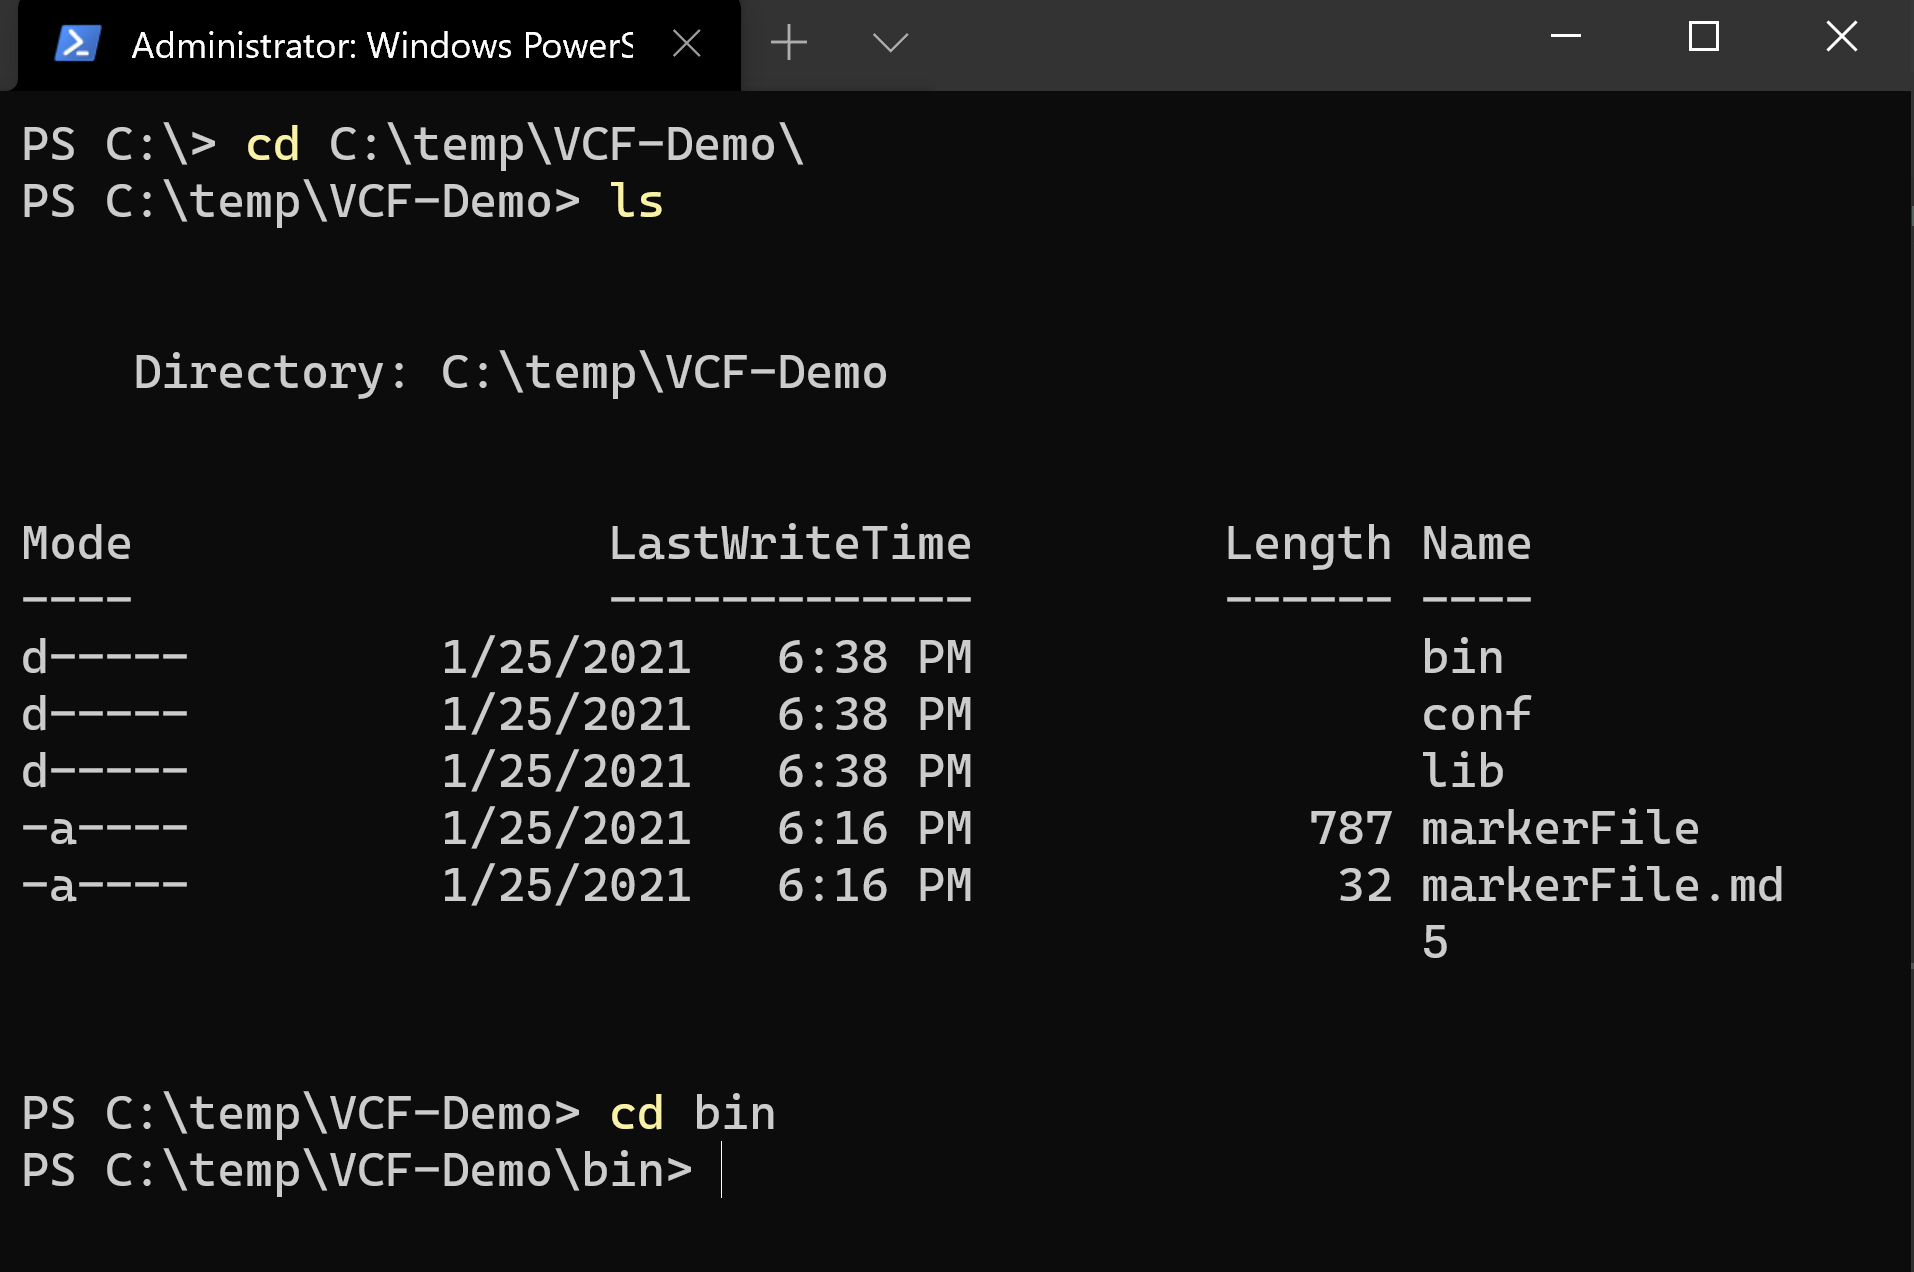
On the workstation with interent access. Run Powershell or Command Prompt as administrator.
-
Chanage directory to the “lcm-tools” you recently downloaded
-
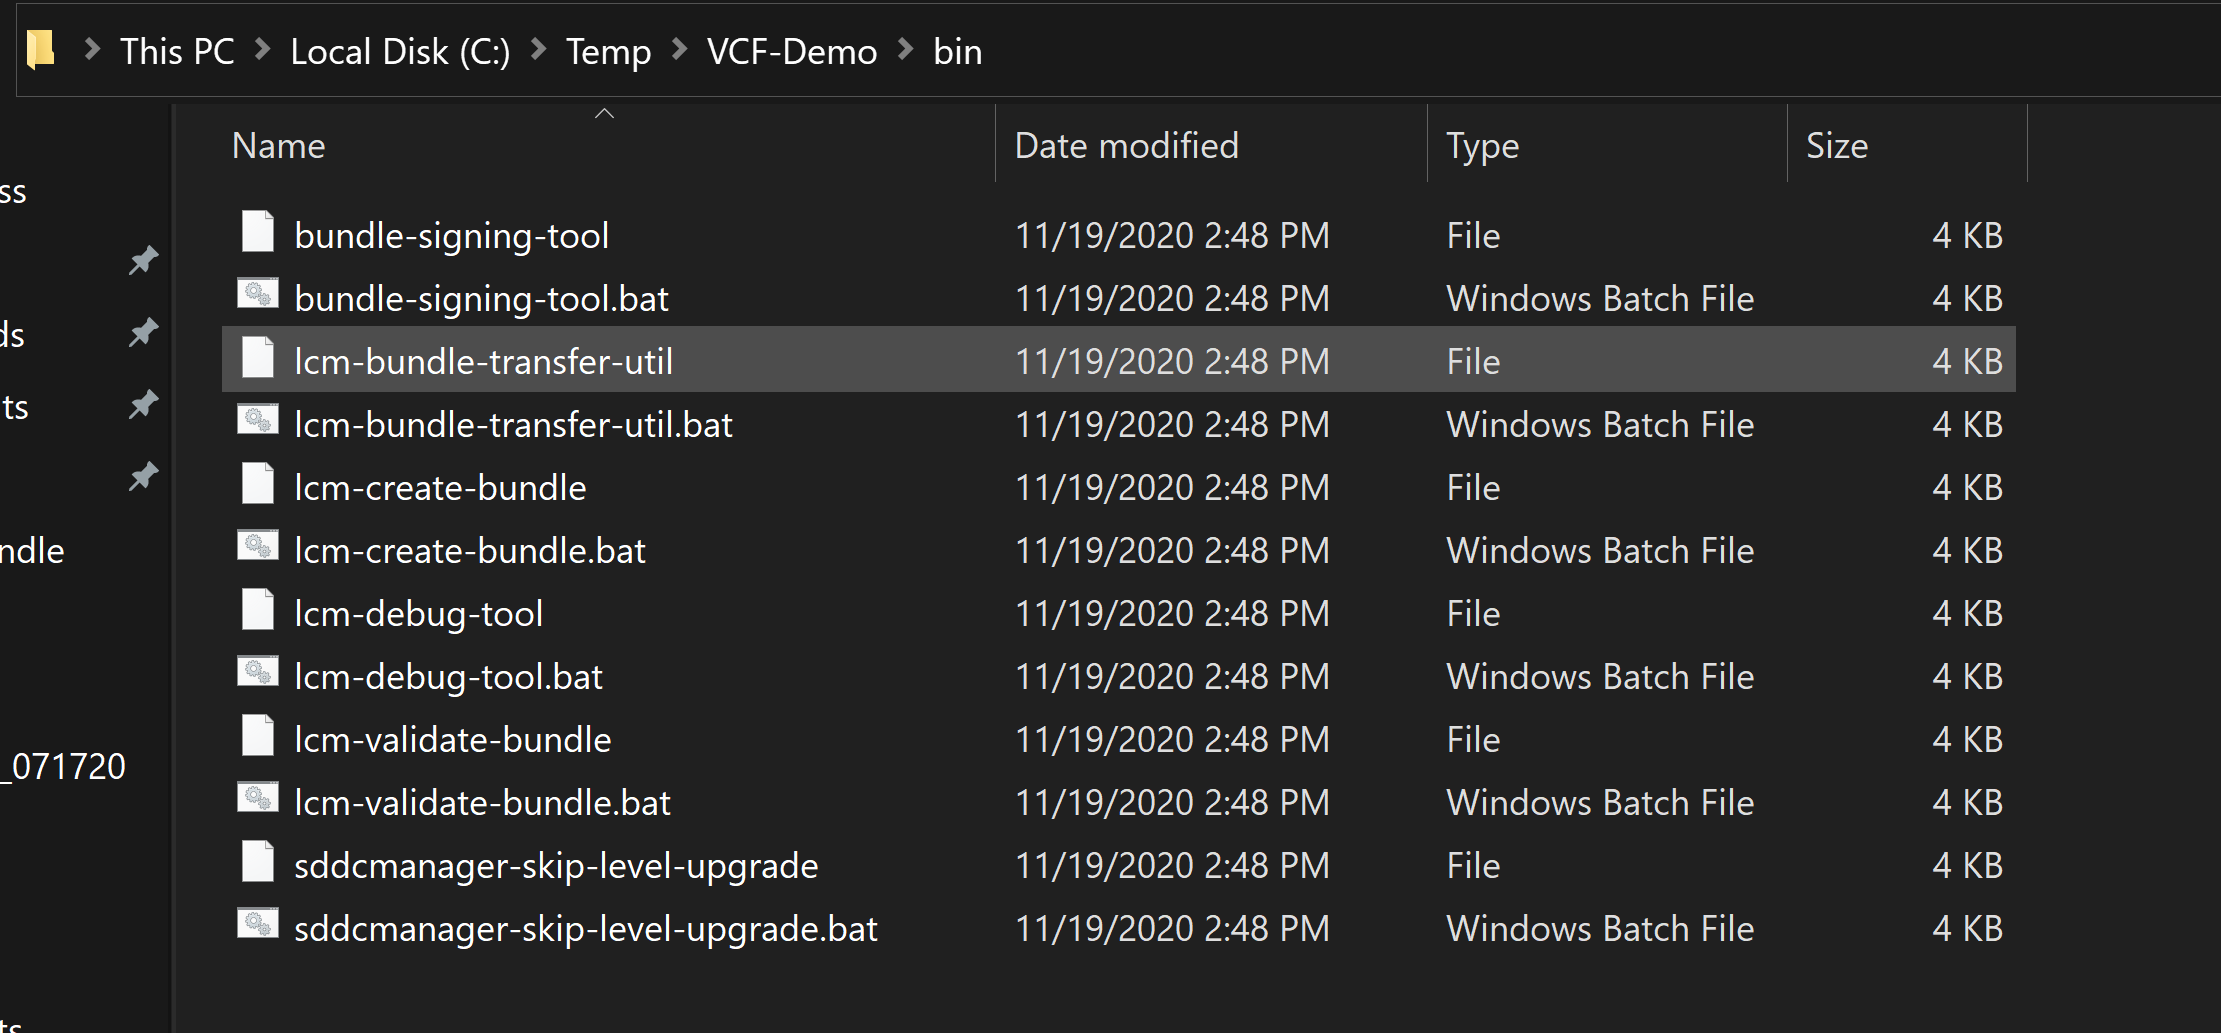
Change directory to the “bin” folder
-
Type the following command: (Note it is case sensitive!)
This part will require a MyVMware account that has entitlement for VMware Cloud Foundation.
1./lcm-bundle-transfer-util --download --manifestDownload --depotUser Username
Downloading offline bundle on the interent connected workstation
-
On the workstation with interent access. Run Powershell or Command Prompt as administrator.
-
Chanage directory to the “lcm-tools” you recently downloaded
-
Change directory to the “bin” folder


-
Type the following command: (Note it is case sensitive!)
1./lcm-bundle-transfer-util --download --outputDirectory absolute-path-output-dir --depotUser depotUser --sv current-vcf-version --p target-vcf-version

This part will require a MyVMware account that has entitlement for VMware Cloud Foundation. (Note if you have VxRail –pdu or –partnerDepotUser switch would be added.) Note: VCF 4.4.1 lcm-tools add two new switch “–sv” and “–p” which no longer requires generating makerfile.
| Option | Description |
|---|---|
| –sv | current-vcf-version, Current version of VMware Cloud Foundation. For example, 4.3.1.1. If you do not specify a current version, the utility uses 4.1.0.0. |
| –p | target-vcf-version, Target version of VMware Cloud Foundation. For example, 4.4.0.0. |
-
Type in your MyVMware password
-
Answer the prompt " Do you want to download vRealize bundles?" press y or n
-
Specify which bundles you would like to download. Enter of the following options
- all
- install
- patch
| Option | Description |
|---|---|
| all | This will download both the install and upgrade bundles. |
| install | This will download ONLY the INSTALL bundles to deploy a new workload domain. No upgrade bundles will be downloaded. |
| patch | This will download ONLY the UPGRADE bundles to upgrade and management domain. No install bundles will be downloaded. |
You can also enter a comma-separated list of bundle names to download specific bundles. For example: bundle-38371, bundle-38378.

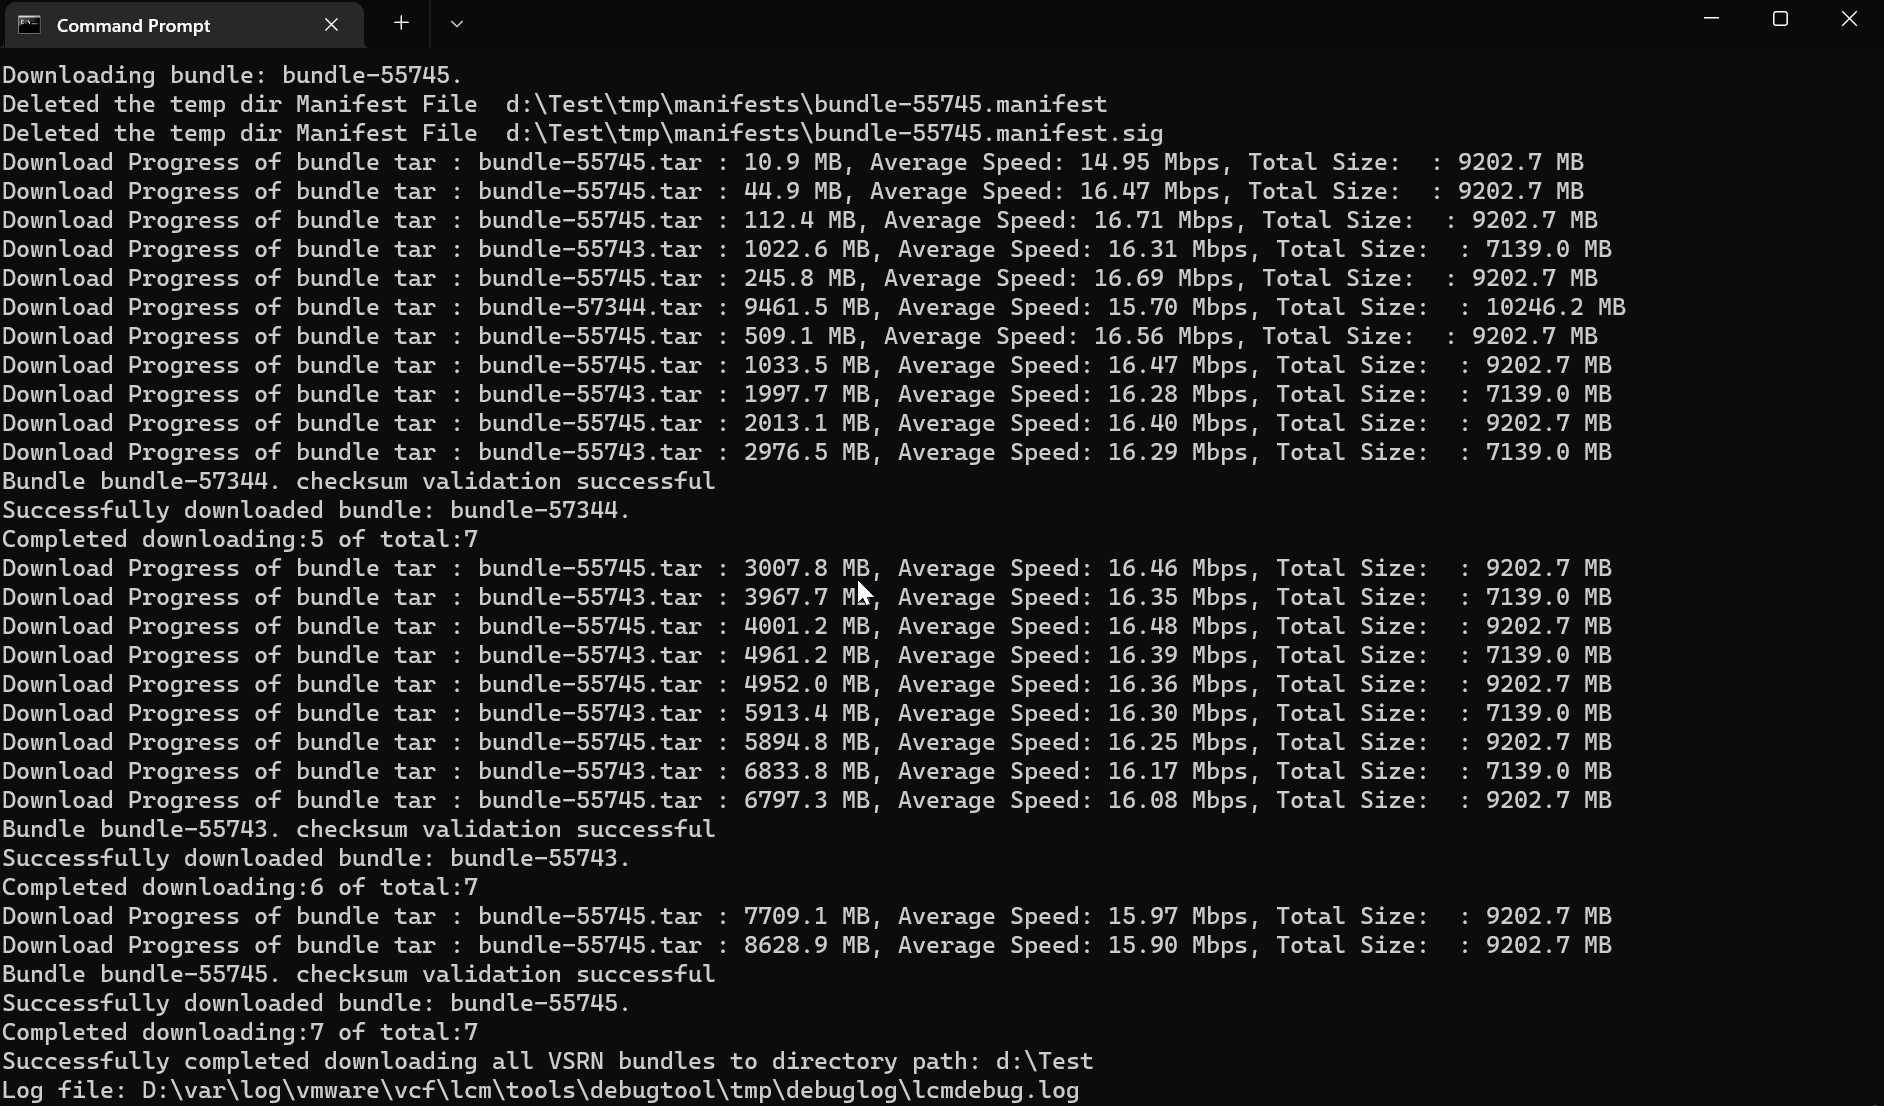
- You should see the following output after the download has completed.
Uploading the Bundle Transfer Utility to SDDC Manager
-
Transfer “lcm-tools-prod.tar.gz” you downloaded from step 1 to the computer with access to SDDC Manager Appliance.
-
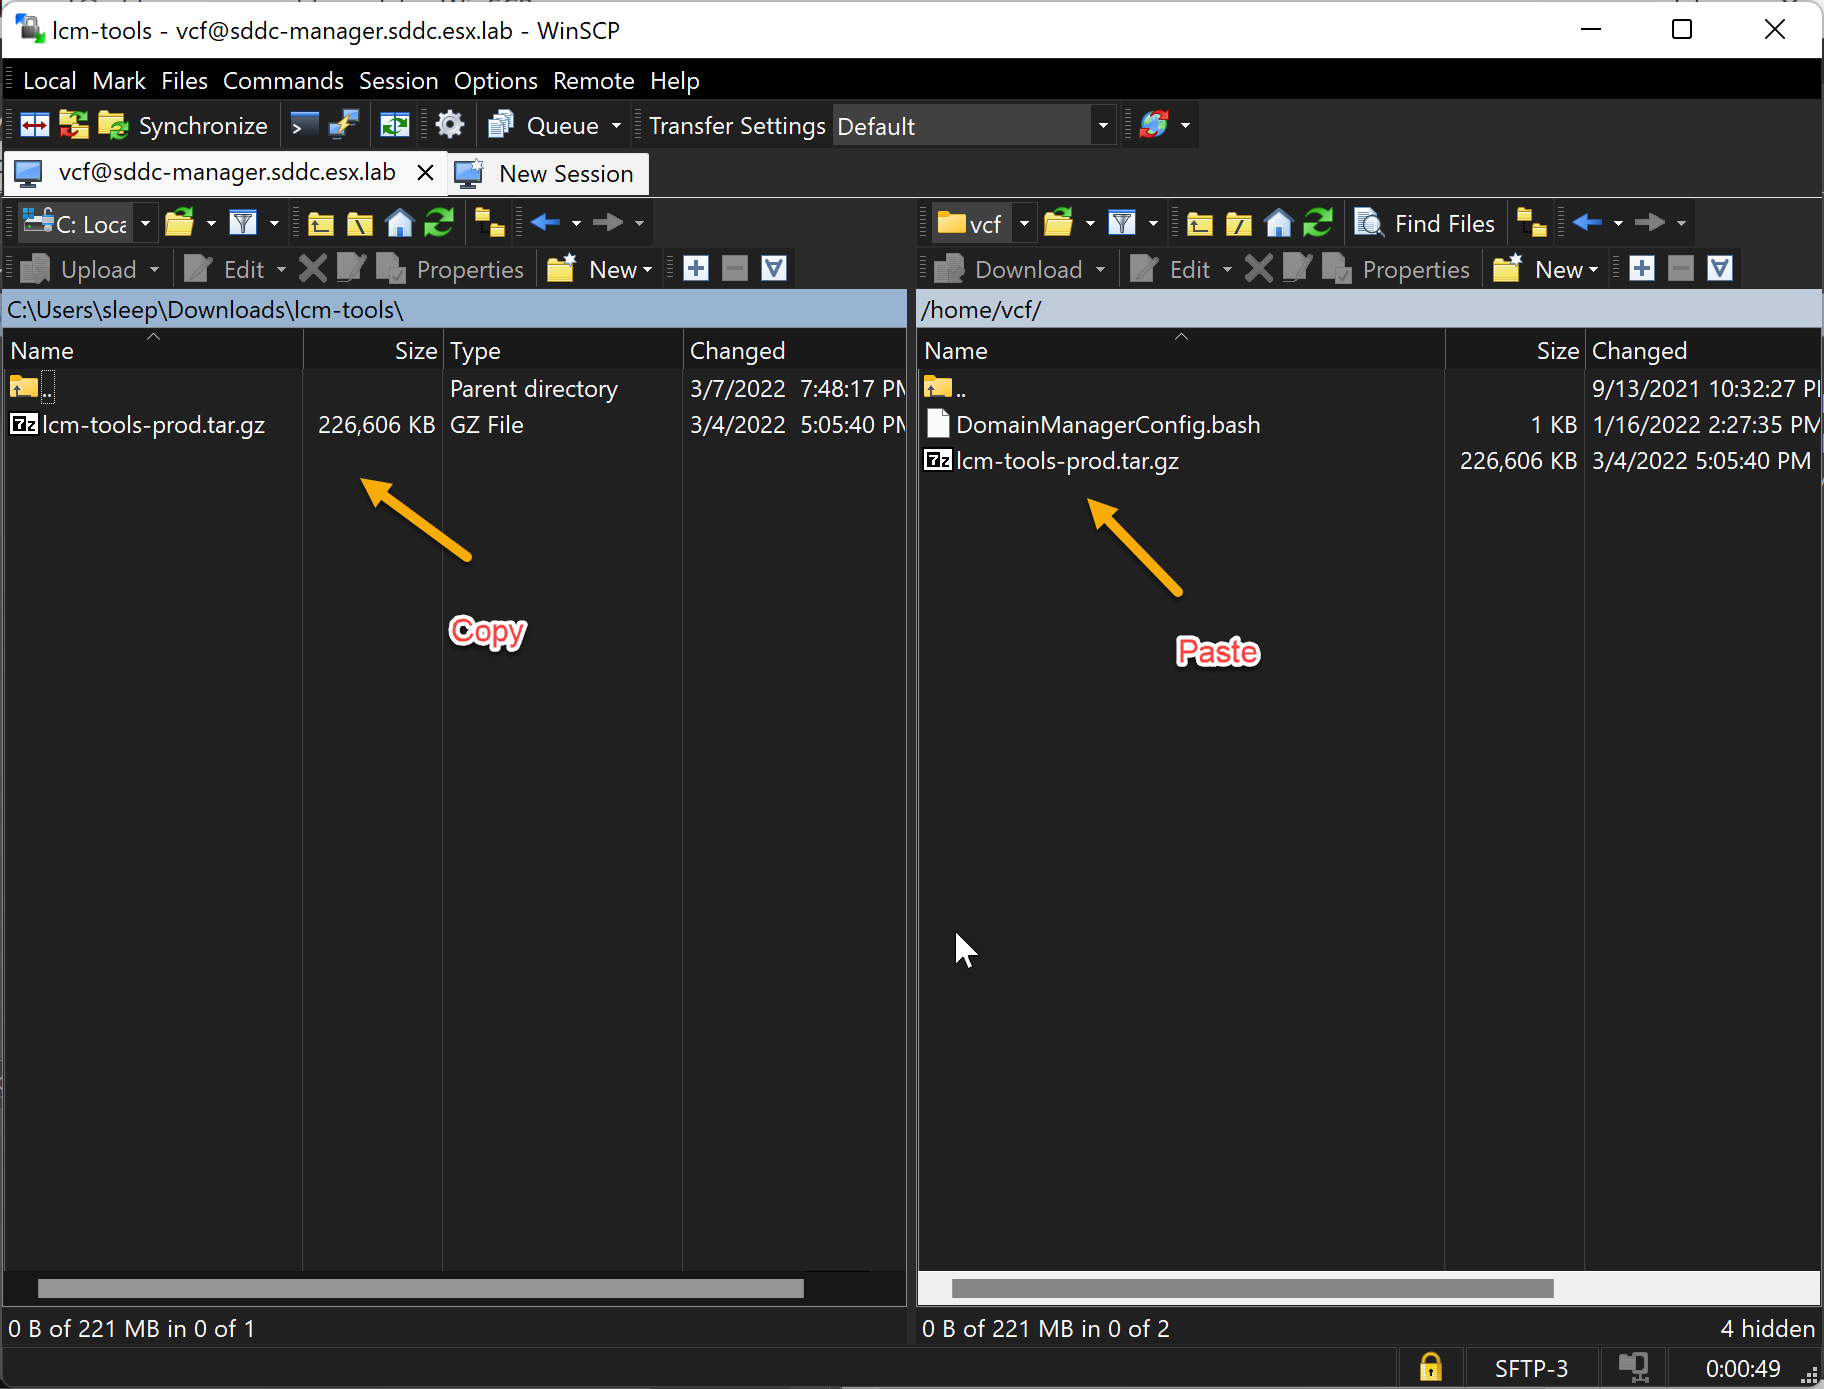
Copy the “lcm-tools-prod.tar.gz” to SDDC Manager Appliance.
Note: I will be using WinSCP to accomplish this task and I will be copying the “lcm-tools-prod.tar.gz” to /home/vcf/ on SDDC Manager Applaince.
How to connect to SDDC Manager using WinSCP
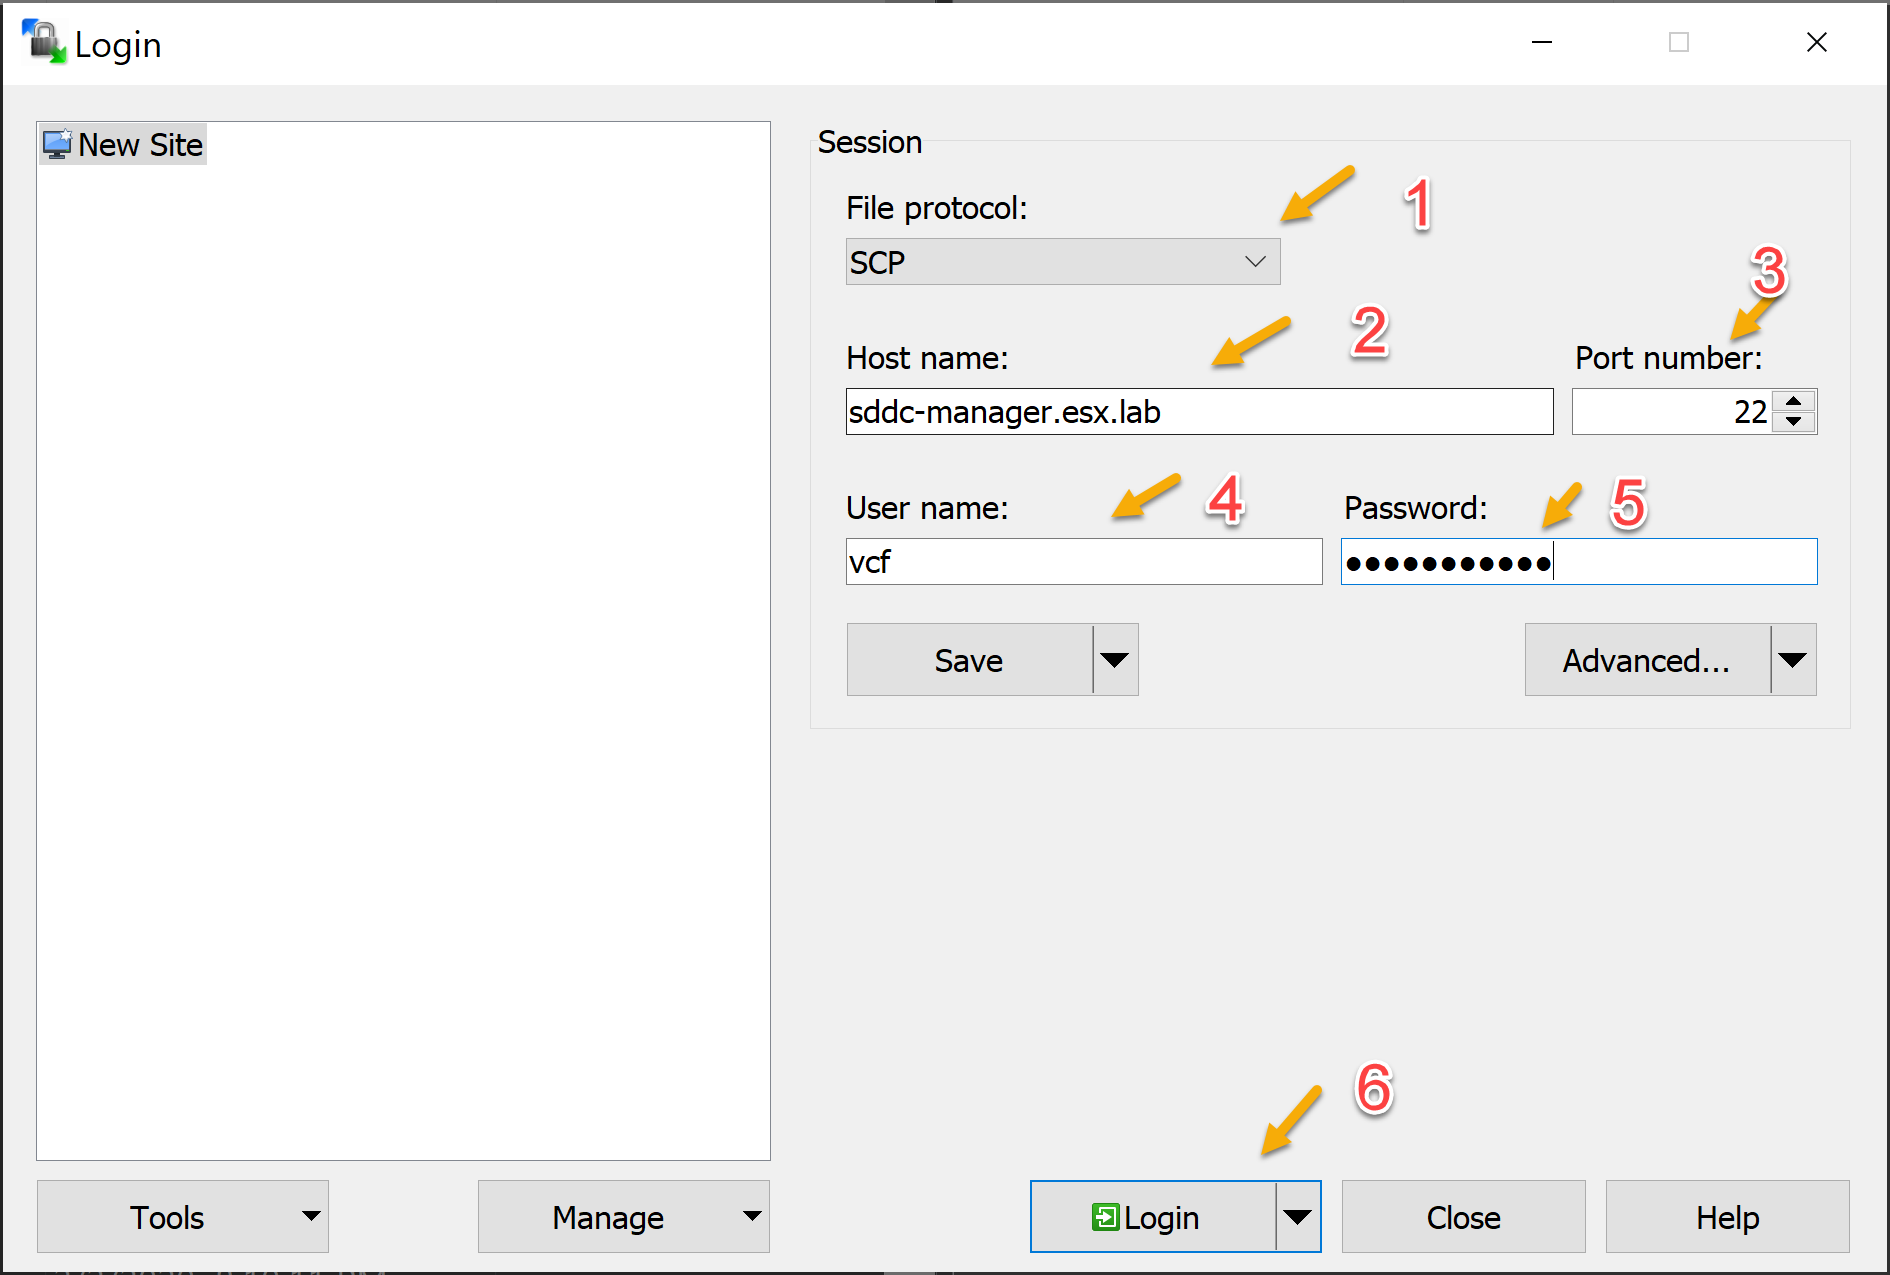
- Open WinSCP
- Set file protocol to “SCP”
- Provide the Hostname or IP to your SDDC Manager (example, sddc-manager.esx.lab)
- Port Number should be 22
- Username should be “vcf”
- Enter the password for “vcf” and press login
-
SSH into the SDDC Manager applaince using “vcf” user account.
-
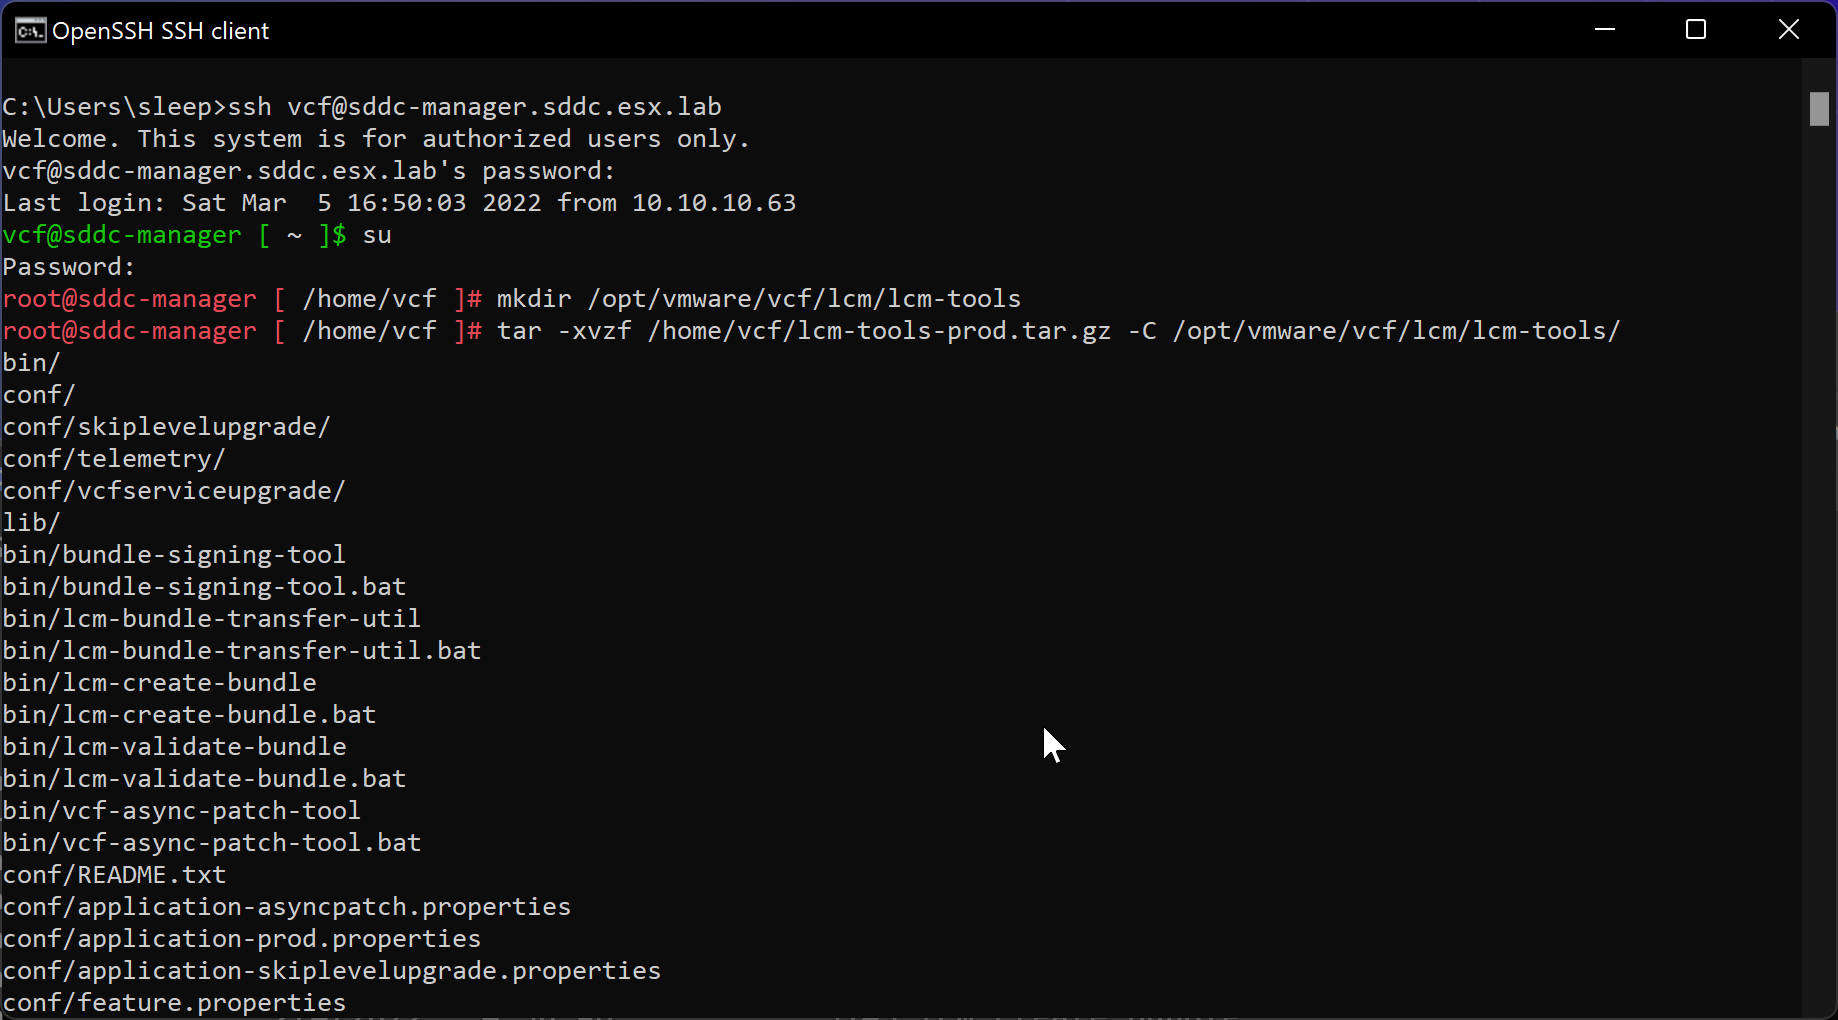
Enter “su” to switch to the root user.
-
Create the lcm-tools directory
1 mkdir /opt/vmware/vcf/lcm/lcm-tools
- Extract the “lcm-tools-prod.tar.gz” to the new “lcm-tools” directory.
1tar -xvzf /home/vcf/lcm-tools-prod.tar.gz -C /opt/vmware/vcf/lcm/lcm-tools/
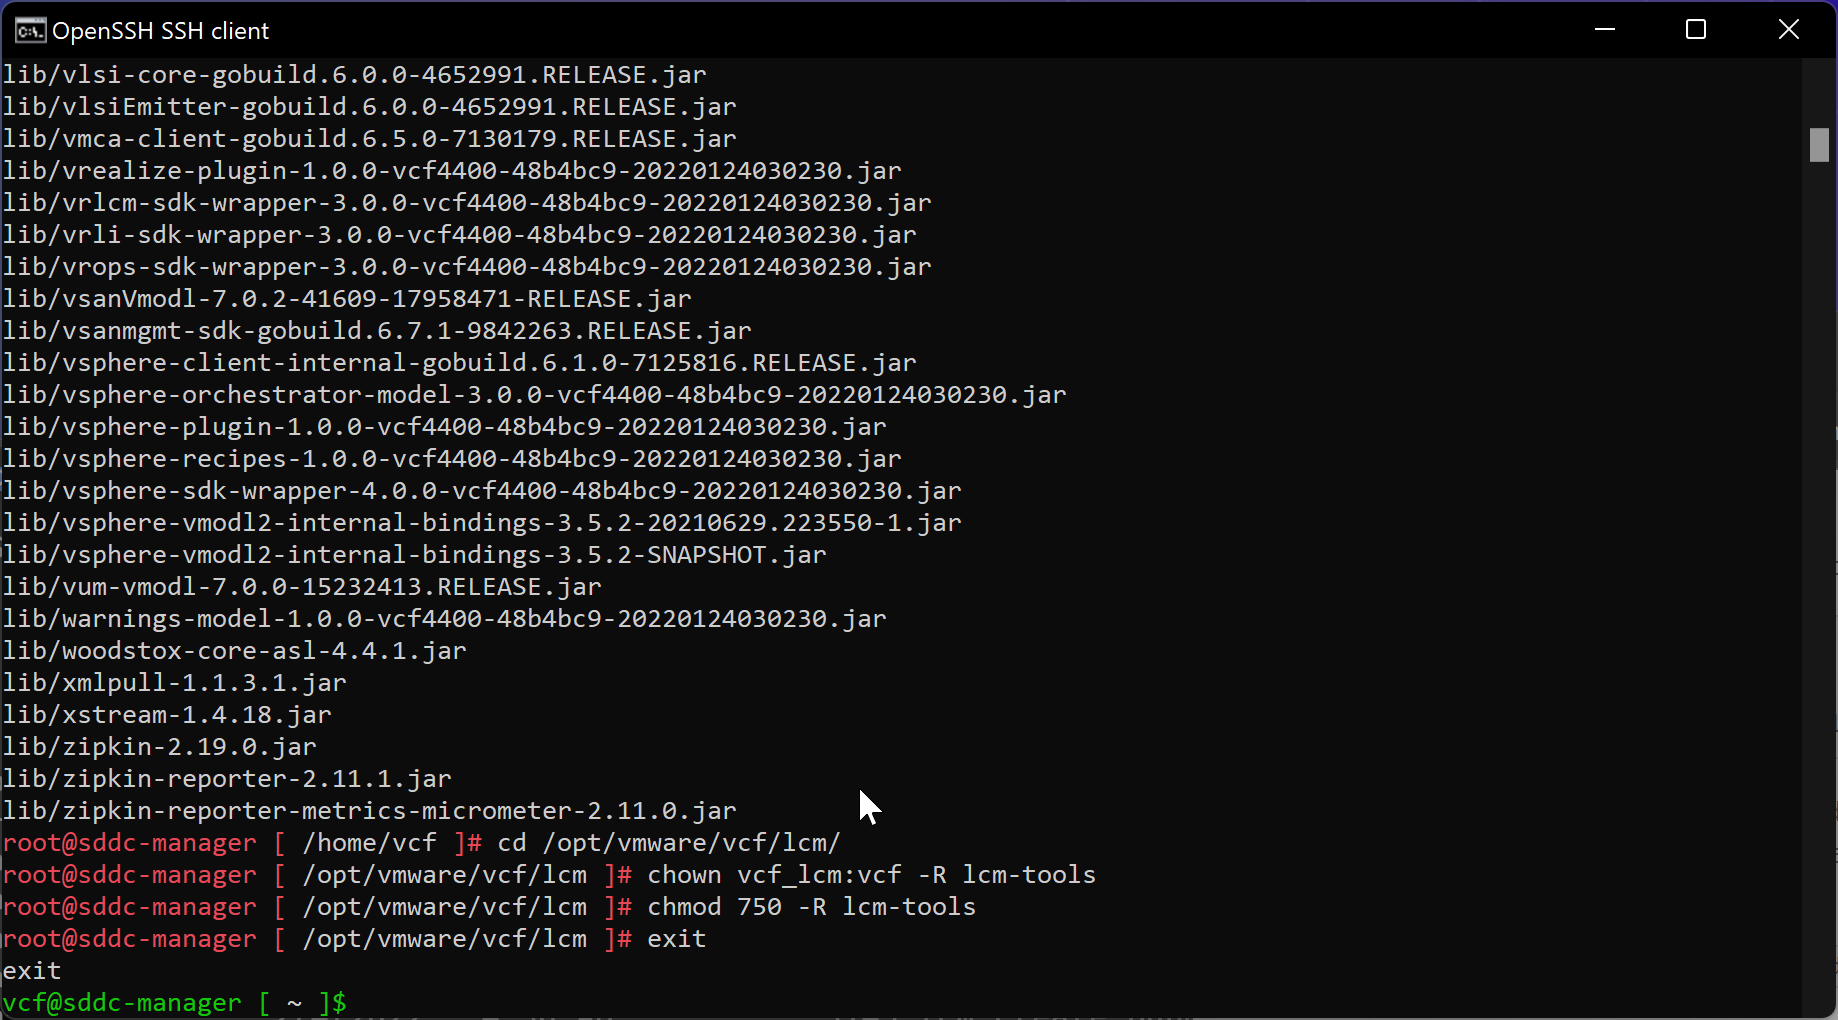
- After extracting “lcm-tools-prod.tar.gz” to the new “lcm-tools” directory will need to set the permissions.
1cd /opt/vmware/vcf/lcm/
2chown vcf_lcm:vcf -R lcm-tools
3chmod 750 -R lcm-tools
- After setting permissions on the “lcm-tools” directory, “exit” the “su” user
-
Navigate to the /opt/vmware/vcf/lcm/lcm-tools/bin/ directory
-
Validate that the utility version matches the target release. Run the following command to display the utility version:
./lcm-bundle-transfer-util -v
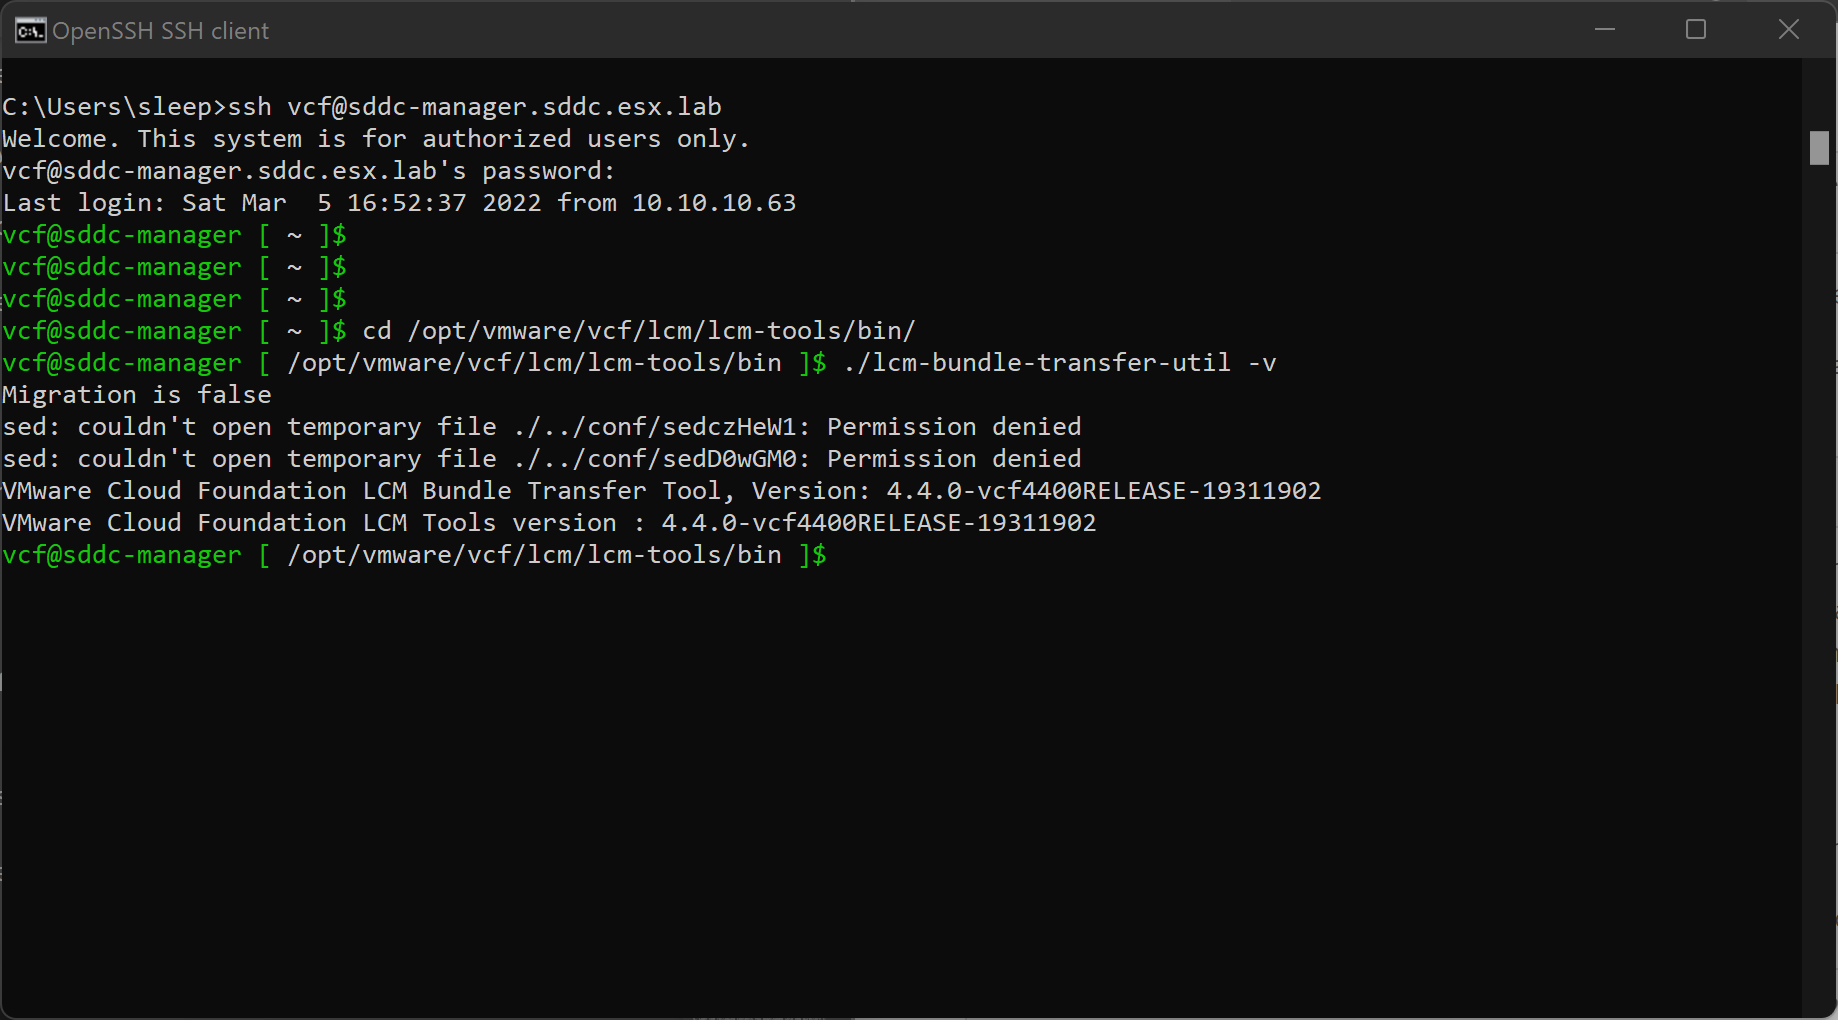
Note: You may have to anwser the CEIP as “root”
Uploading and Importing the LCM mainfest on the SDDC Manager
Uploading the manifest file to SDDC Manager
- Open WinSCP and connect to the SDDC Manager VM
- Change directory in WinSCP
1/home/vcf/
- Copy the manifest file you downloaded into a directory (Ex. /home/vcf/) on the SDDC Manager
1lcmManifestv1.json
Importing the manifest file
- SSH into SDDC Manager VM
- Change directory to the following
1cd /opt/vmware/vcf/lcm/lcm-tools/bin
- Run the following command:
1./lcm-bundle-transfer-util --update --sourceManifestDirectory Manifest-Downloaded-Directory --sddcMgrFqdn "SDDC Manager FQDN" --sddcMgrUser administrator@vsphere.local
2

-
Wait for the tool to validate the manifest file
-
You should see the following output when the process is completed.

Verify manifest import within the SDDC Manager client
- Log into SDDC Manager client using a web browser.
1https://sddc-manager.esx.lab
-
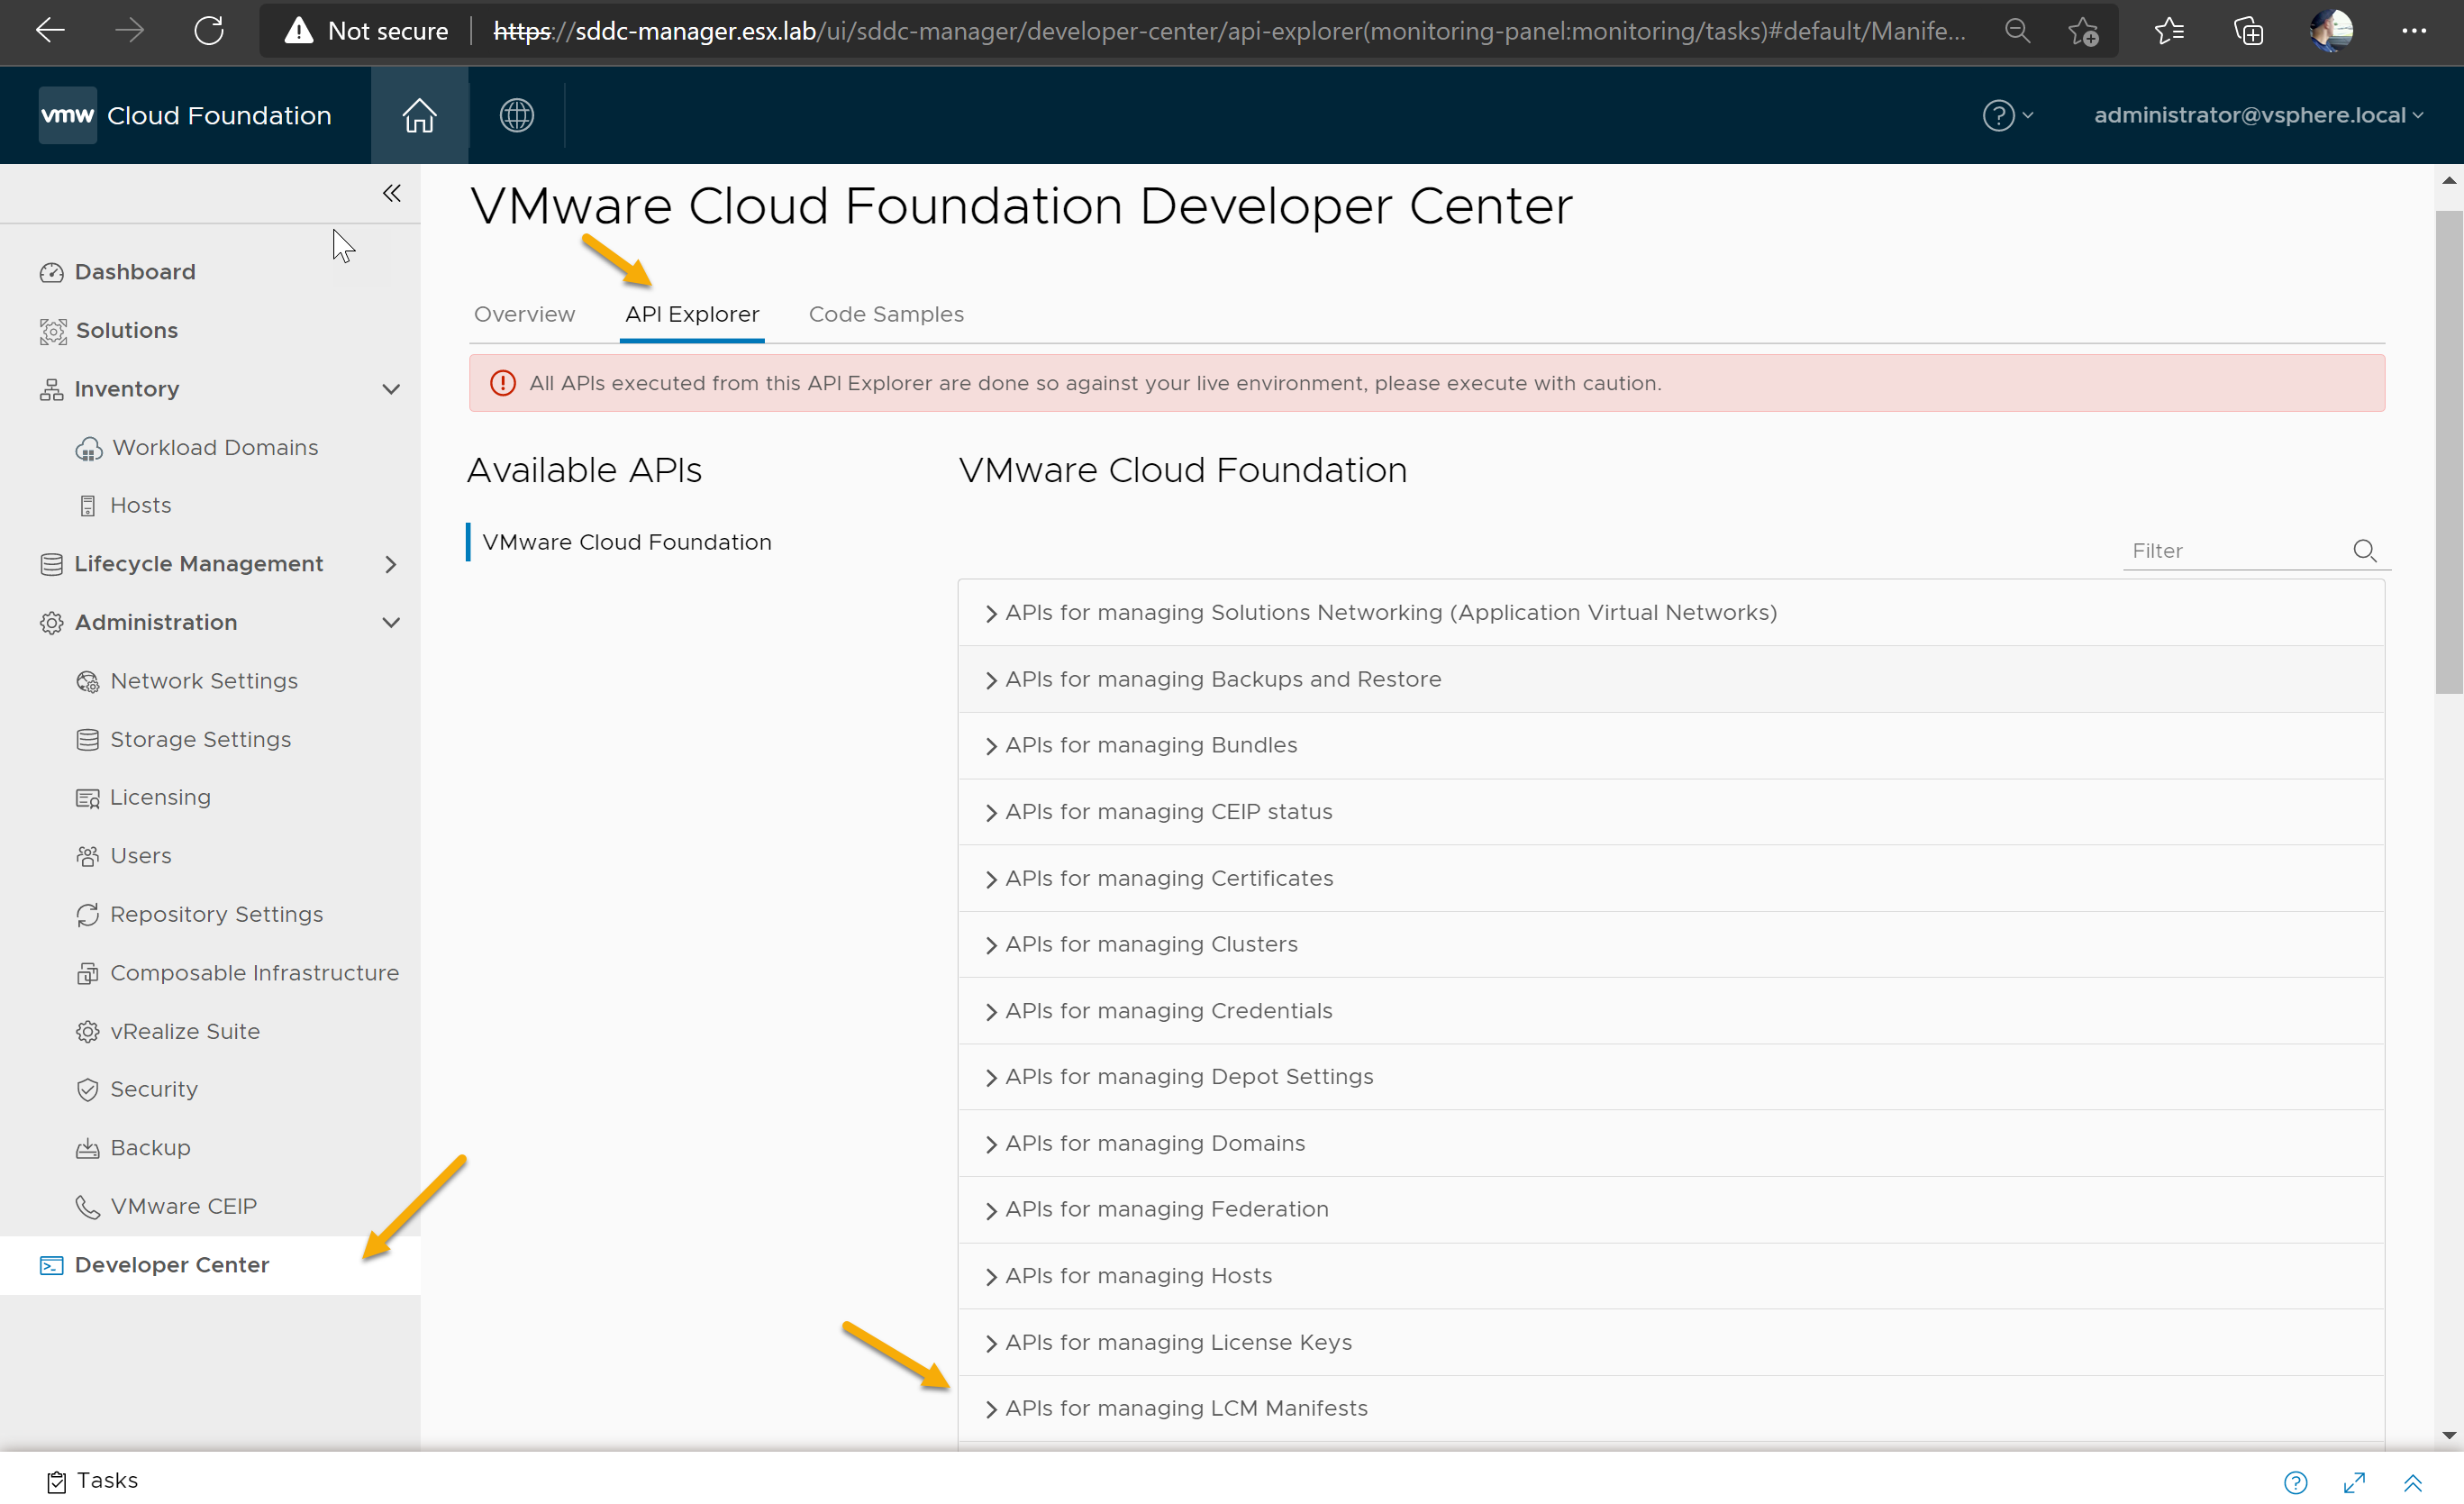
Go to “Devloper Center”
-
Select “API Explorer” and “APIs for managing LCM Manifest”
-
Expand “GET” and Select “Execute”
-
Under Response select “Manifest” and review the output to verify the manifest was uploaded.
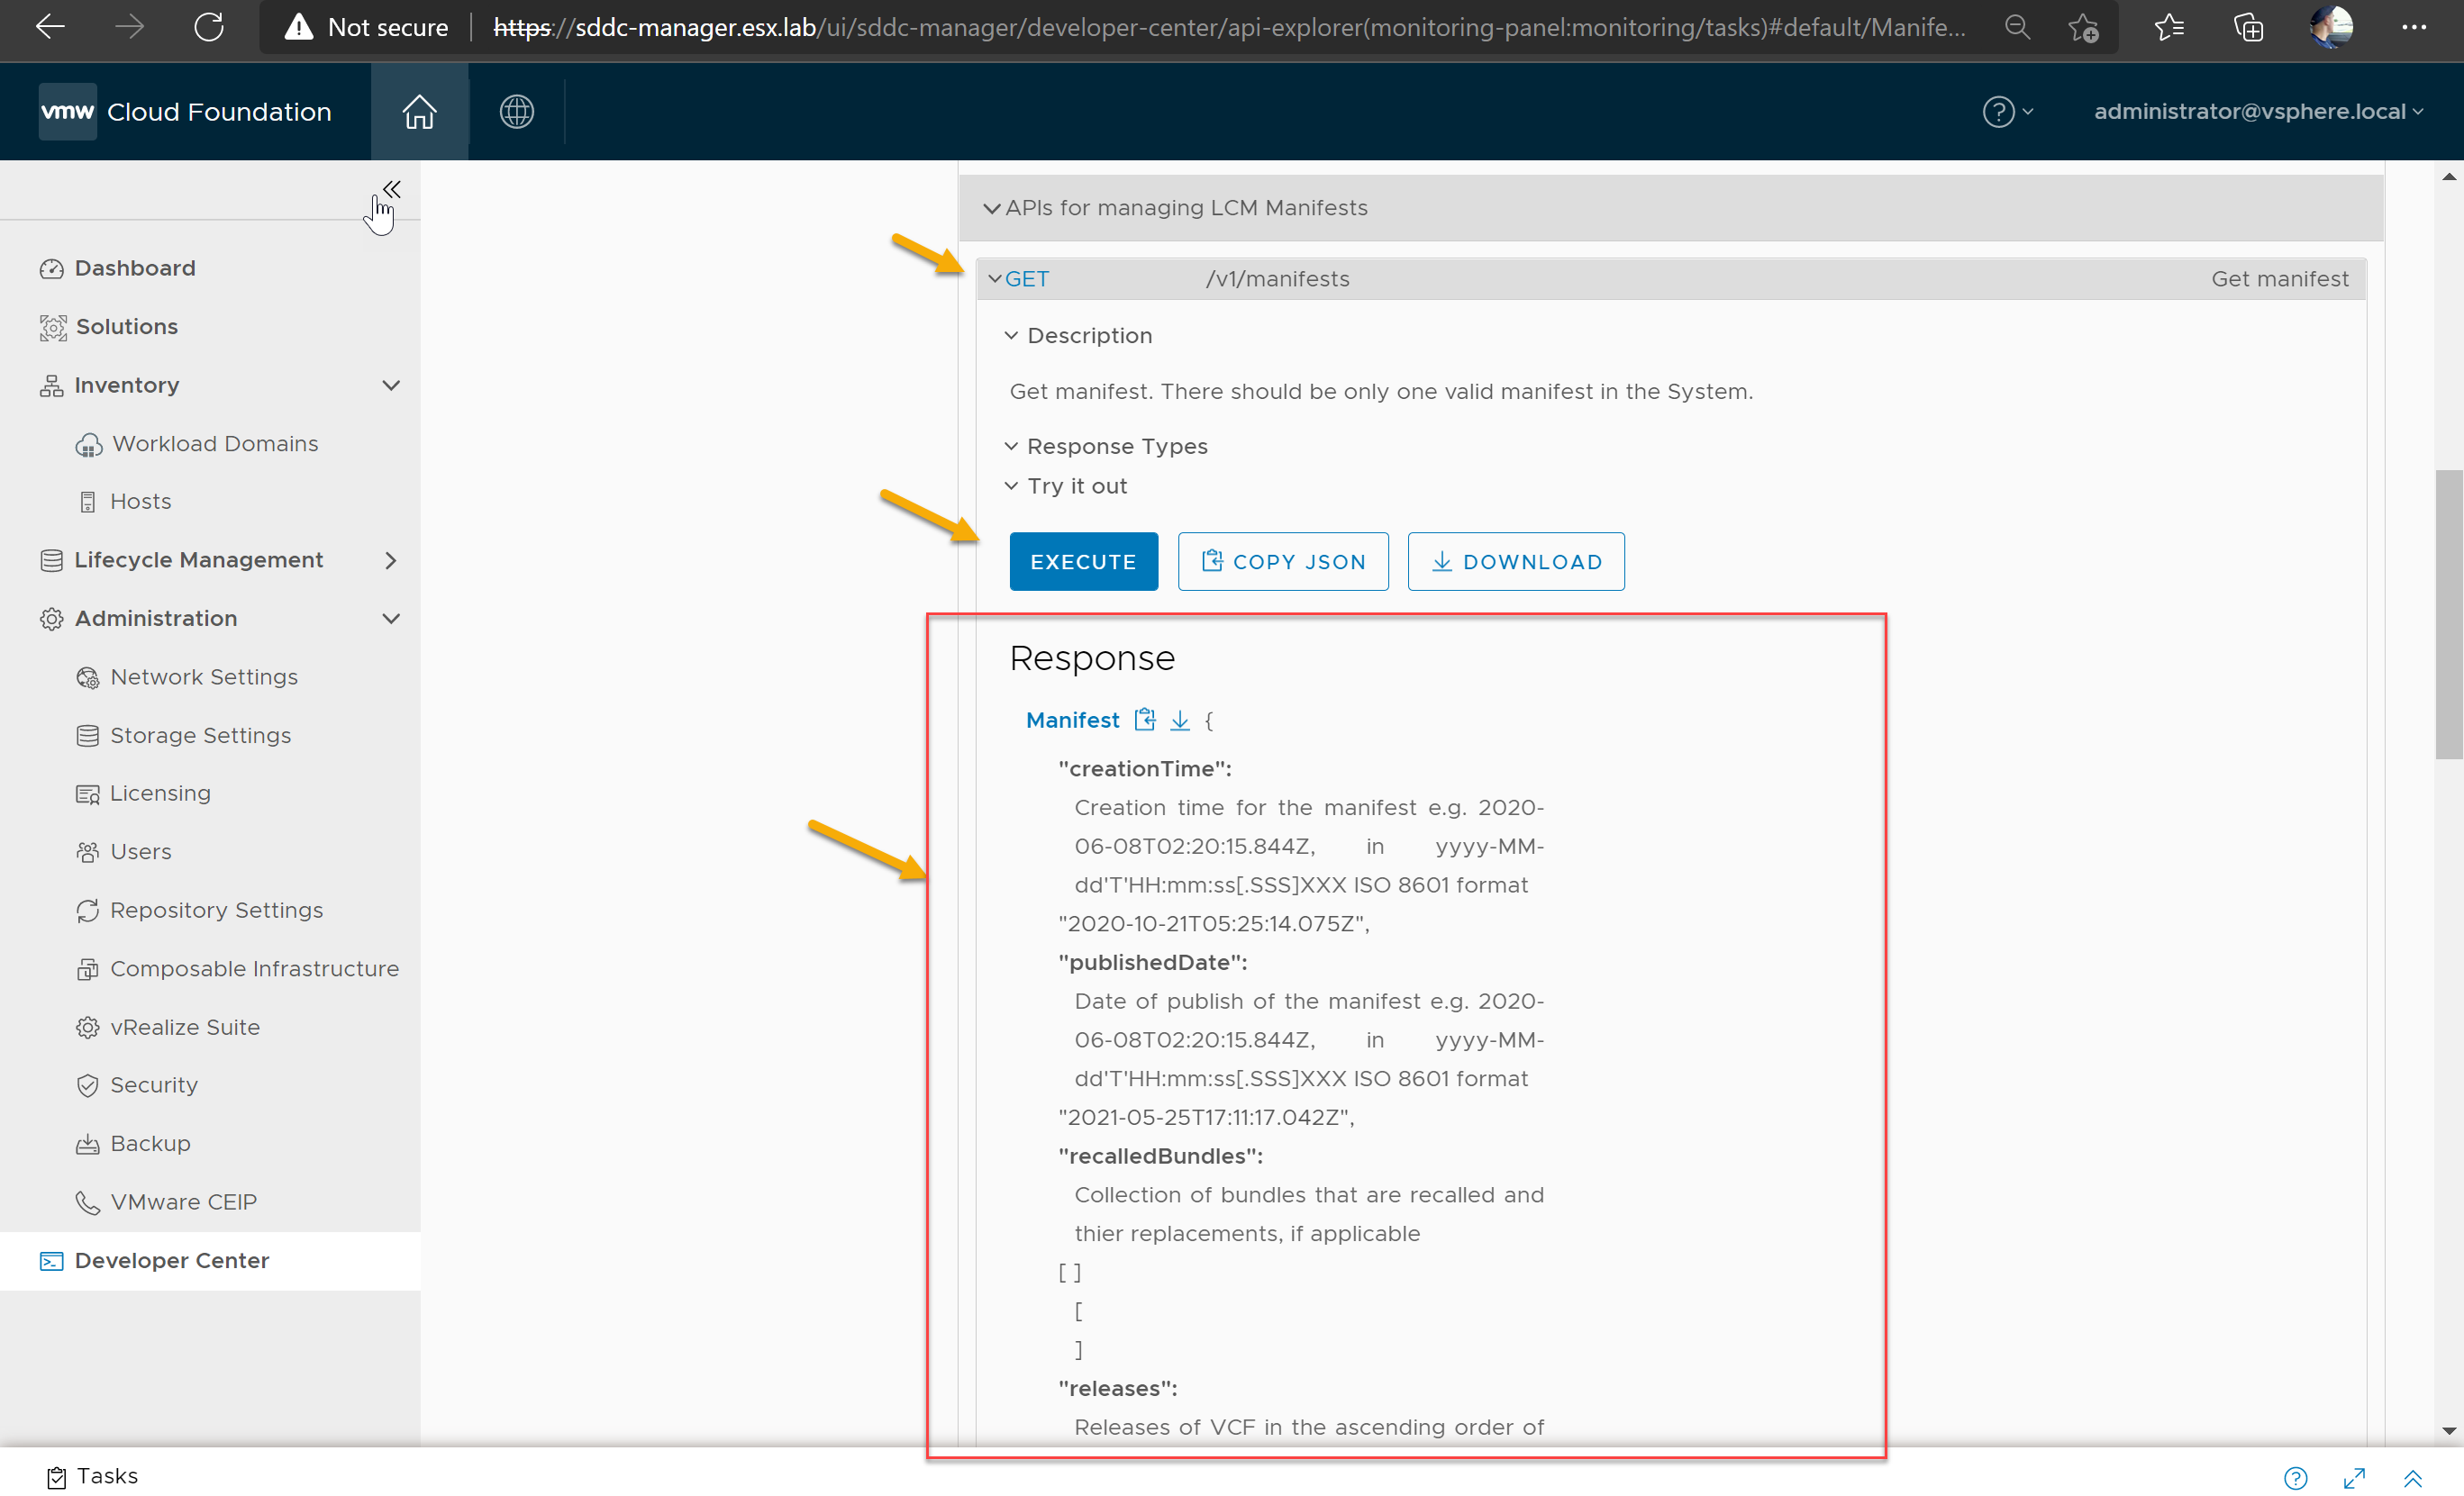
Thats it! You have succesfully imported the manifest file into SDDC manager.
Uploading and Importing the offline bundles on the SDDC Manager
Uploading the update bundle to the SDDC Manager VM
For this demo, we are going to assume I have already copied the update bundle back into dark site environment.
- Open WinSCP and connect to the SDDC Manager VM
- Change directory in WinSCP
1/nfs/vmware/vcf/nfs-mount/
- Create a folder (example, VCF_Offline_Upload)
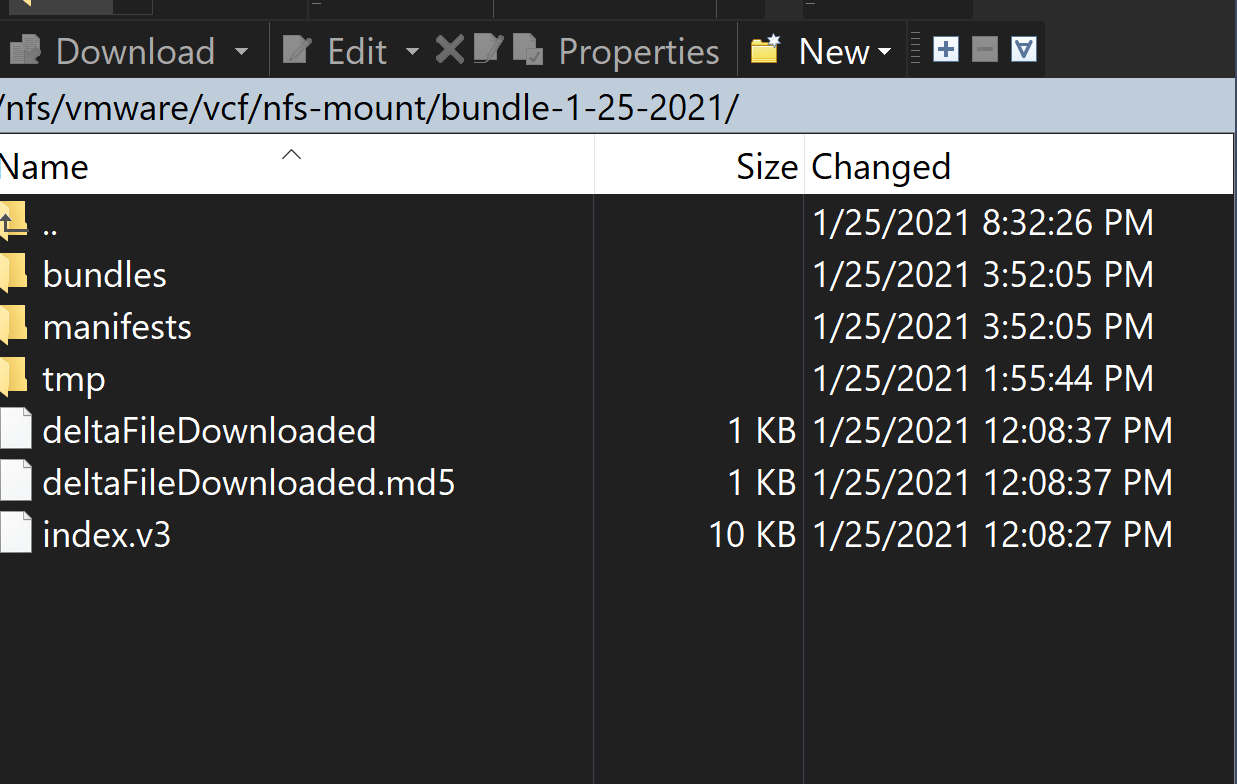
- Copy the following contents you downloaded into new directory created on the SDDC Manager
1  ├── bundles (Folder)
2  ├── manifests (Folder)
3  ├── tmp (folder)
4  ├── deltafileDownloaded
5  ├── deltafileDownloaded.md5
6  ├── index.v3
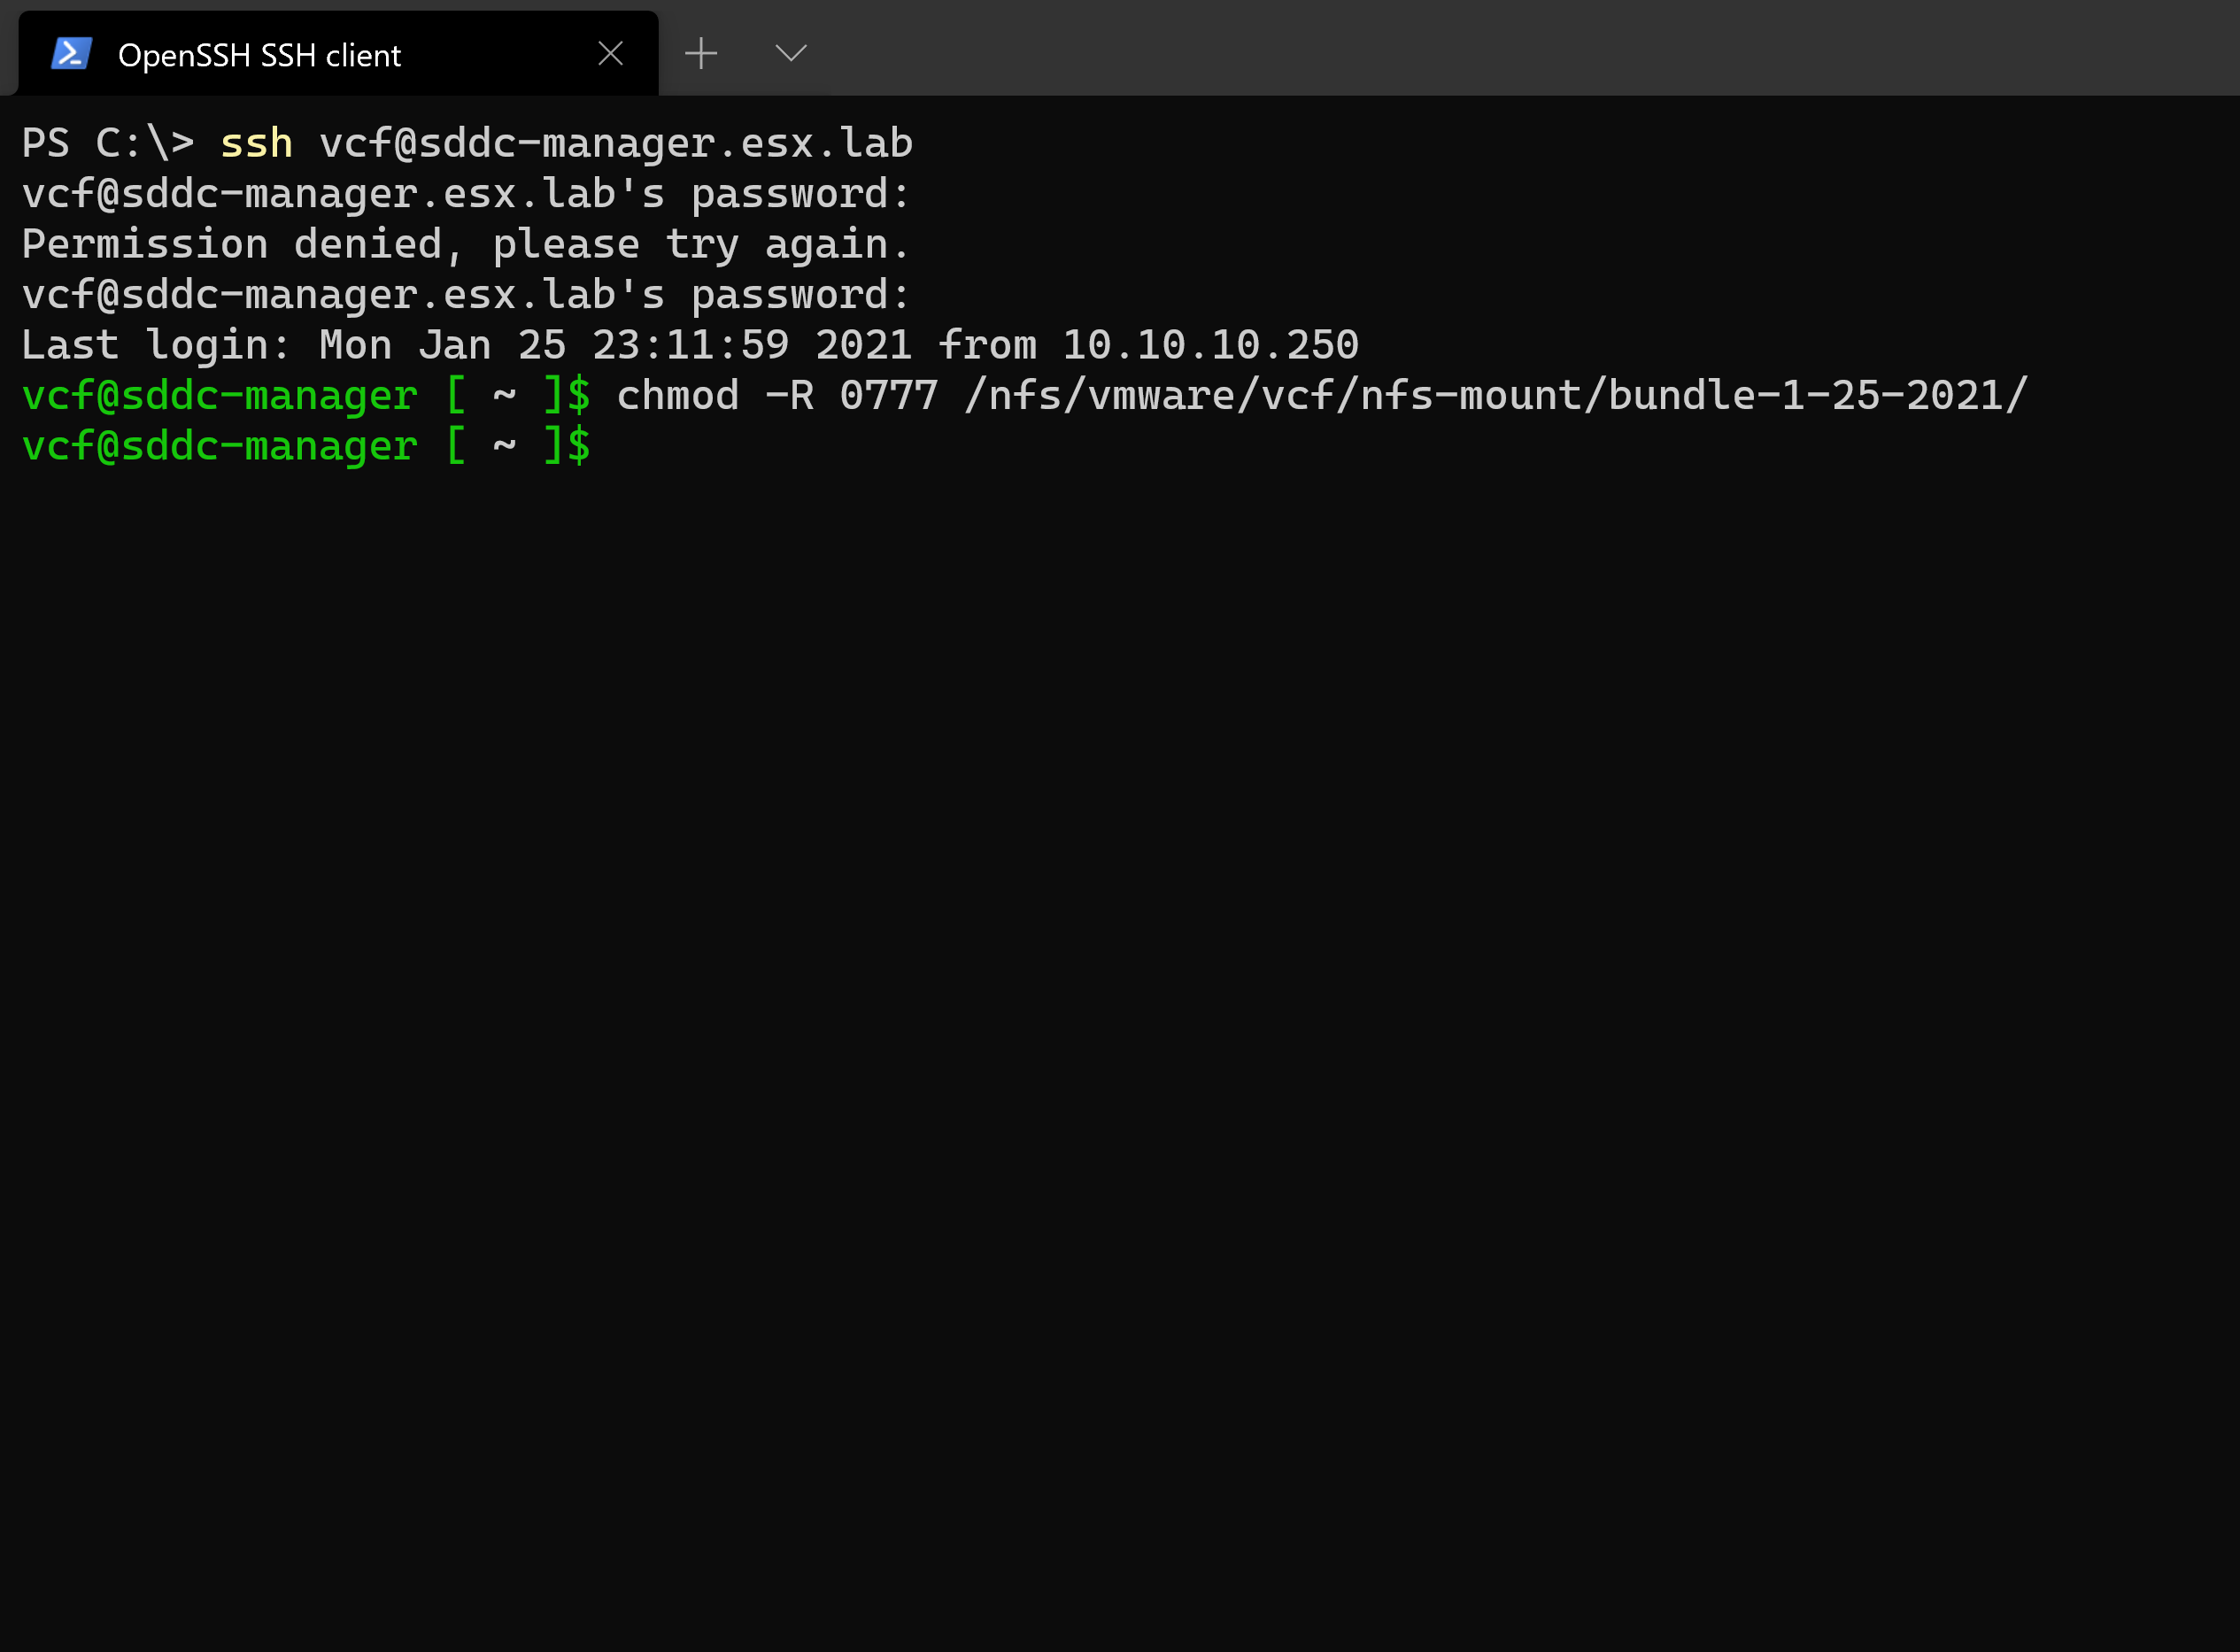
In the SDDC Manager VM, change ownership and permissions of the uploaded bundle
- SSH into SDDC Manager VM
- Run the following command:
1chmod -R 0777 /nfs/vmware/vcf/nfs-mount/folderyoucreated
In the SDDC Manager VM, import the update bundle
- SSH into SDDC Manager VM
- Change directory to the following
1cd /opt/vmware/vcf/lcm/lcm-tools/bin
- Run the following command:
1./lcm-bundle-transfer-util -upload -bundleDirectory /nfs/vmware/vcf/nfs-mount/folderyoucreated

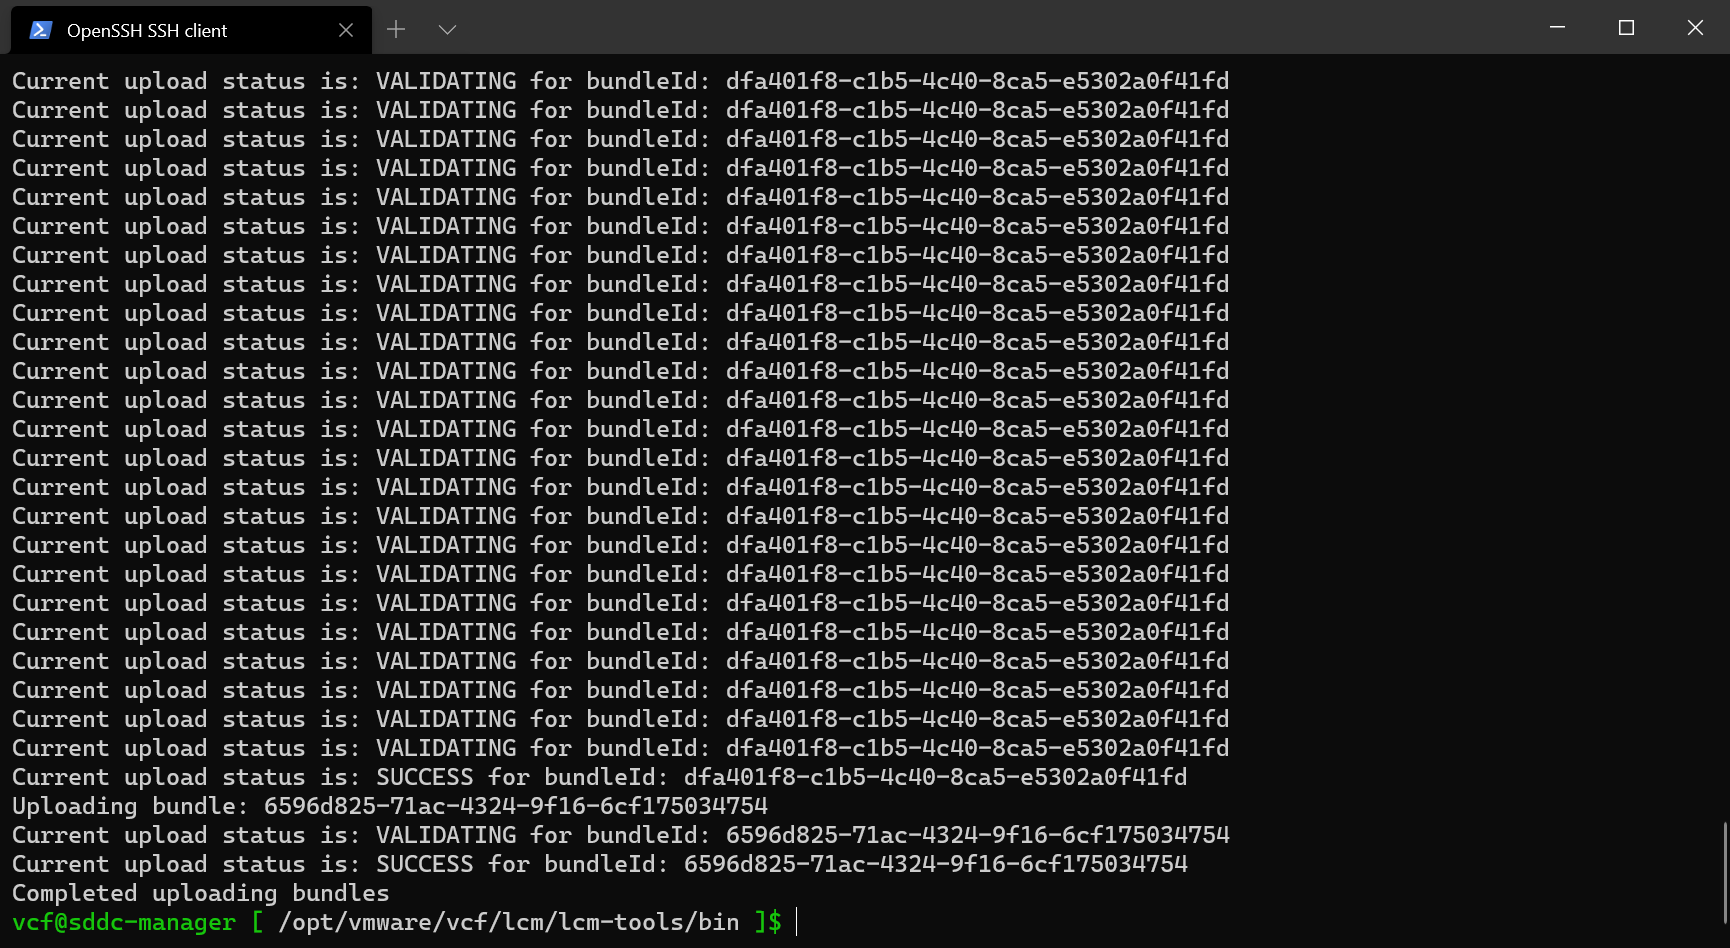
- Wait for the tool to validate all the files. This may take awhile * Note you can see the import process if you log into the SDDC Manager mangement interface.
Wait for all bundles to be uploaded before proceeding with the upgrade.
- You should see the following output when the process is completed.
Verify import within the SDDC Manager client
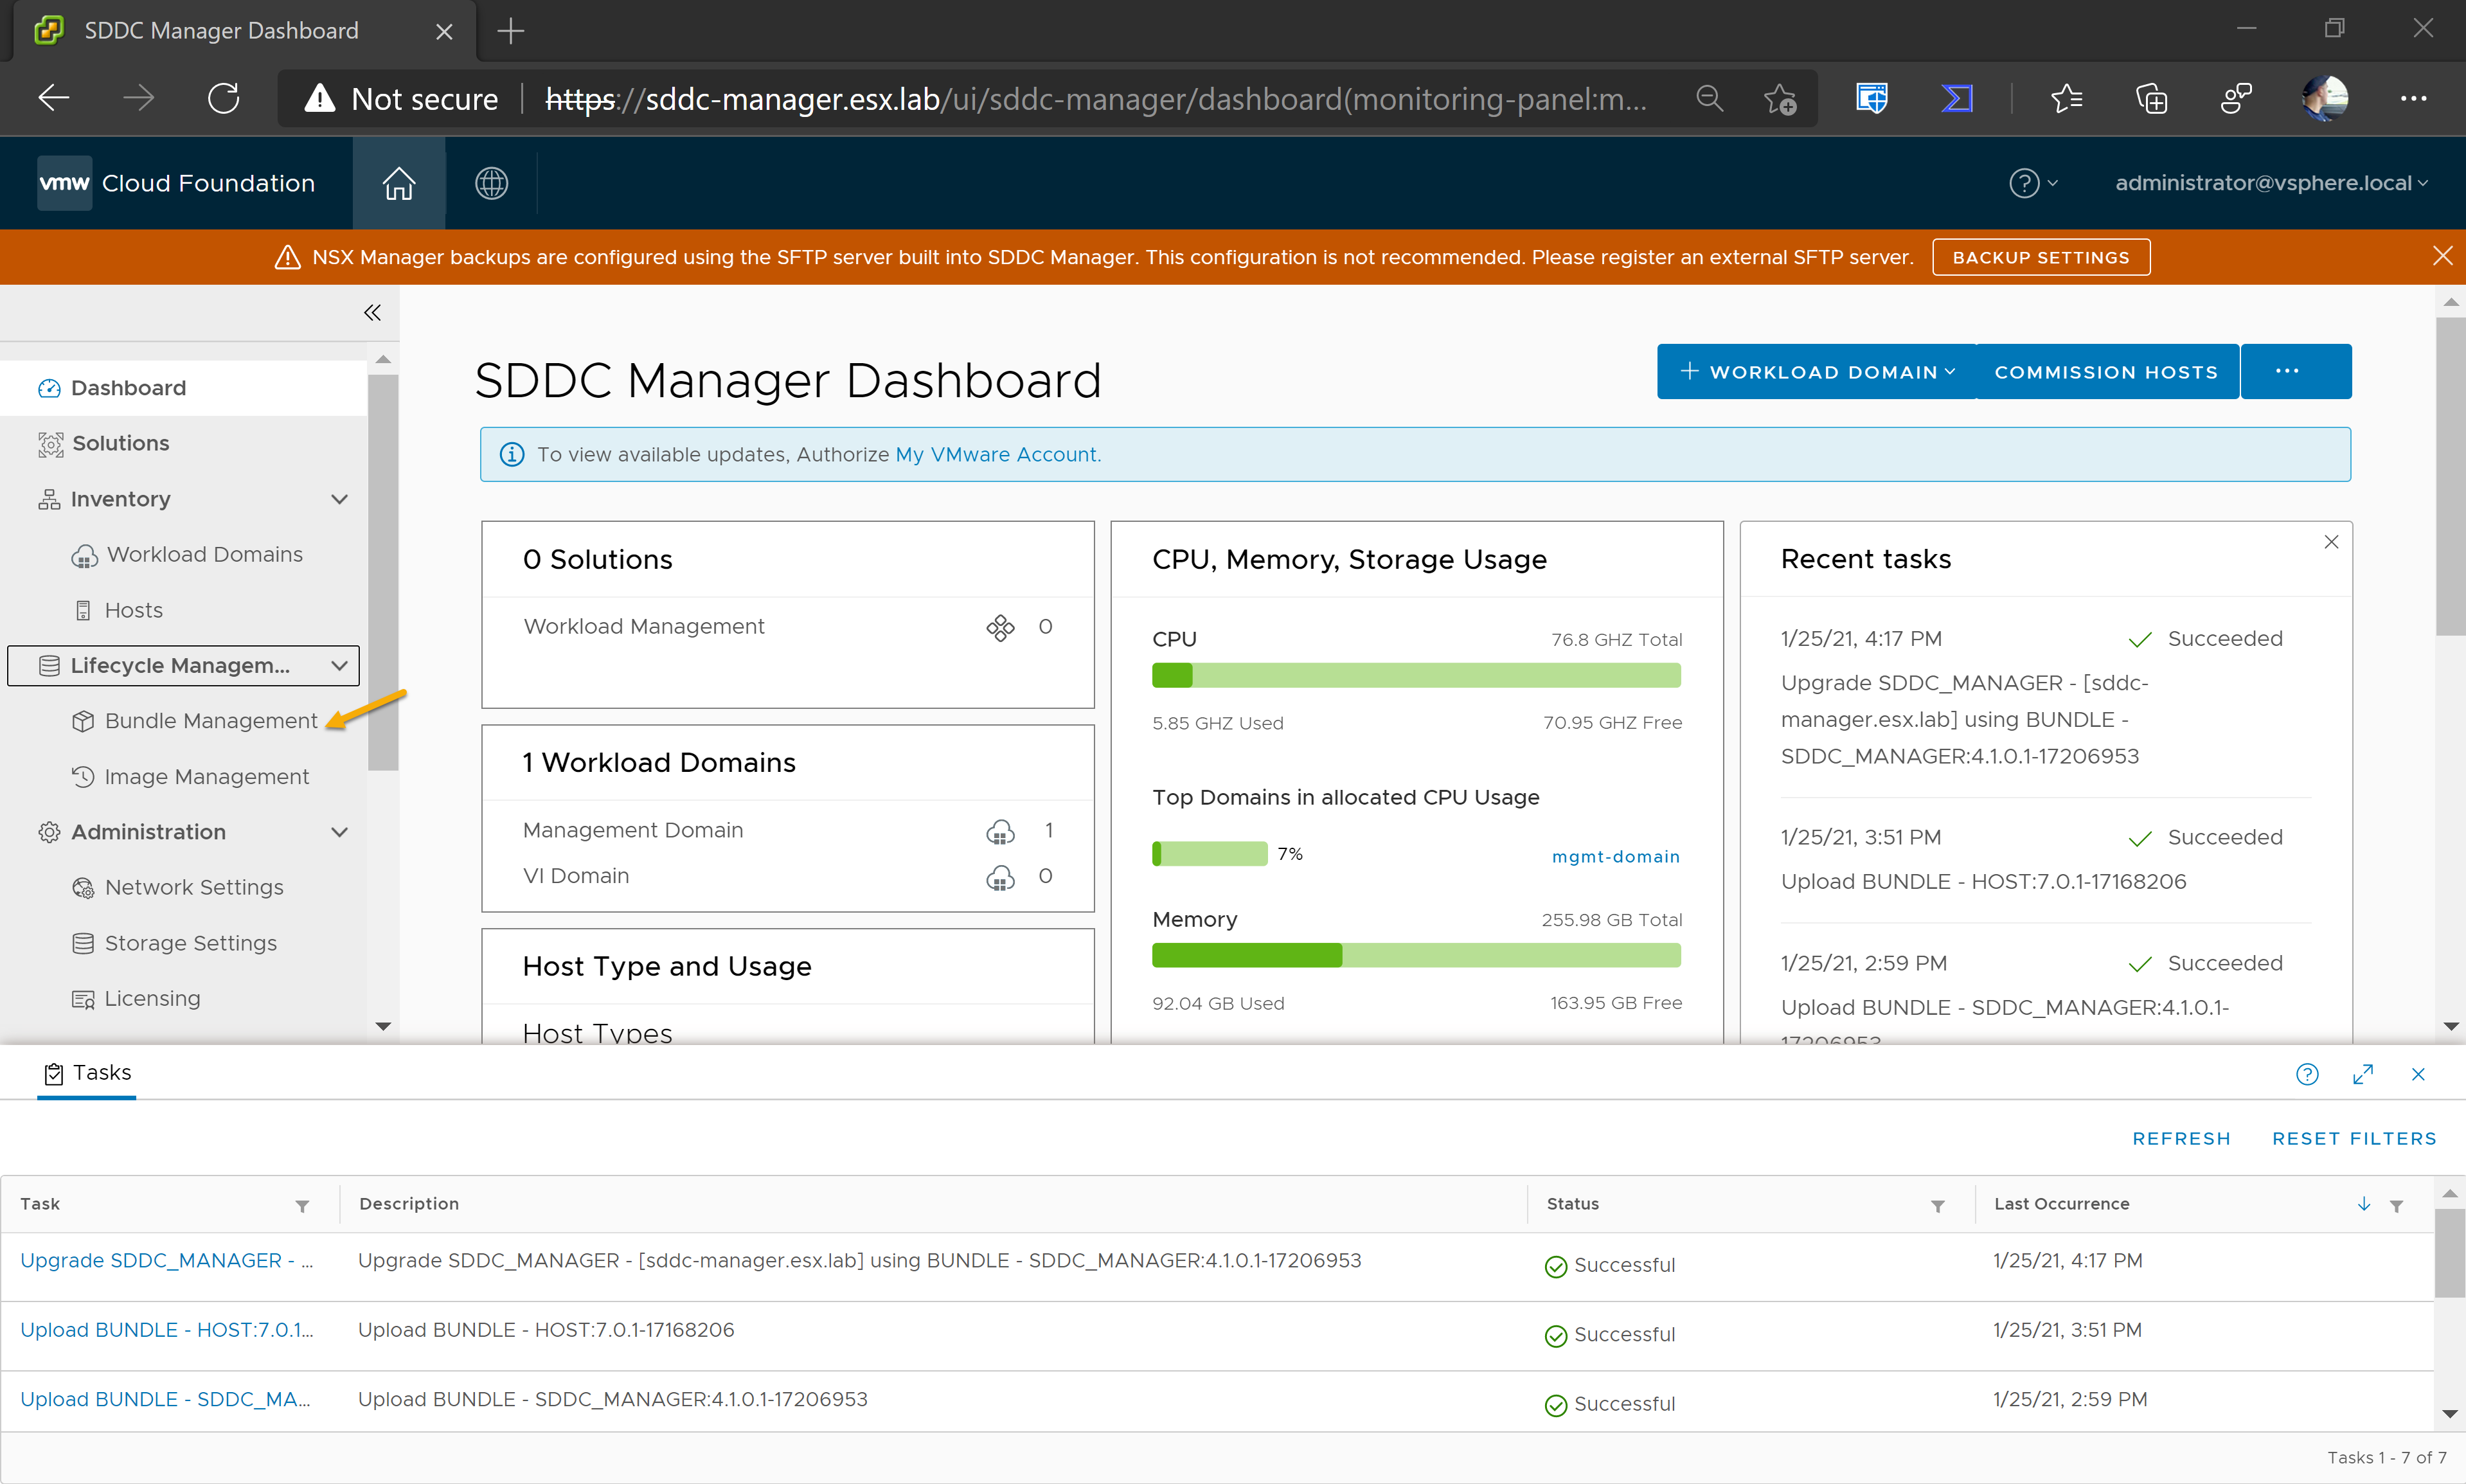
- Log into SDDC Manager client using a web browser.
1https://sddc-manager.esx.lab
-
Go to “Lifecyle Management” and select “Bundle Management”
-
You should see the applicable bundles for your environment inside Lifecyle Management. Clicking on download history will show all of the compoments that have been imported.
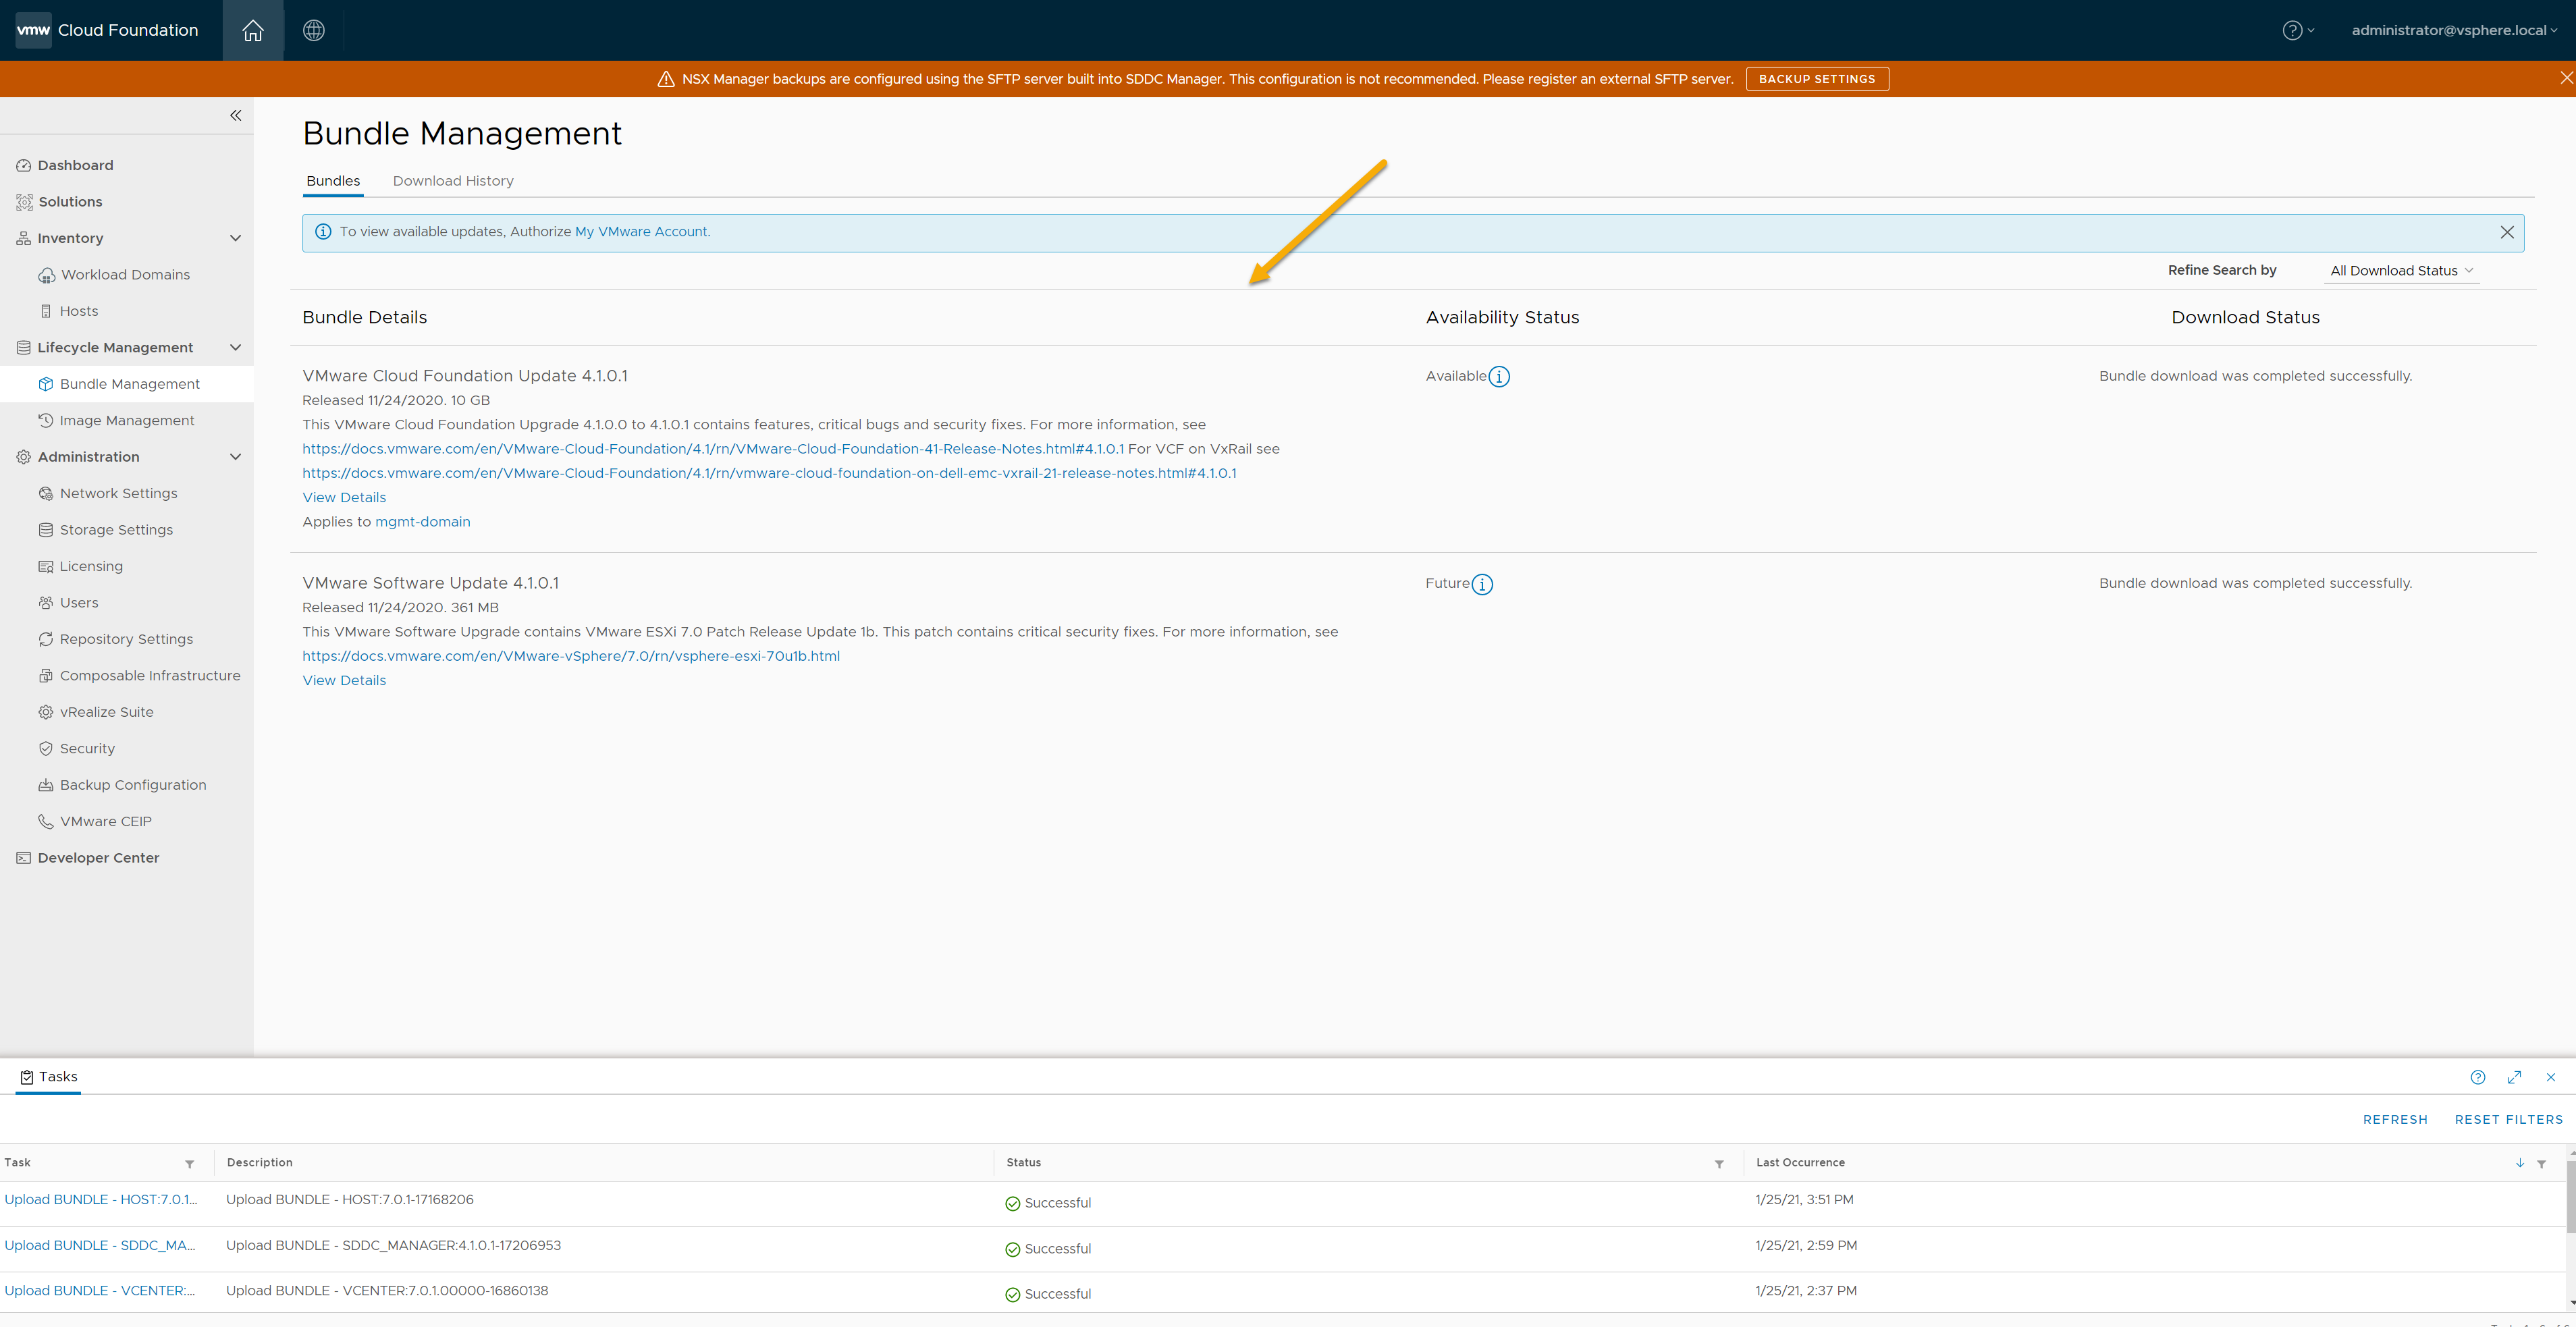
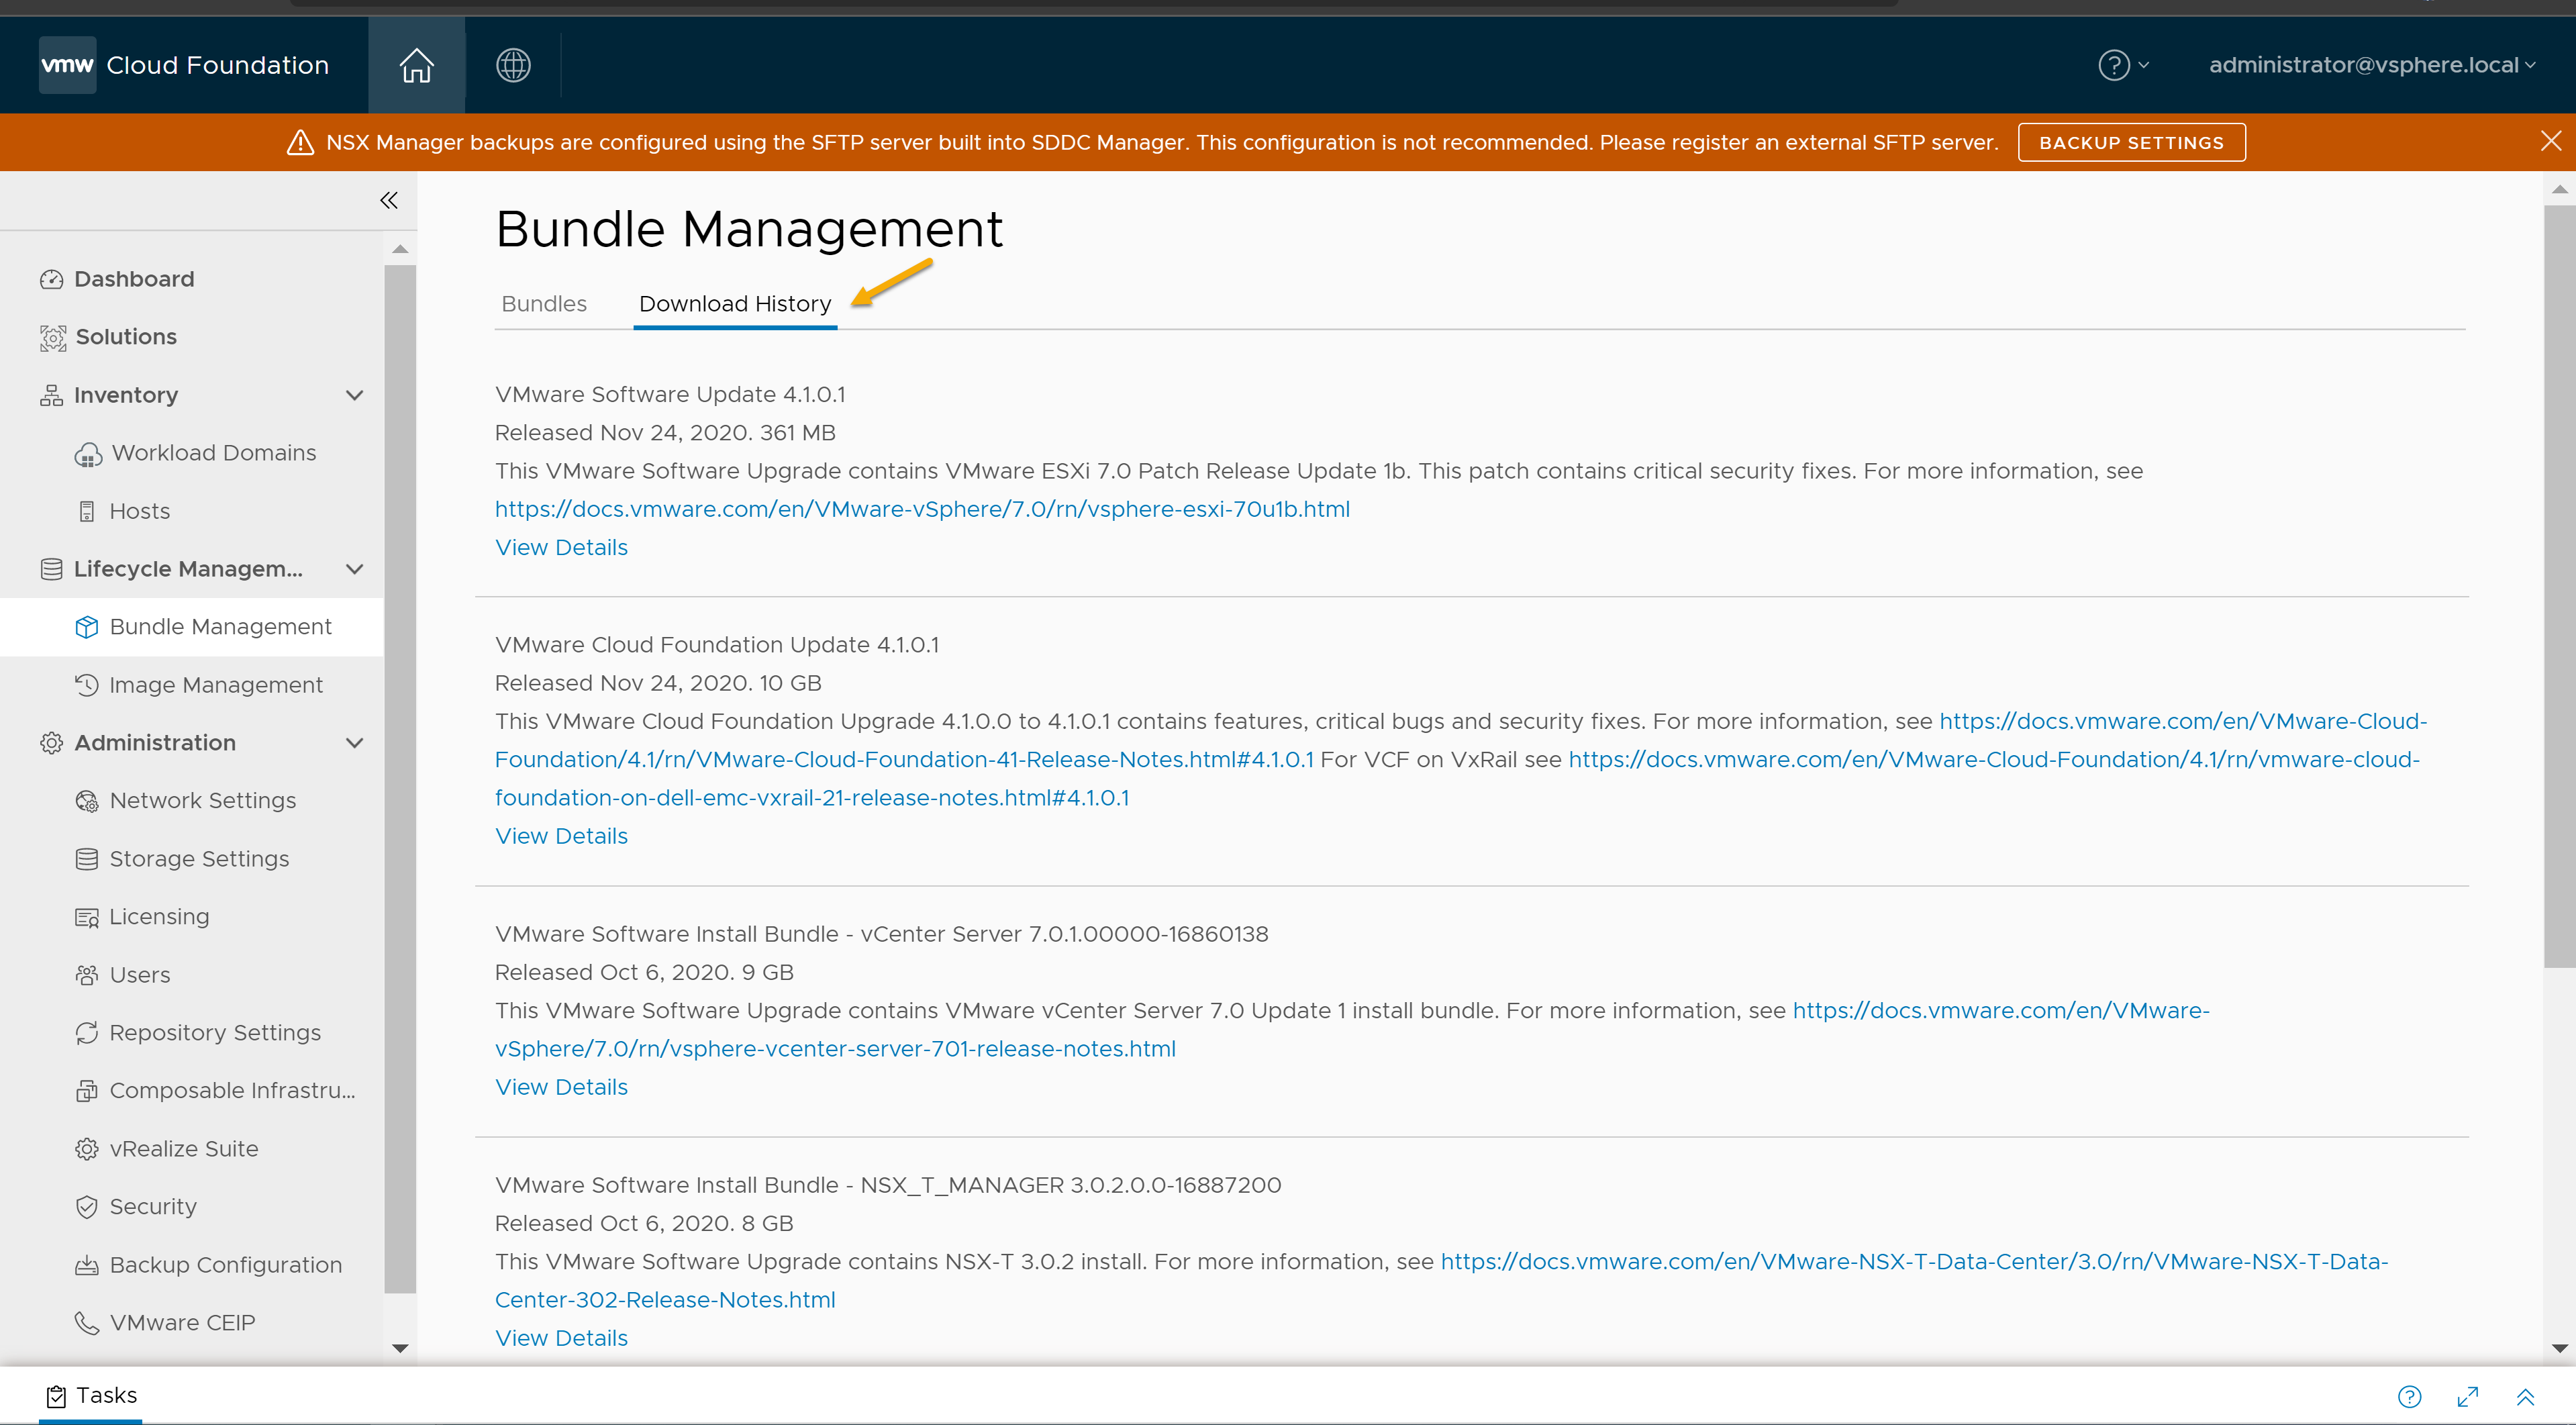
Thats it! You have succesfully imported offline bundles into SDDC manager.
Sources
Offline Bundle Download for VMware Cloud Foundation
Deep dive into VMware Cloud Foundation – Part 1 Building a Nested Lab
