Install and Configure App Volumes 4.X Manager
In this walkthrough I will be installing App Volumes 4 build 2103. I will be using Windows Server 2019 and SQL Server 2019.
Installing App Volumes Manager 4.X
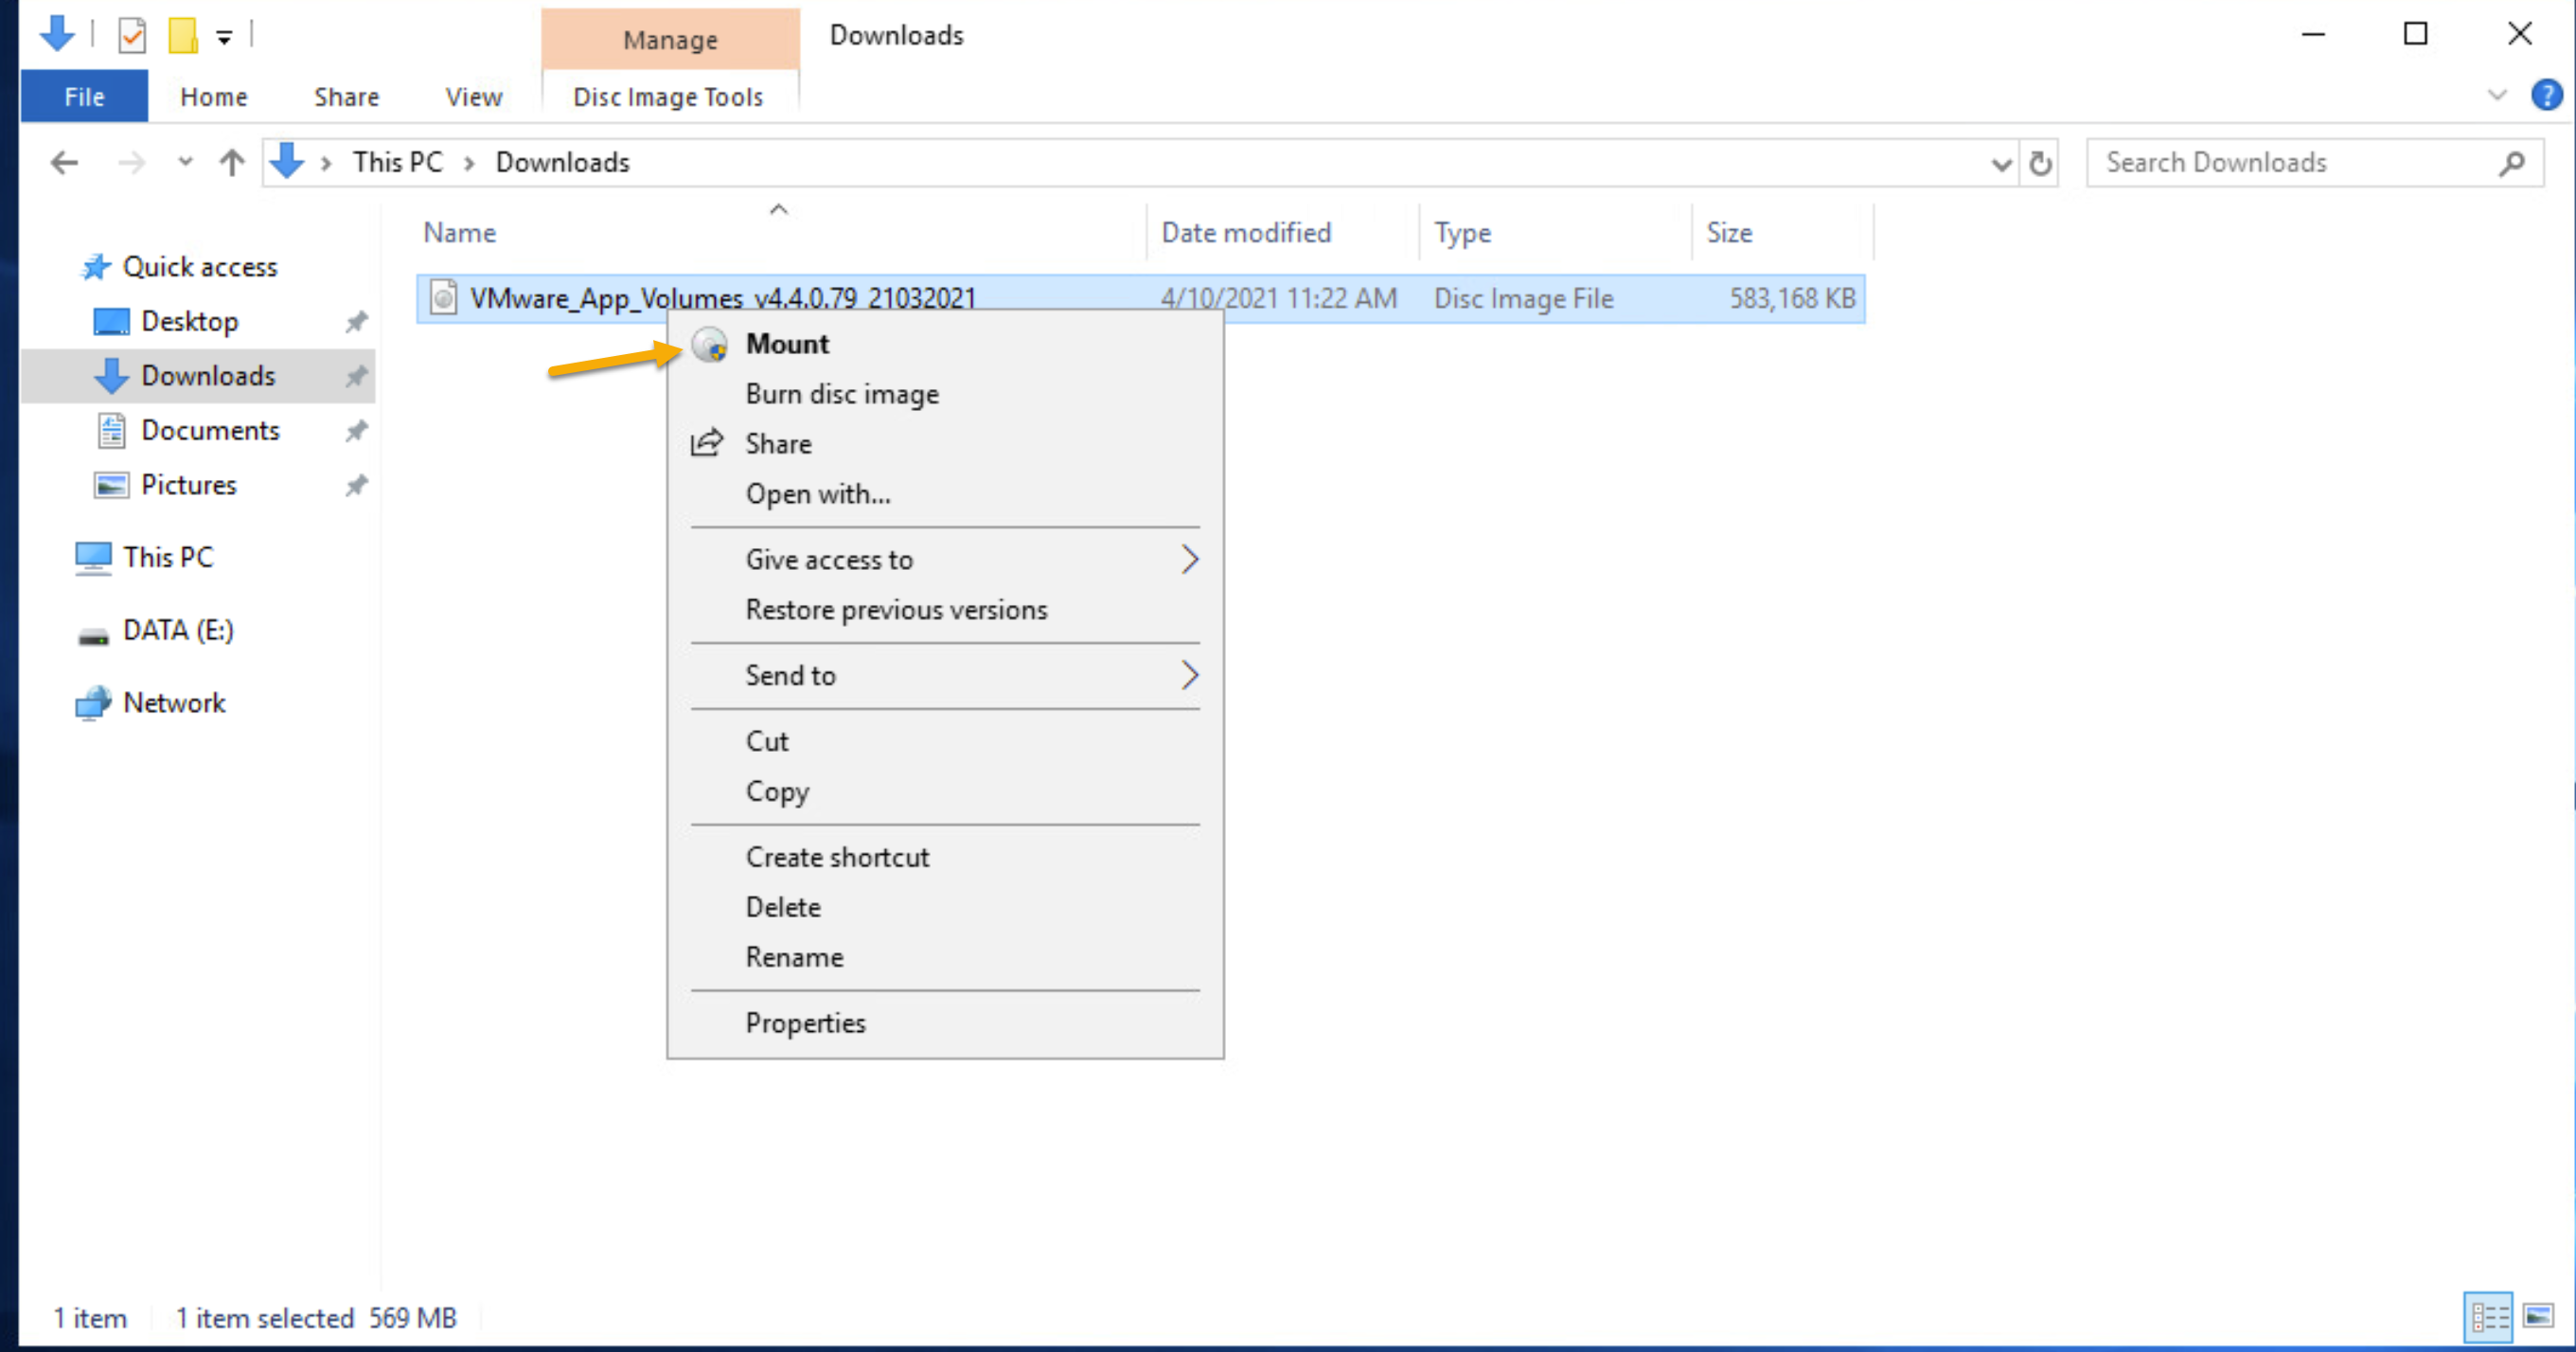
- On App Volumes Manager server mount the .ISO you downloaded from VMware
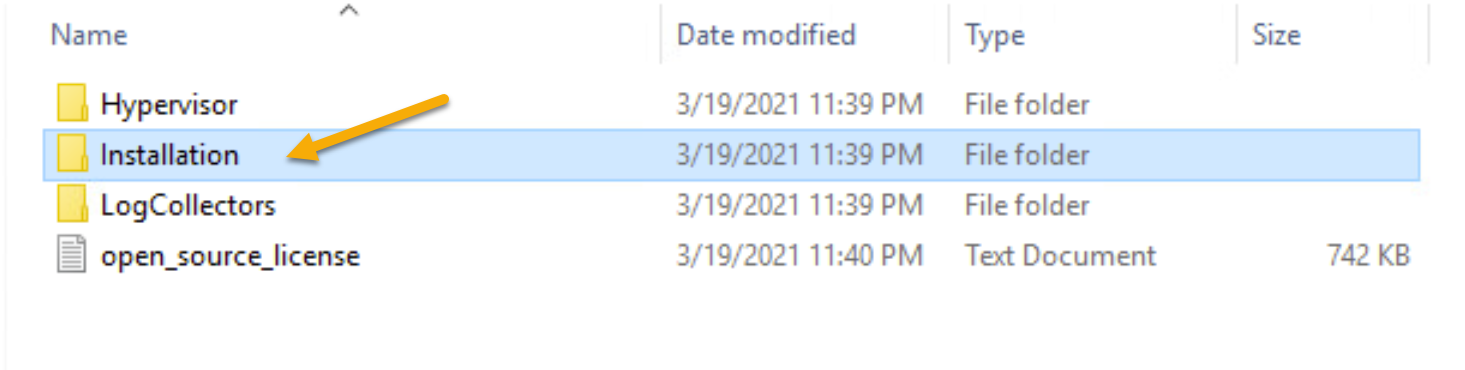
- Open the folder called “Installation”
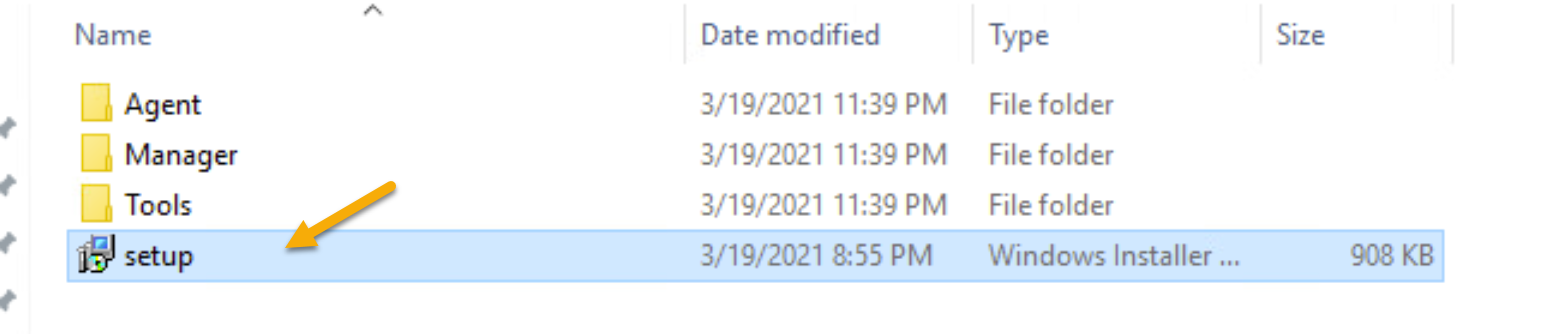
- Run “Setup.msi”
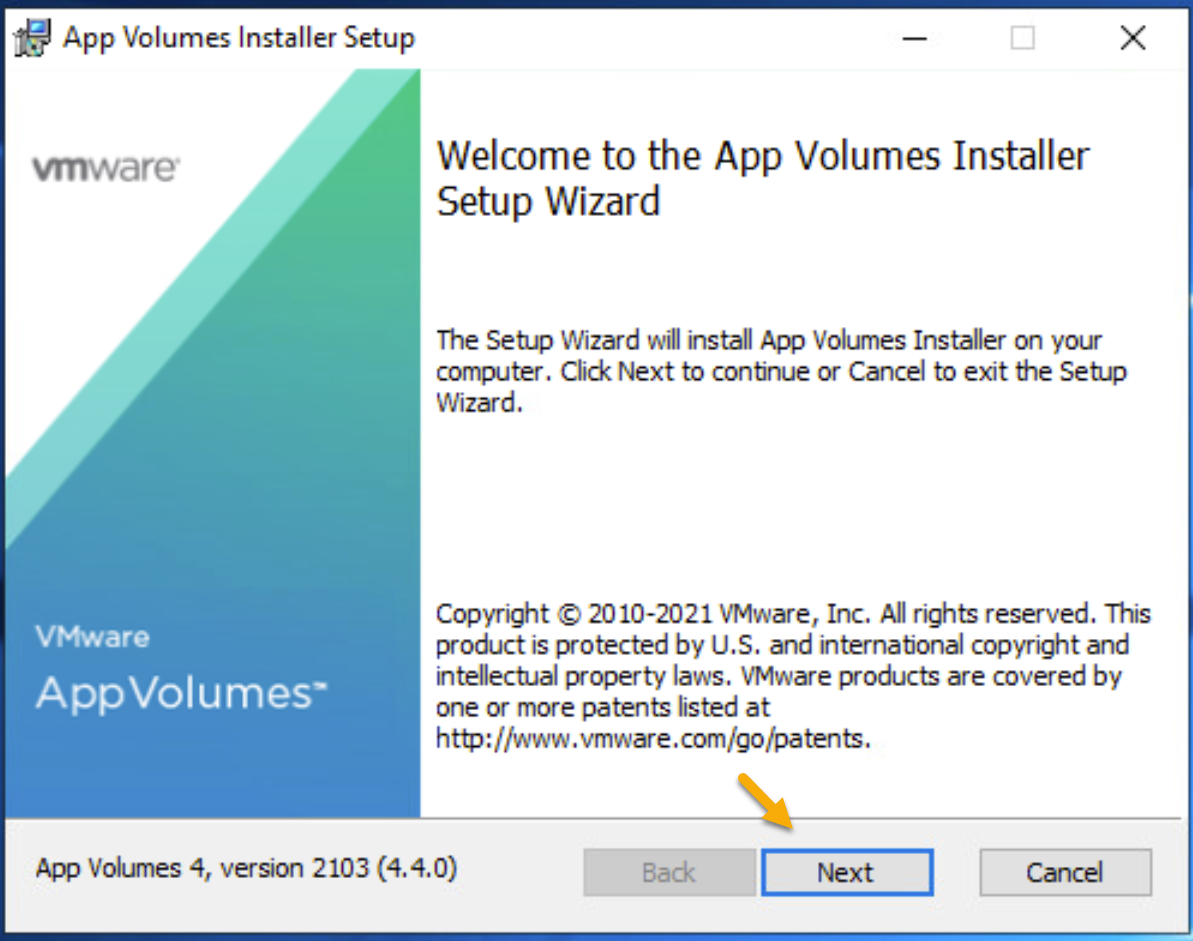
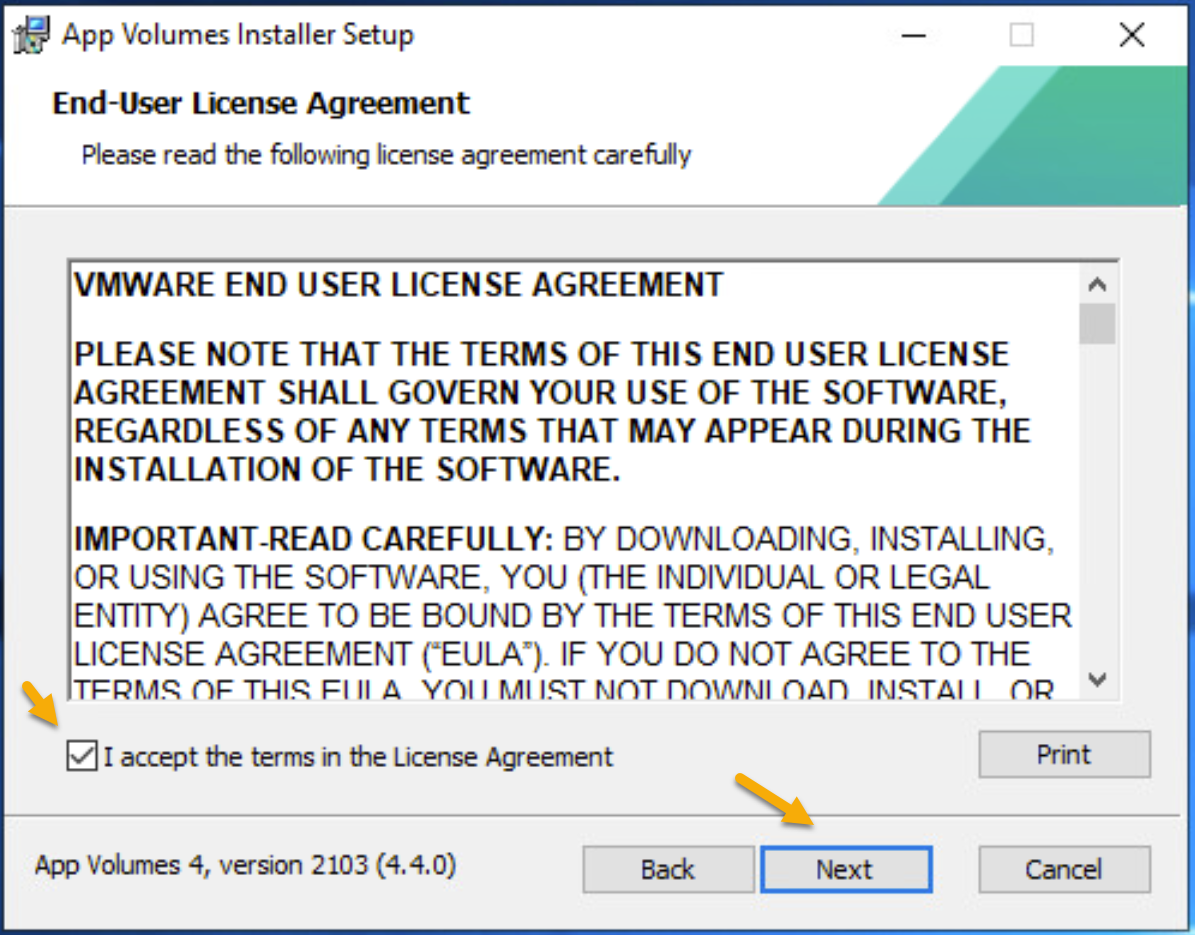
- At the welcome screen press next and accept the licenses agreement.
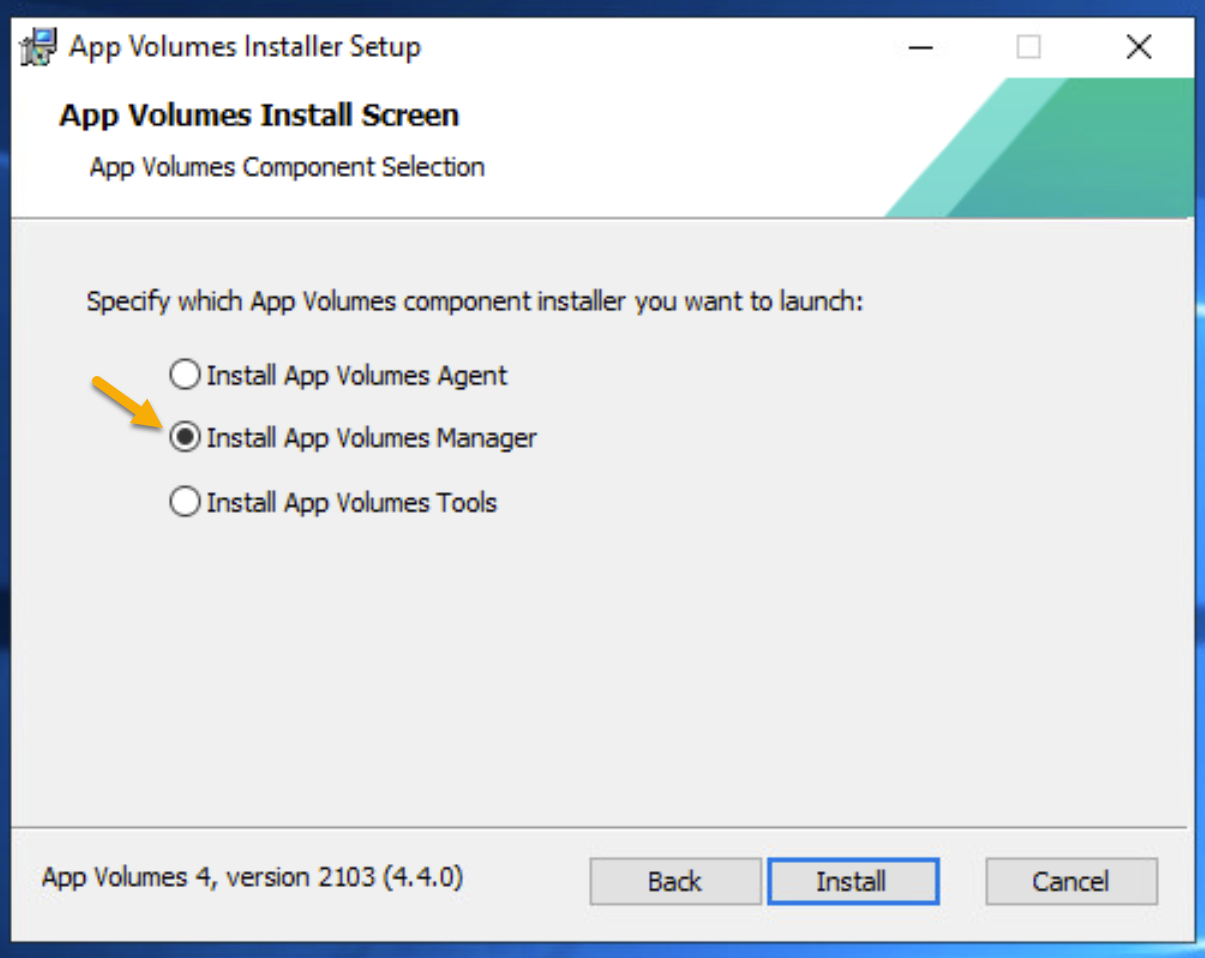
- Choose Install App Volume Manager and press install.
Note: App Volumes Tools was introduced in version 2103. admins can select “App Volumes Tools” when installing on a Windows 10 machine intended for command-line capture. The new appcapture.exe command can be used to package applications without the App Volumes Manager console.
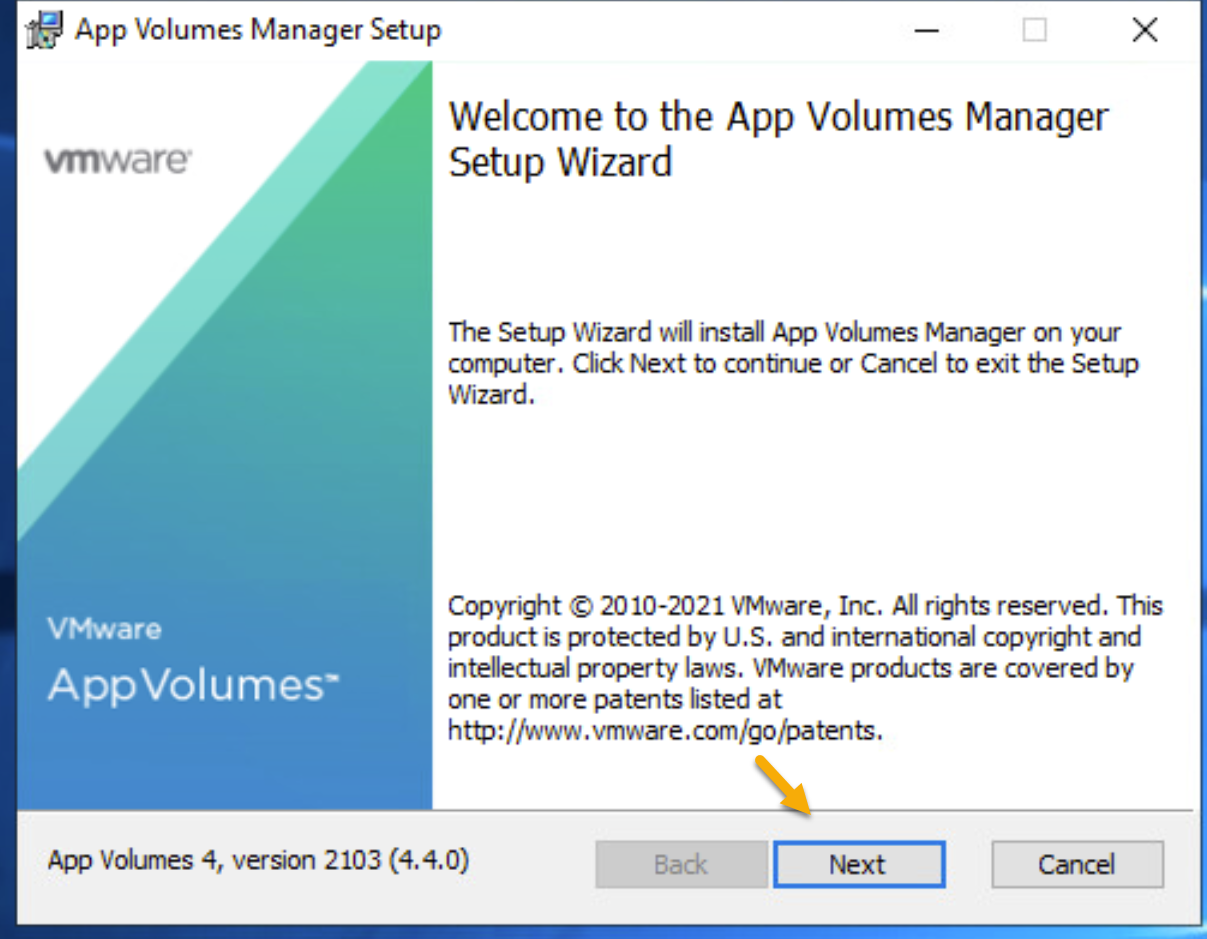
- At the App Volumes Manager Setup welcome screen press next
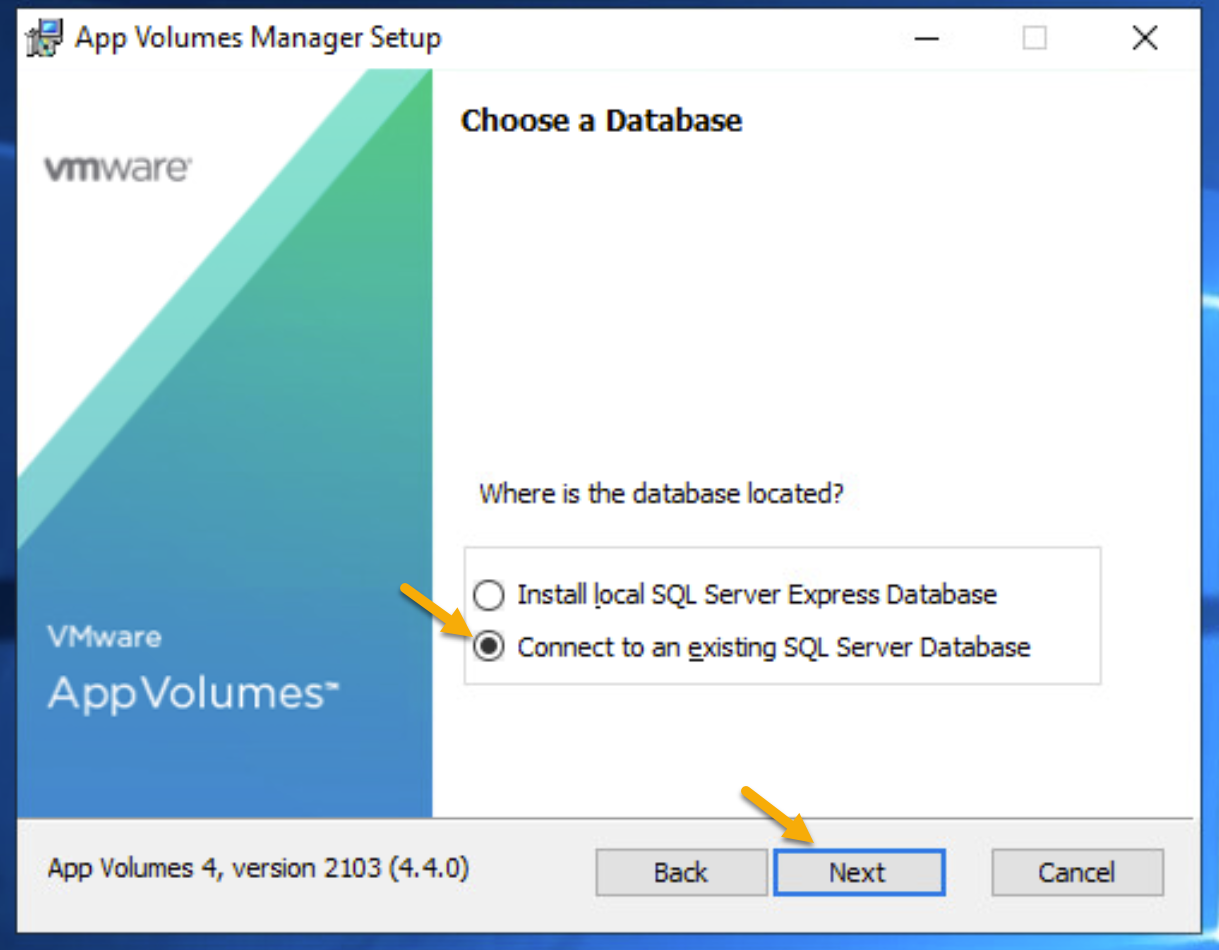
- Select Connect to an existing SQL Server Database (You can install SQL Server Express for this demo we will be using a SQL Server).
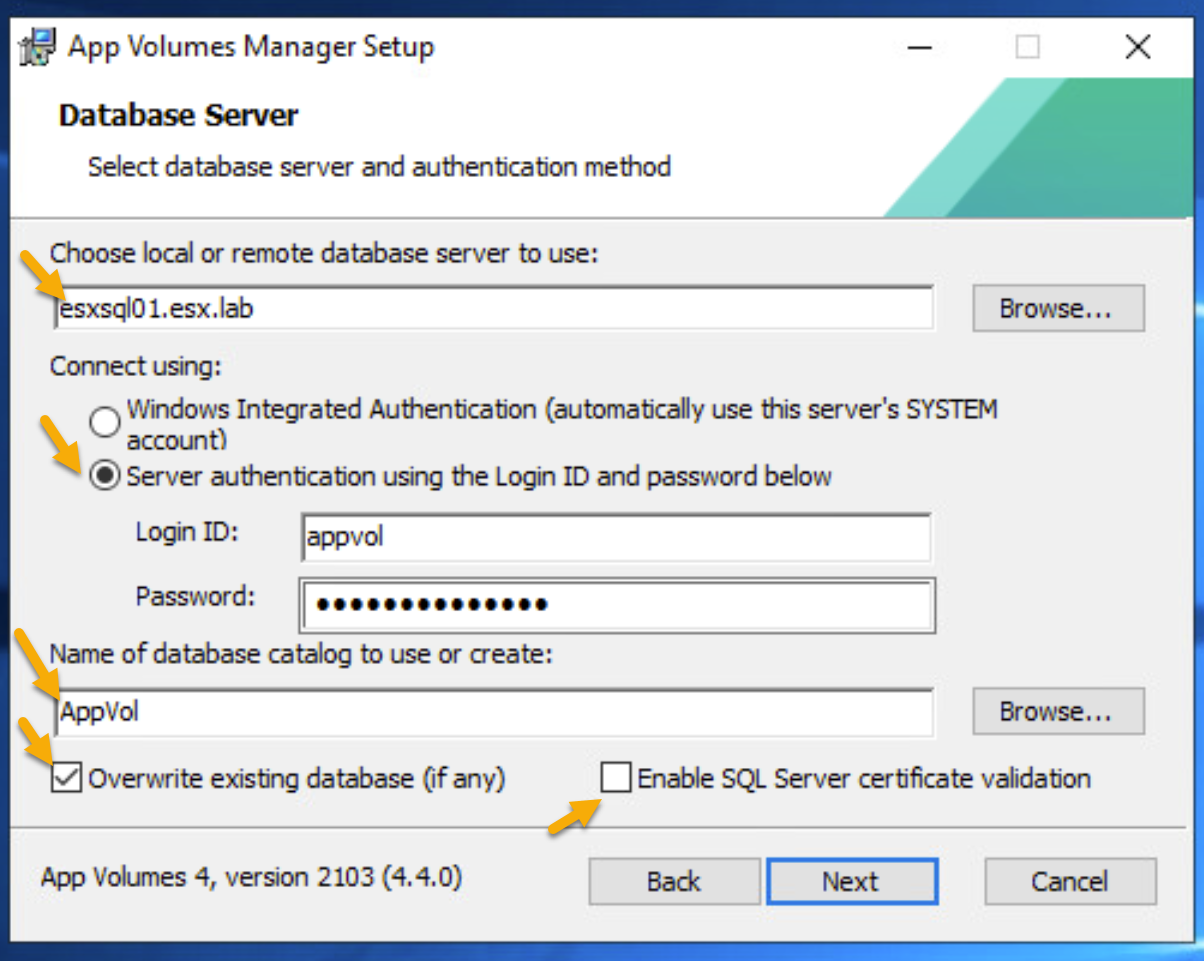
- On Database Server page configure the following
- Local/Remote Database Server
- Connect using Windows Integrated Authentication/Server Authentication
- Name of database
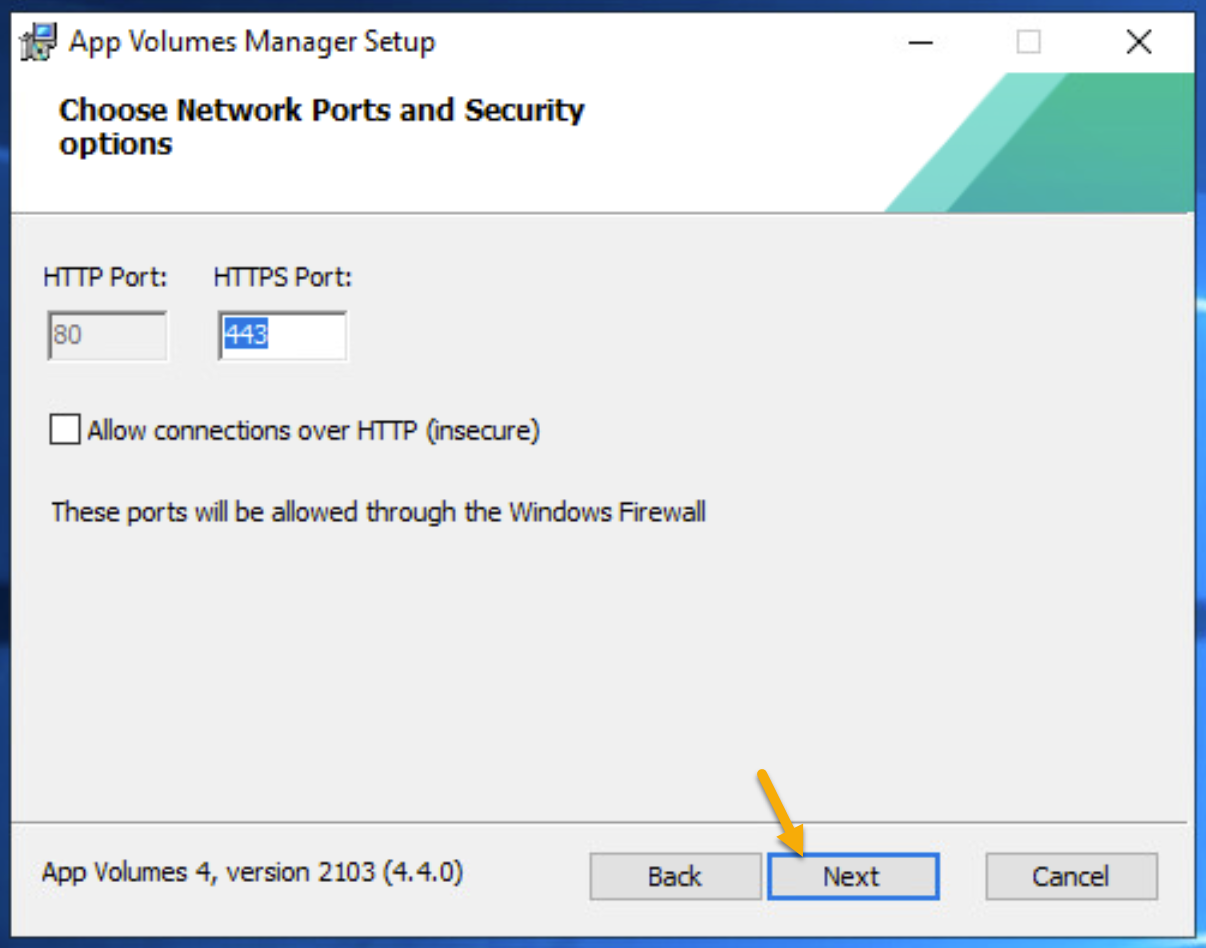
- Choose Network Ports and Security Options (Recommend keeping the defaults).
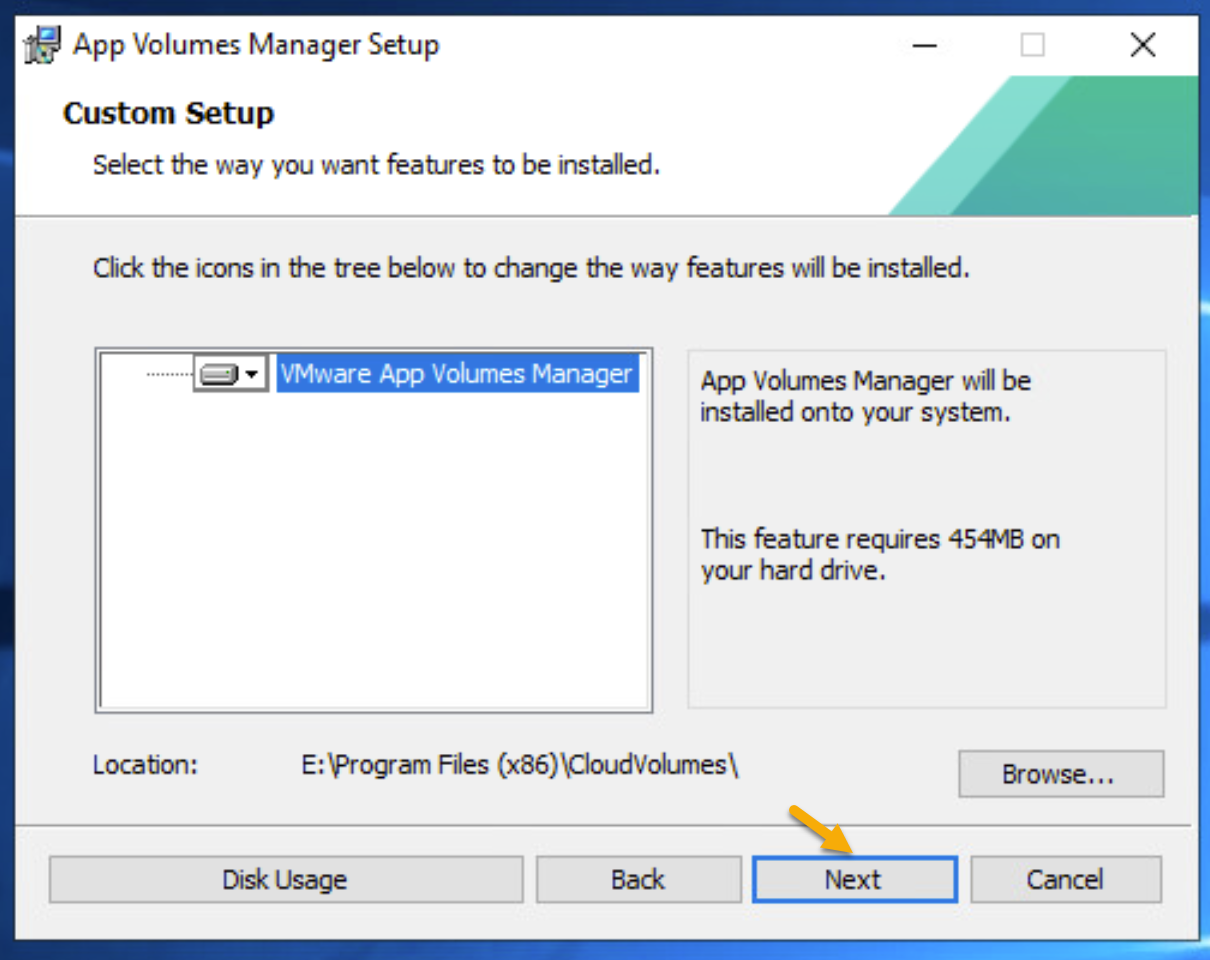
- Configure installation location and press next
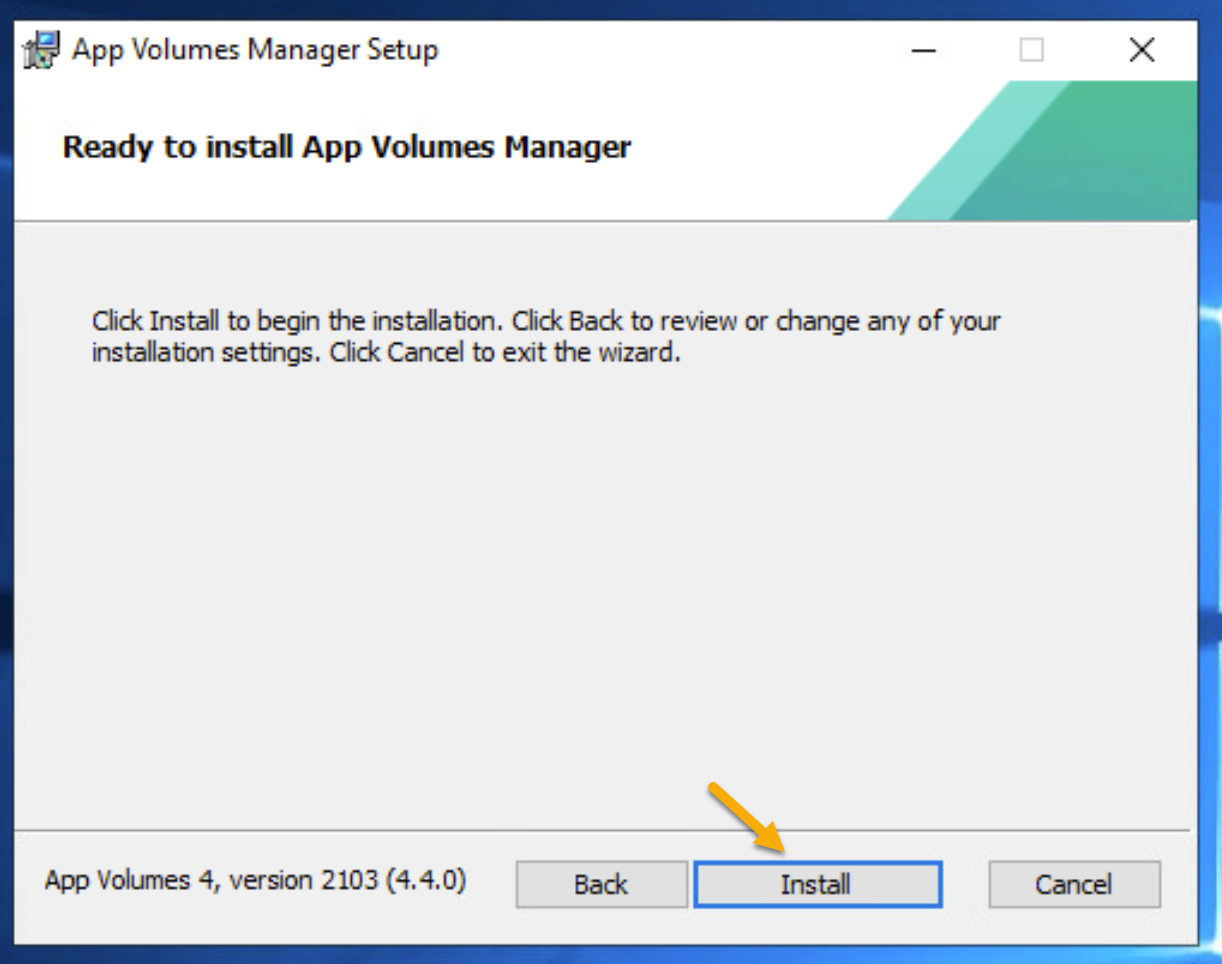
- Press install to begin installation
- After installation has completed. Verify App Volume Manager service is running.
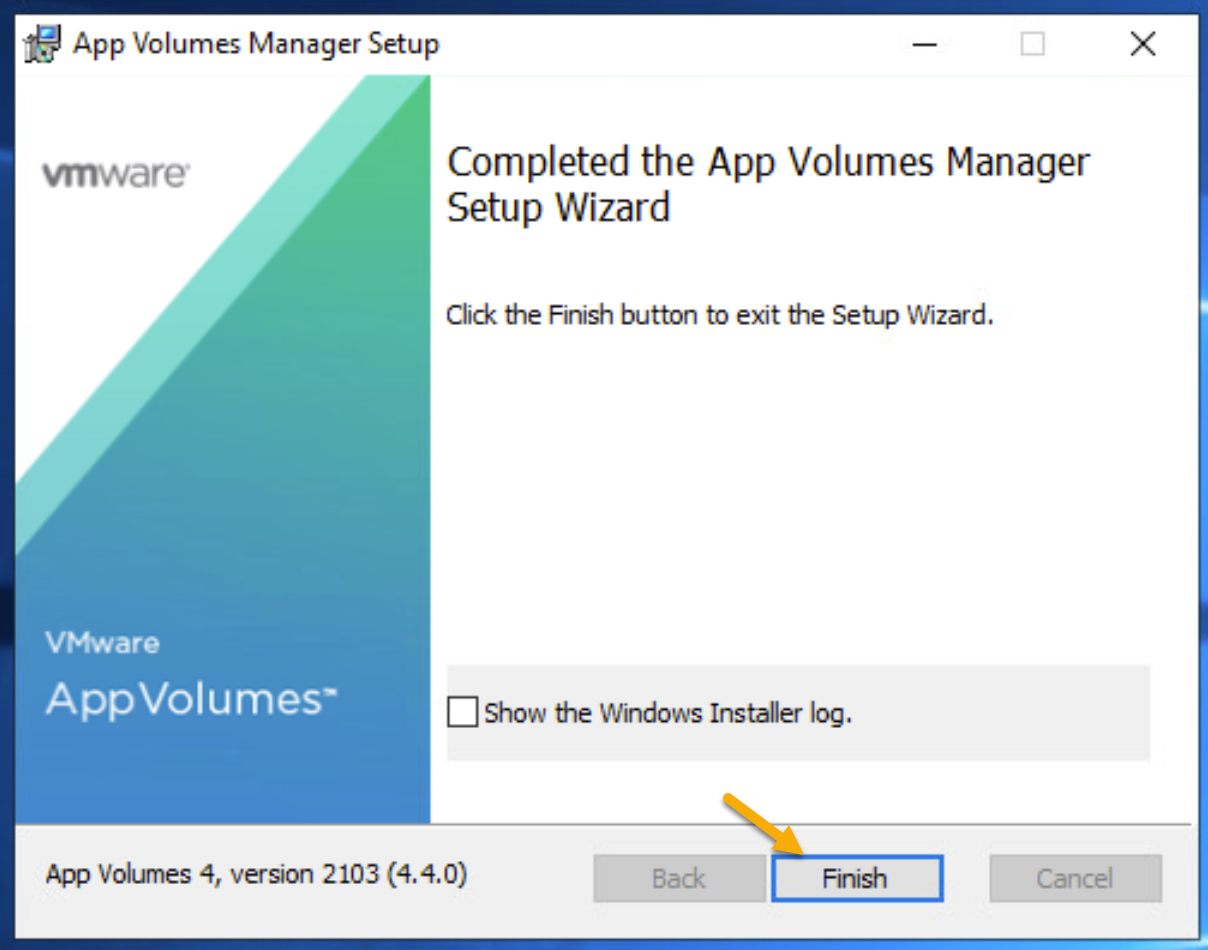
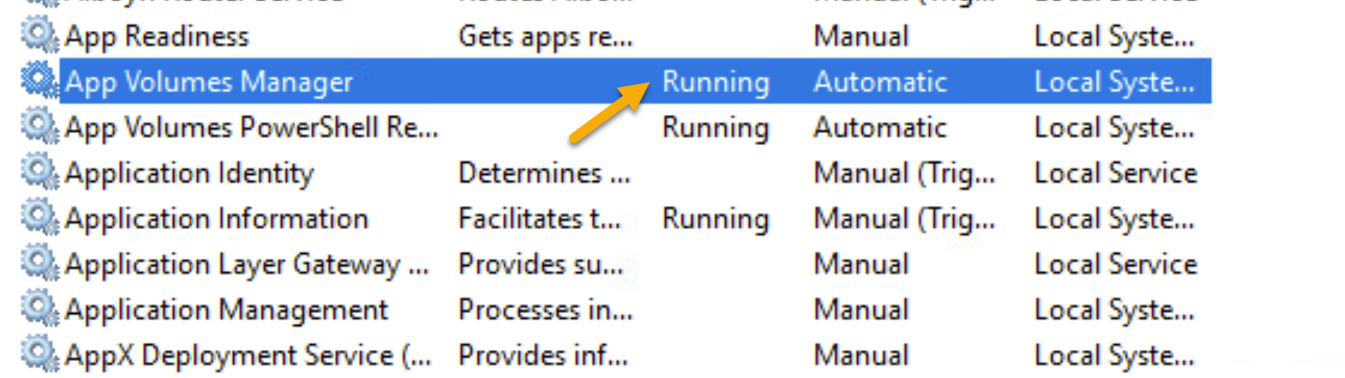
- App Volume Manager has been successfully installed.
Configuring App Volume Manager
Configure CA Certificates in App Volumes Manager
If you don’t have a certificate authority in your enviroment, you can skip this step. However, you must configure the root domain CA certificates if you want to connect securely to Active Directory.
In this Demo I will be using Windows Certificate Authority (CA)
-
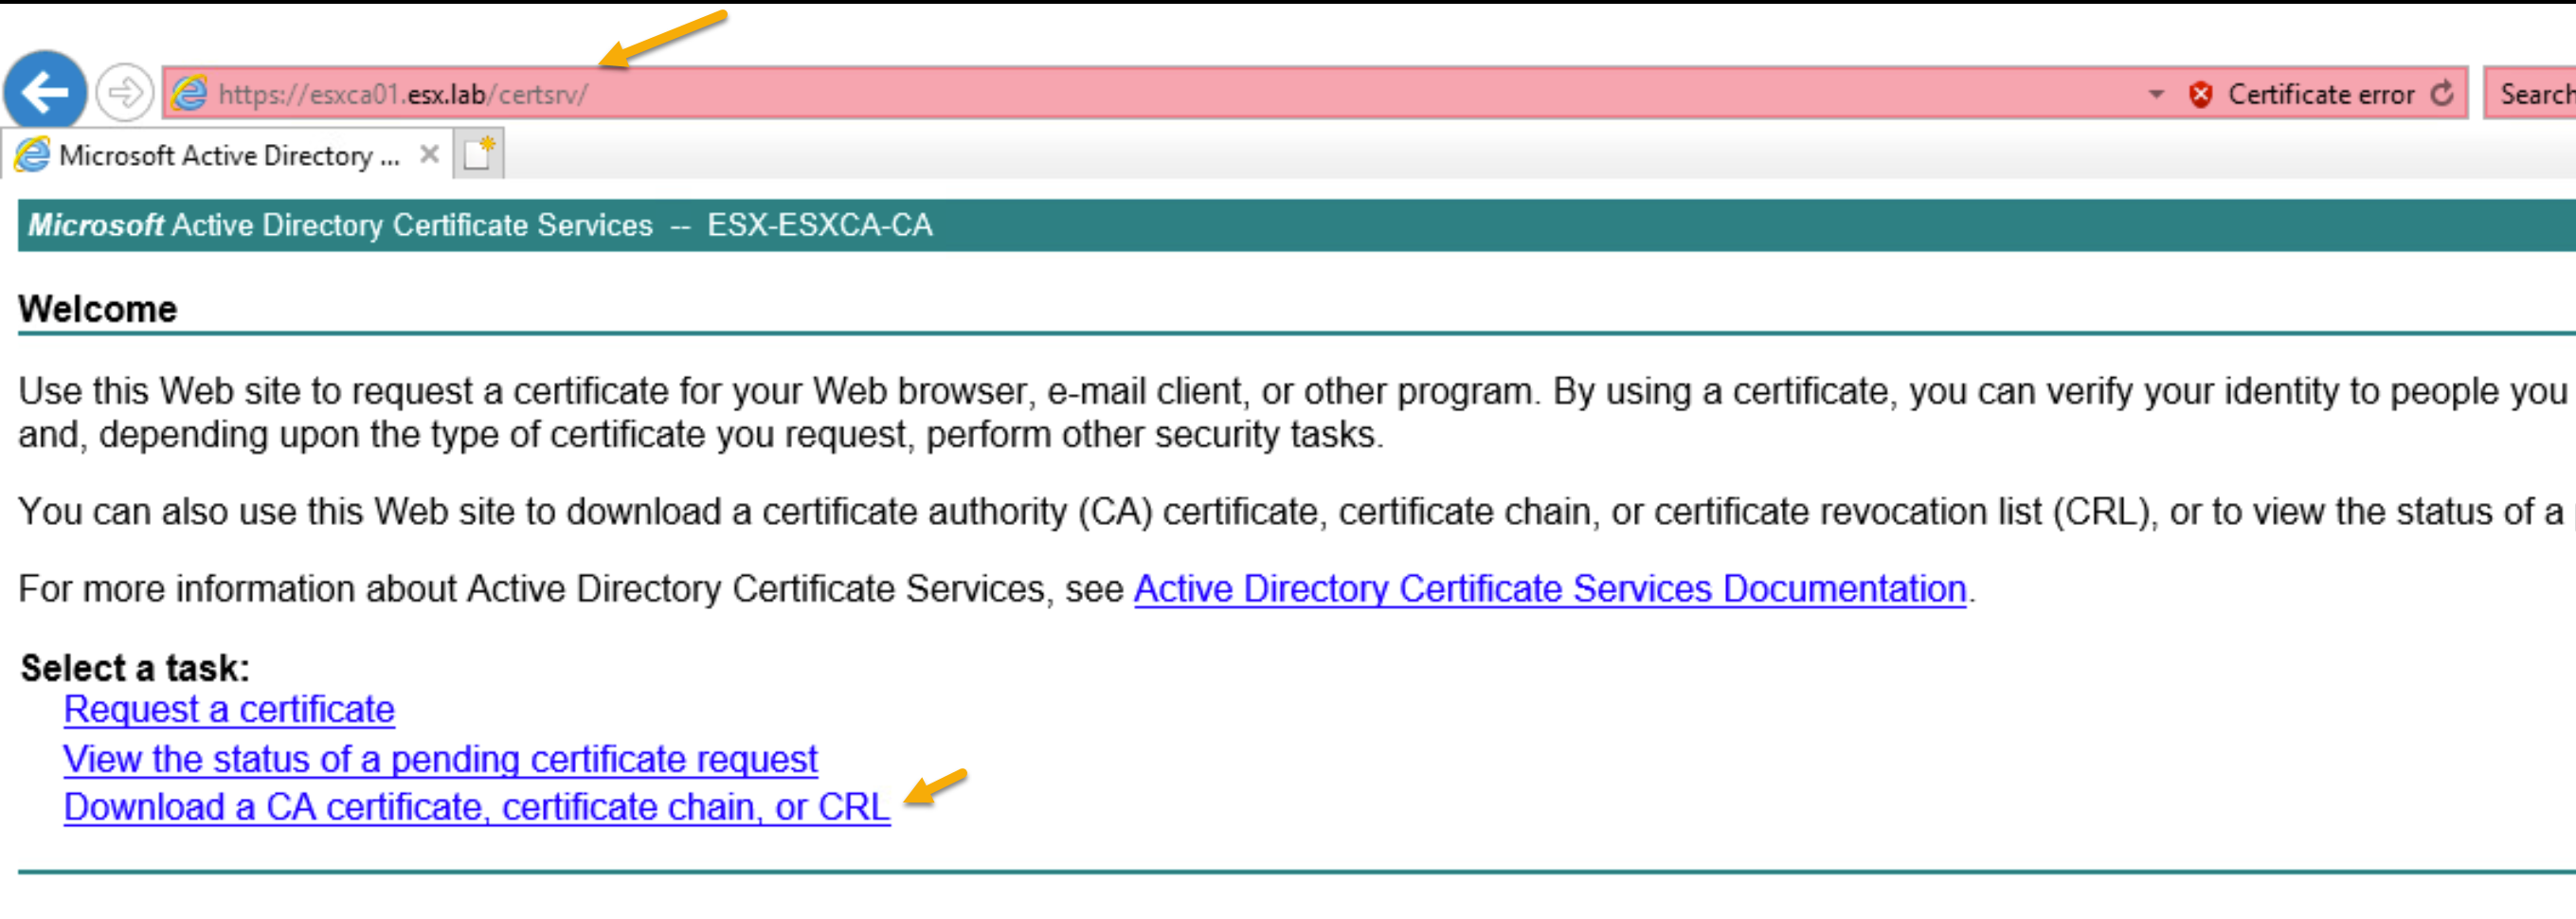
Open a web browser
-
Go to https:///certsrv and login if prompted for credentials.
-
Click on “Download a CA certificate, certificate chain, or CRL”
-
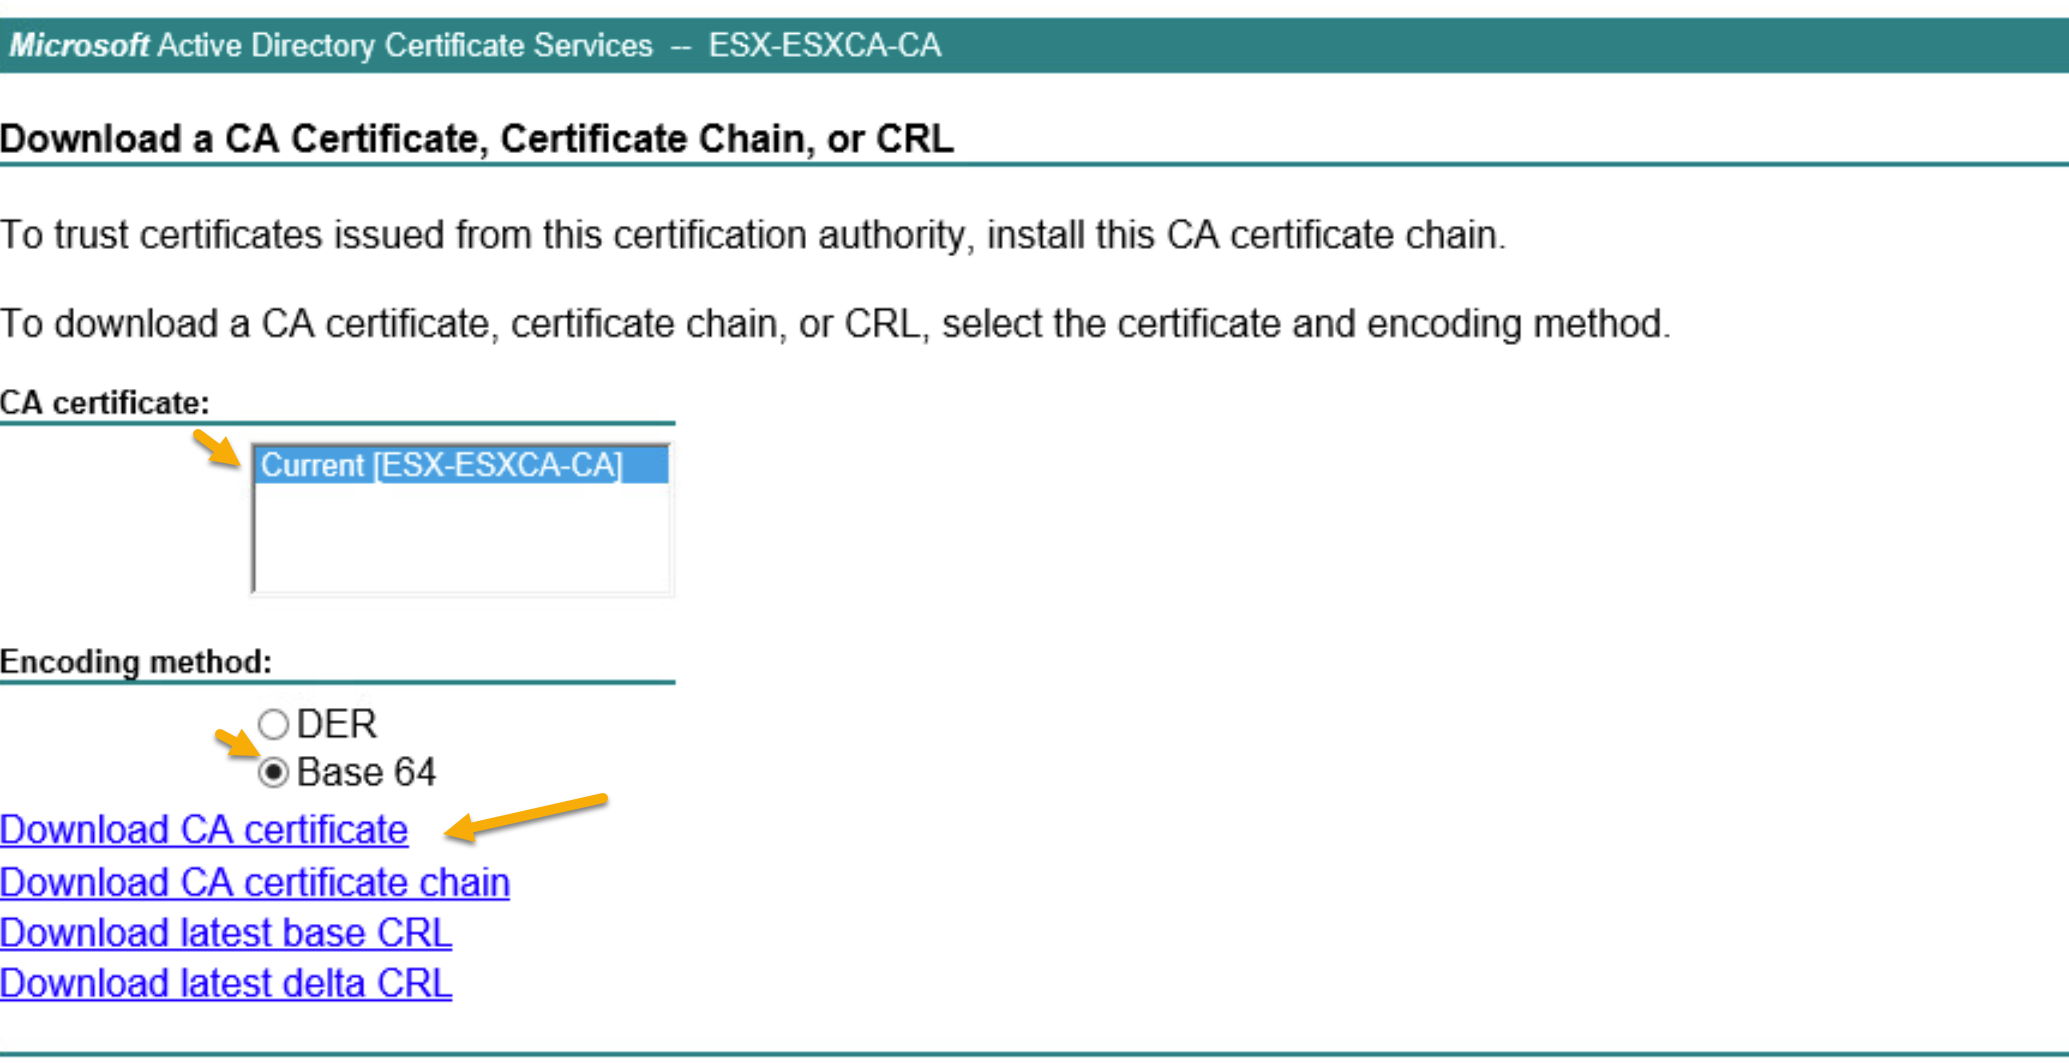
Select the CA cerificate and the encoding method should be “Base 64”.
-
Click “Download CA certificate”
-
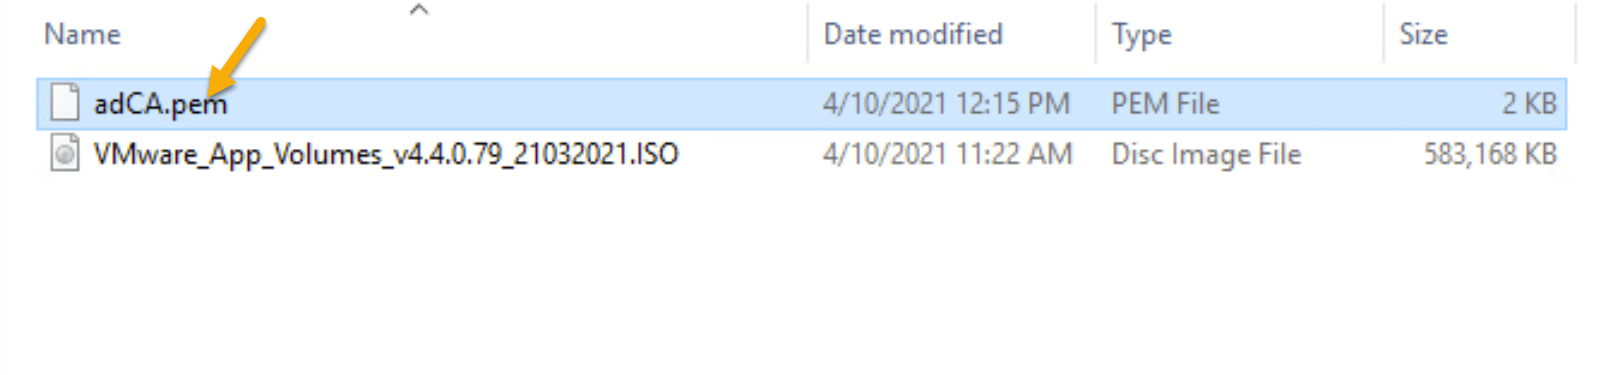
Use File Explorer and browse to the directory where the .cer was saved
-
Rename the file and file extension from certnew.cer to adCA.pem (This is Case Senetive!)
Note: You might need to use openssl if you are converting a CA cert from another encoding method.
- On each App Volumes Manager server, copy the adCA.pem file to the /config directory where the App Volumes Manager is installed.
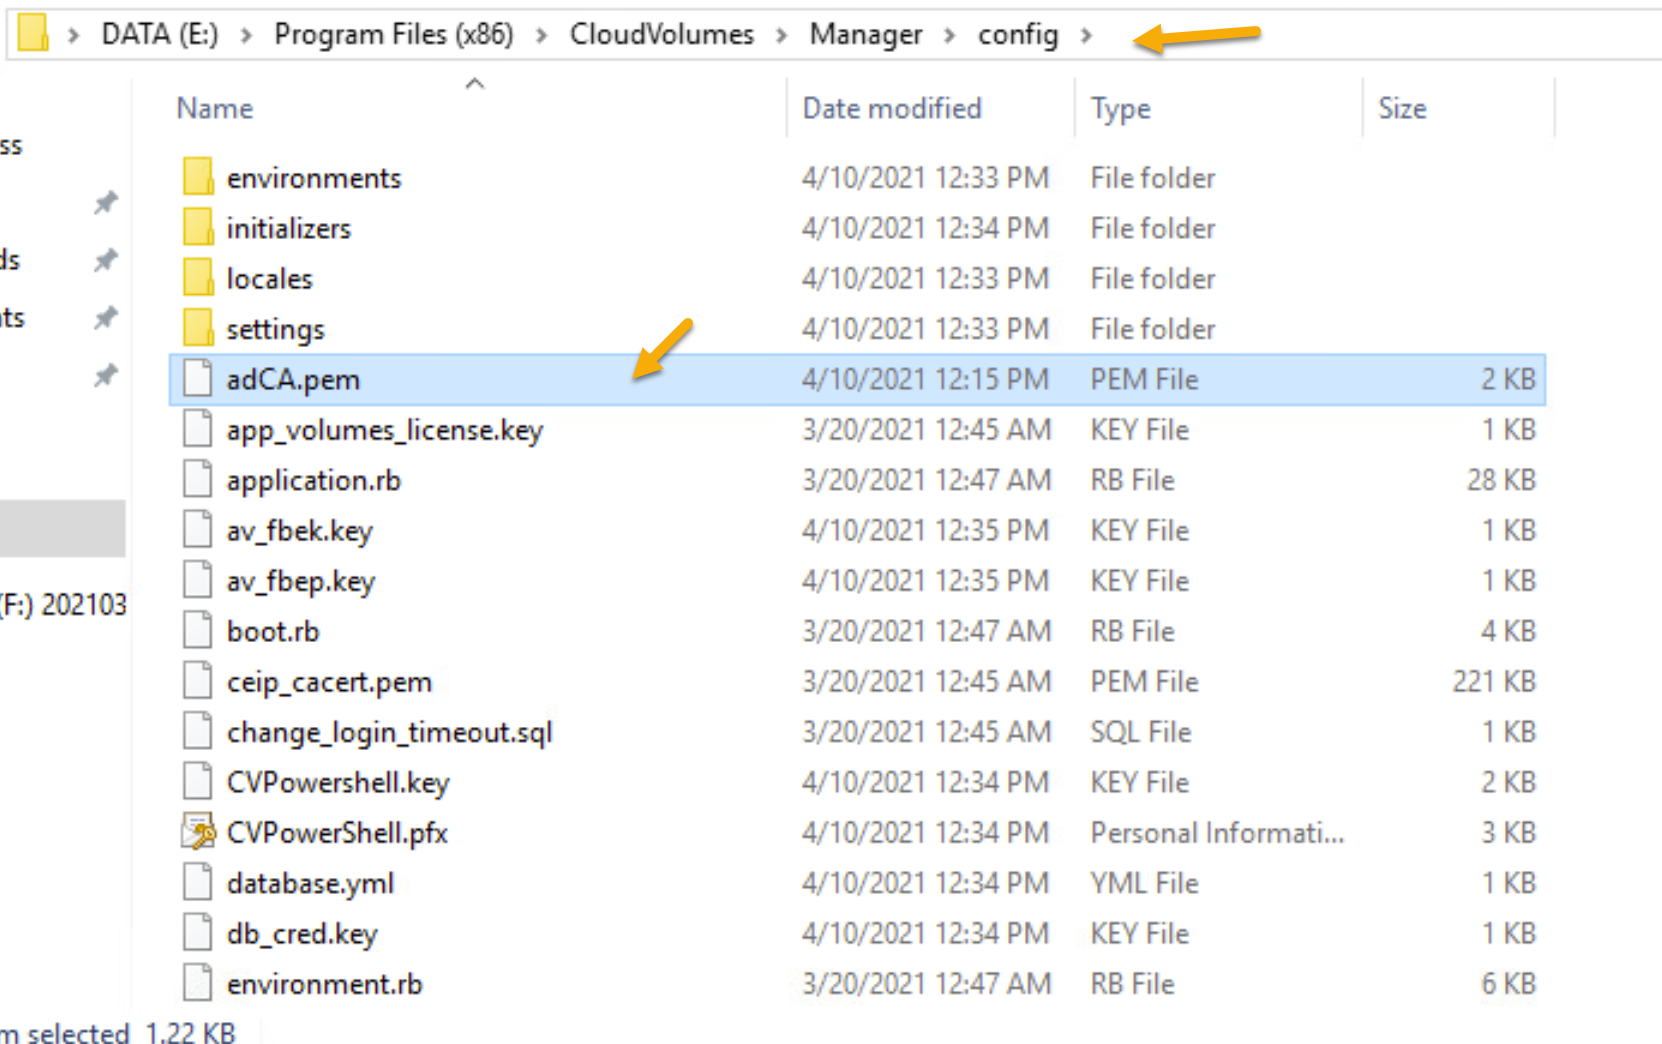
- After copying the adCA.pem restart the App Volumes Manager service.
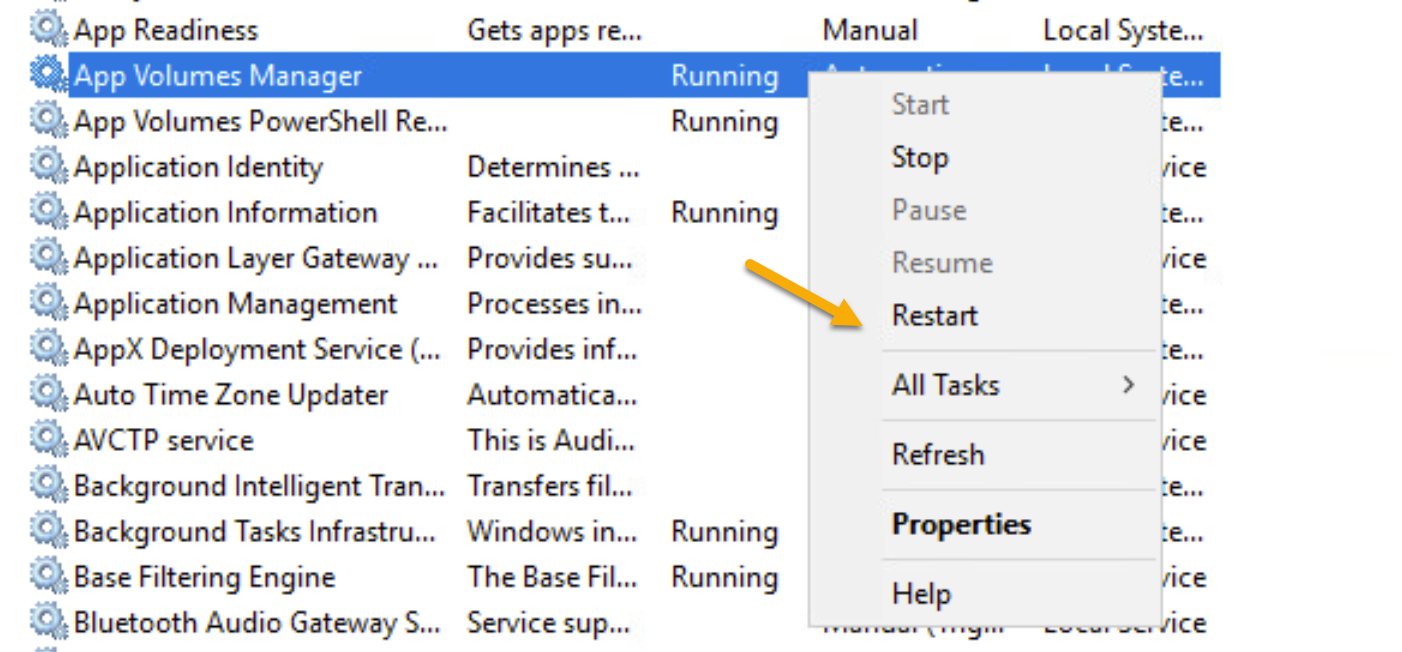
Note: You have to repeat this process on all App Volume Manager Servers in your enviroment.
Configure Custom vCenter Server Role
-
Create a new vCenter Server Role
-
Assign the following Privileges to the new role

- Assgin the new role to a user or group
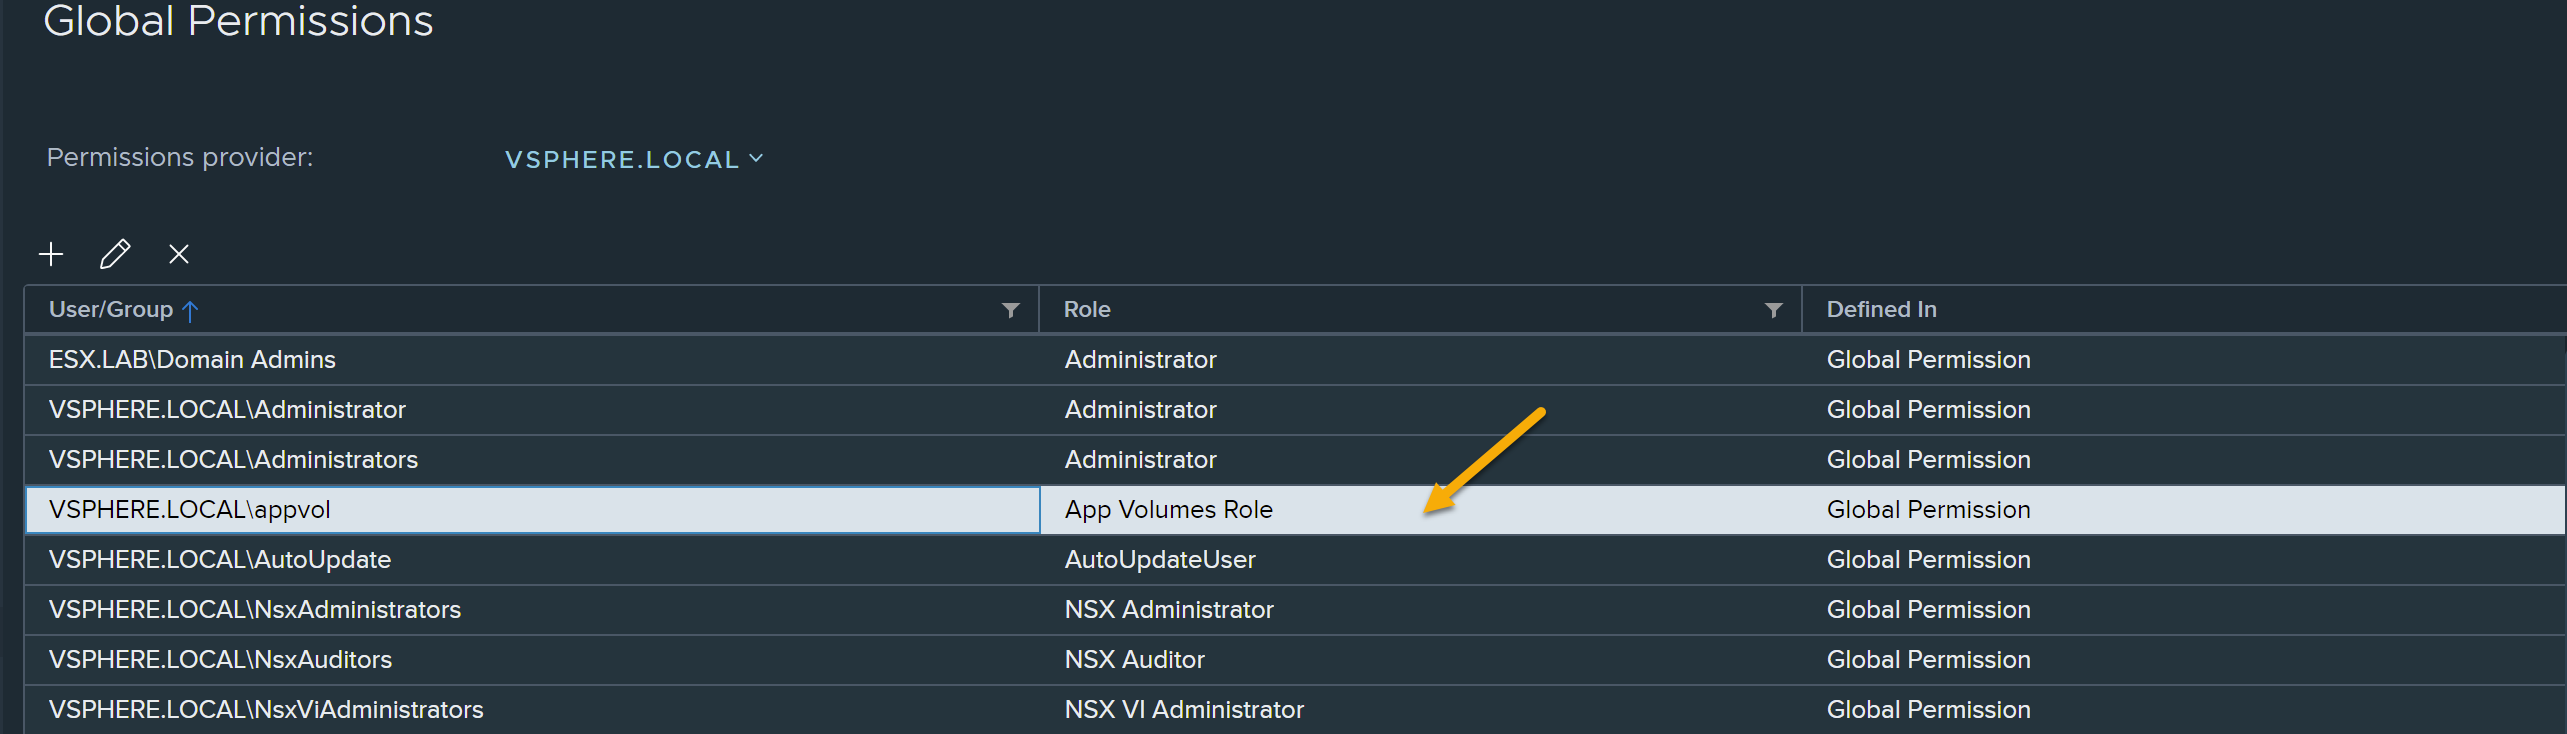
More info can found in this VMware Doc about custom vCenter Server Role.
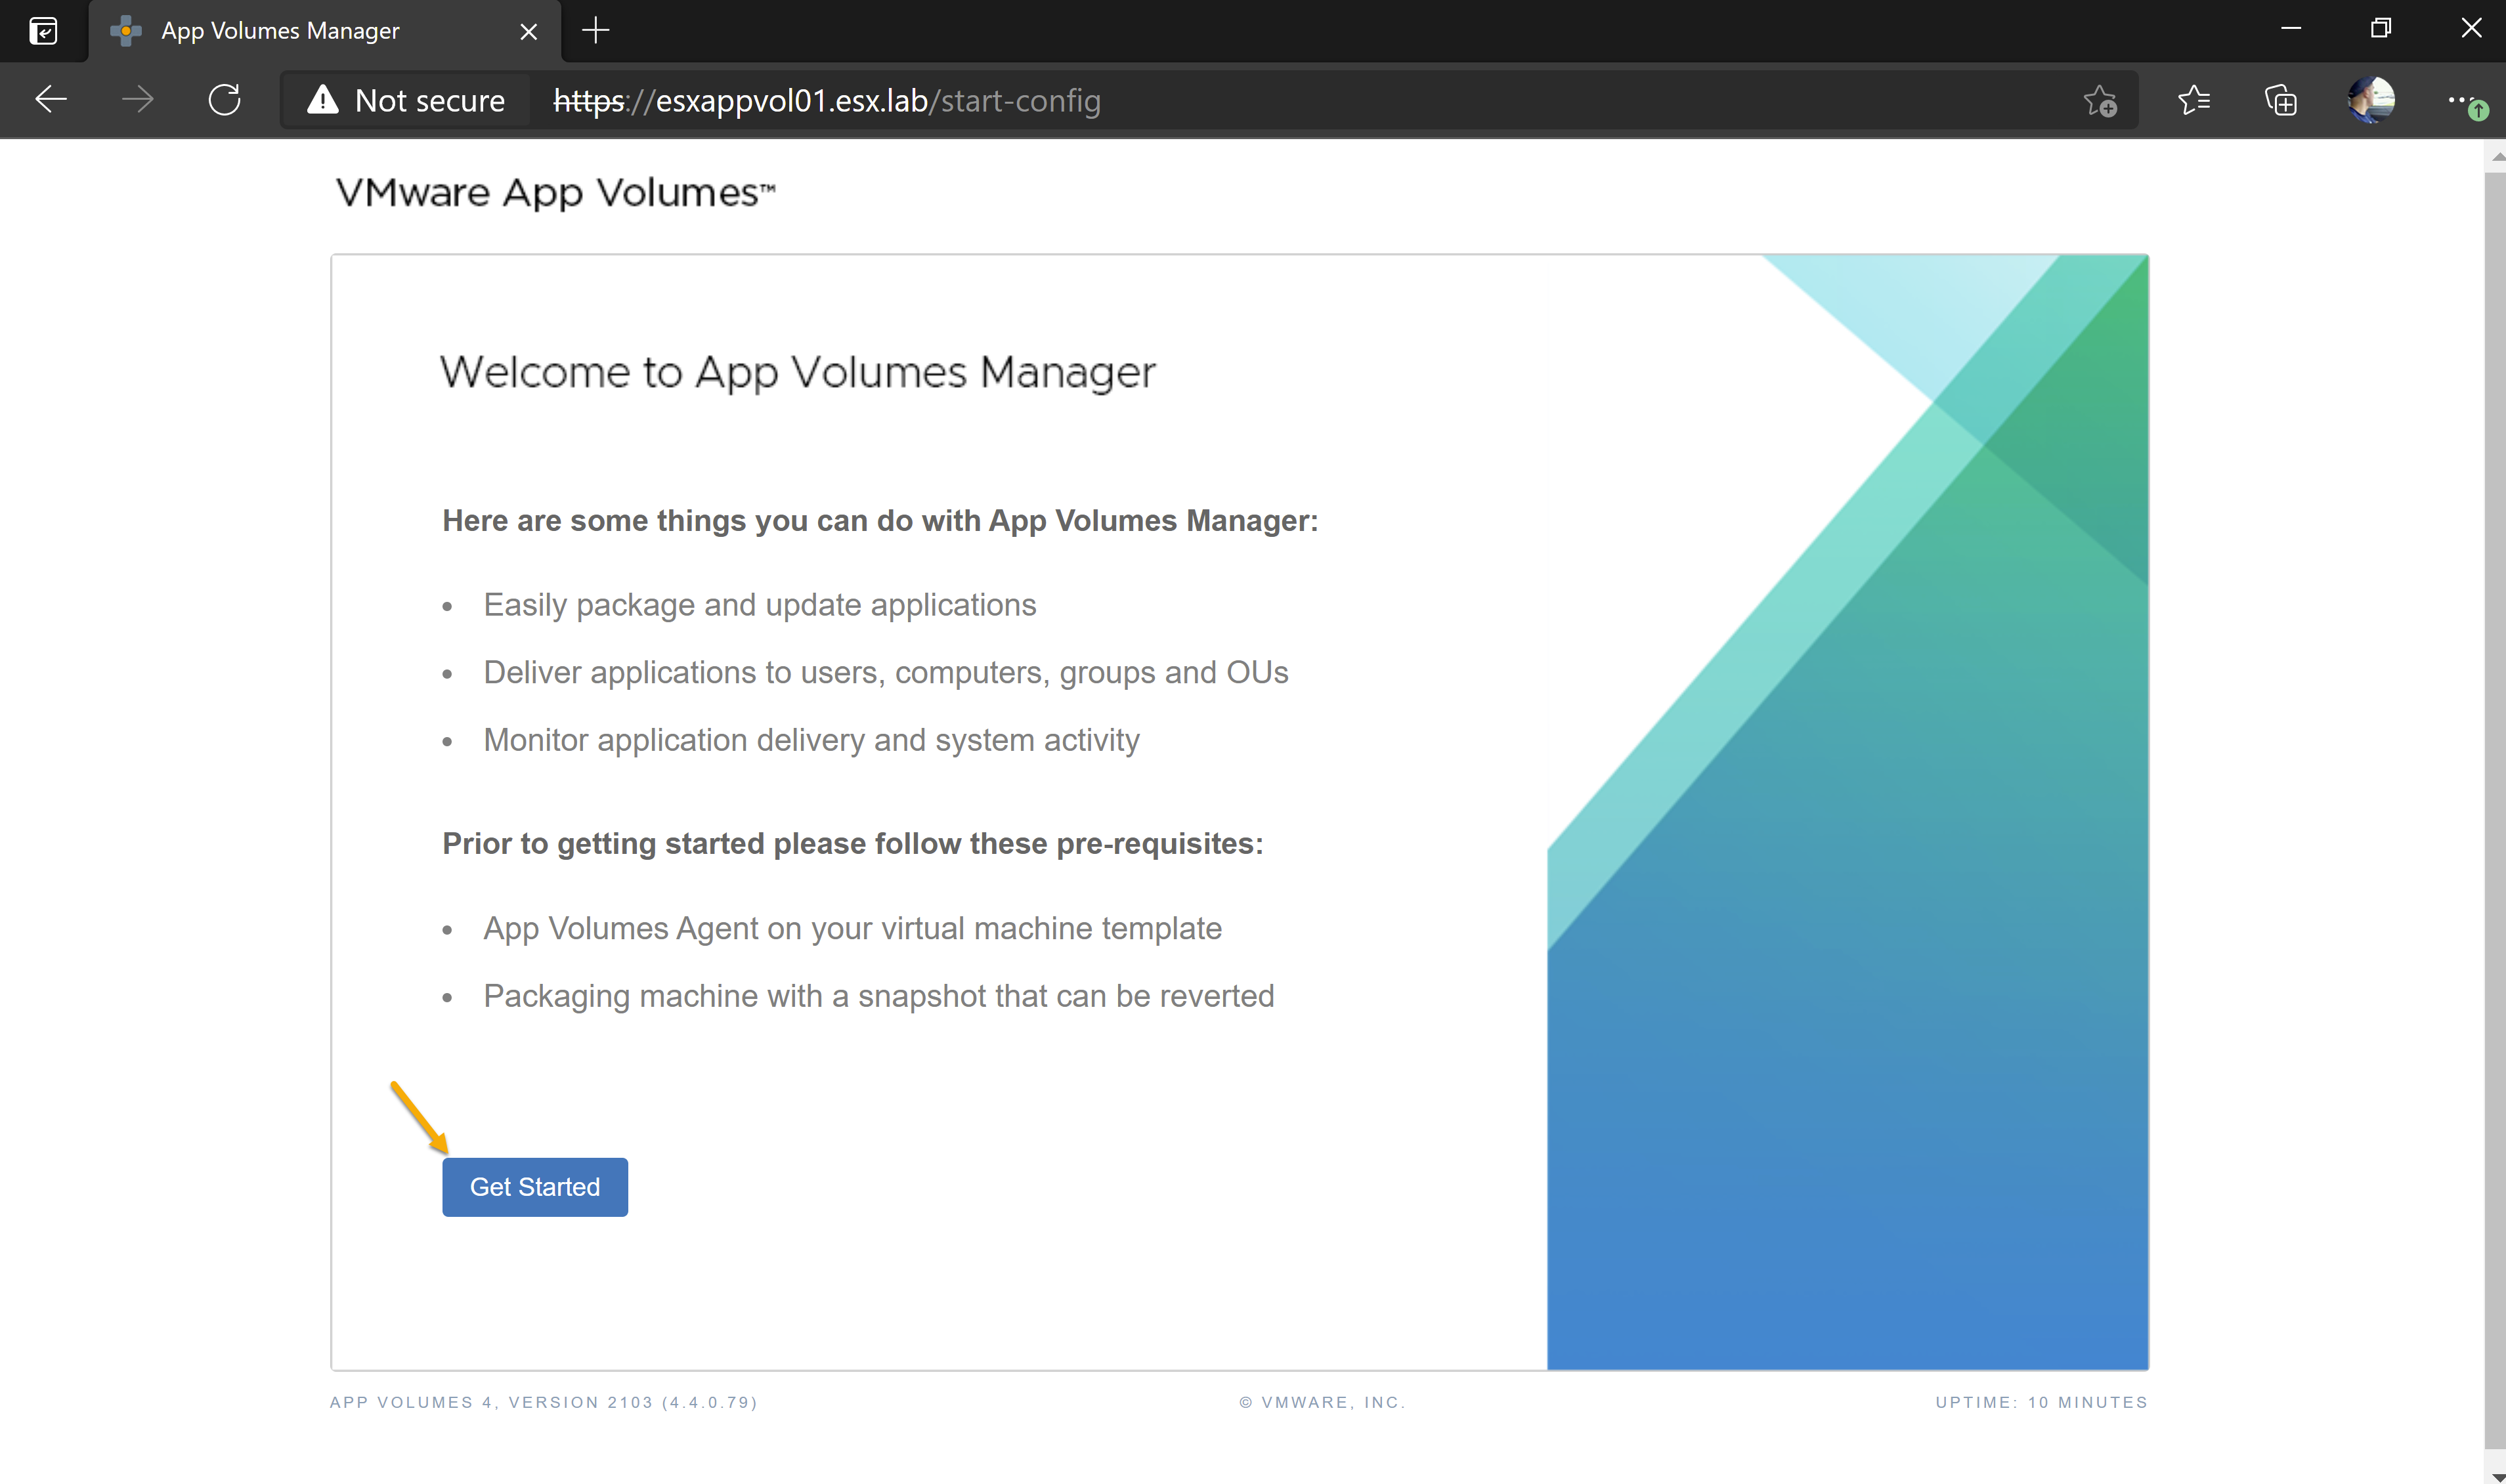
Configure App Volume Start Config
- Open a web browser and go to https://FQDN of App Volume Manager server. You will be presented with start config page. Press Get Started to begin the configuration.
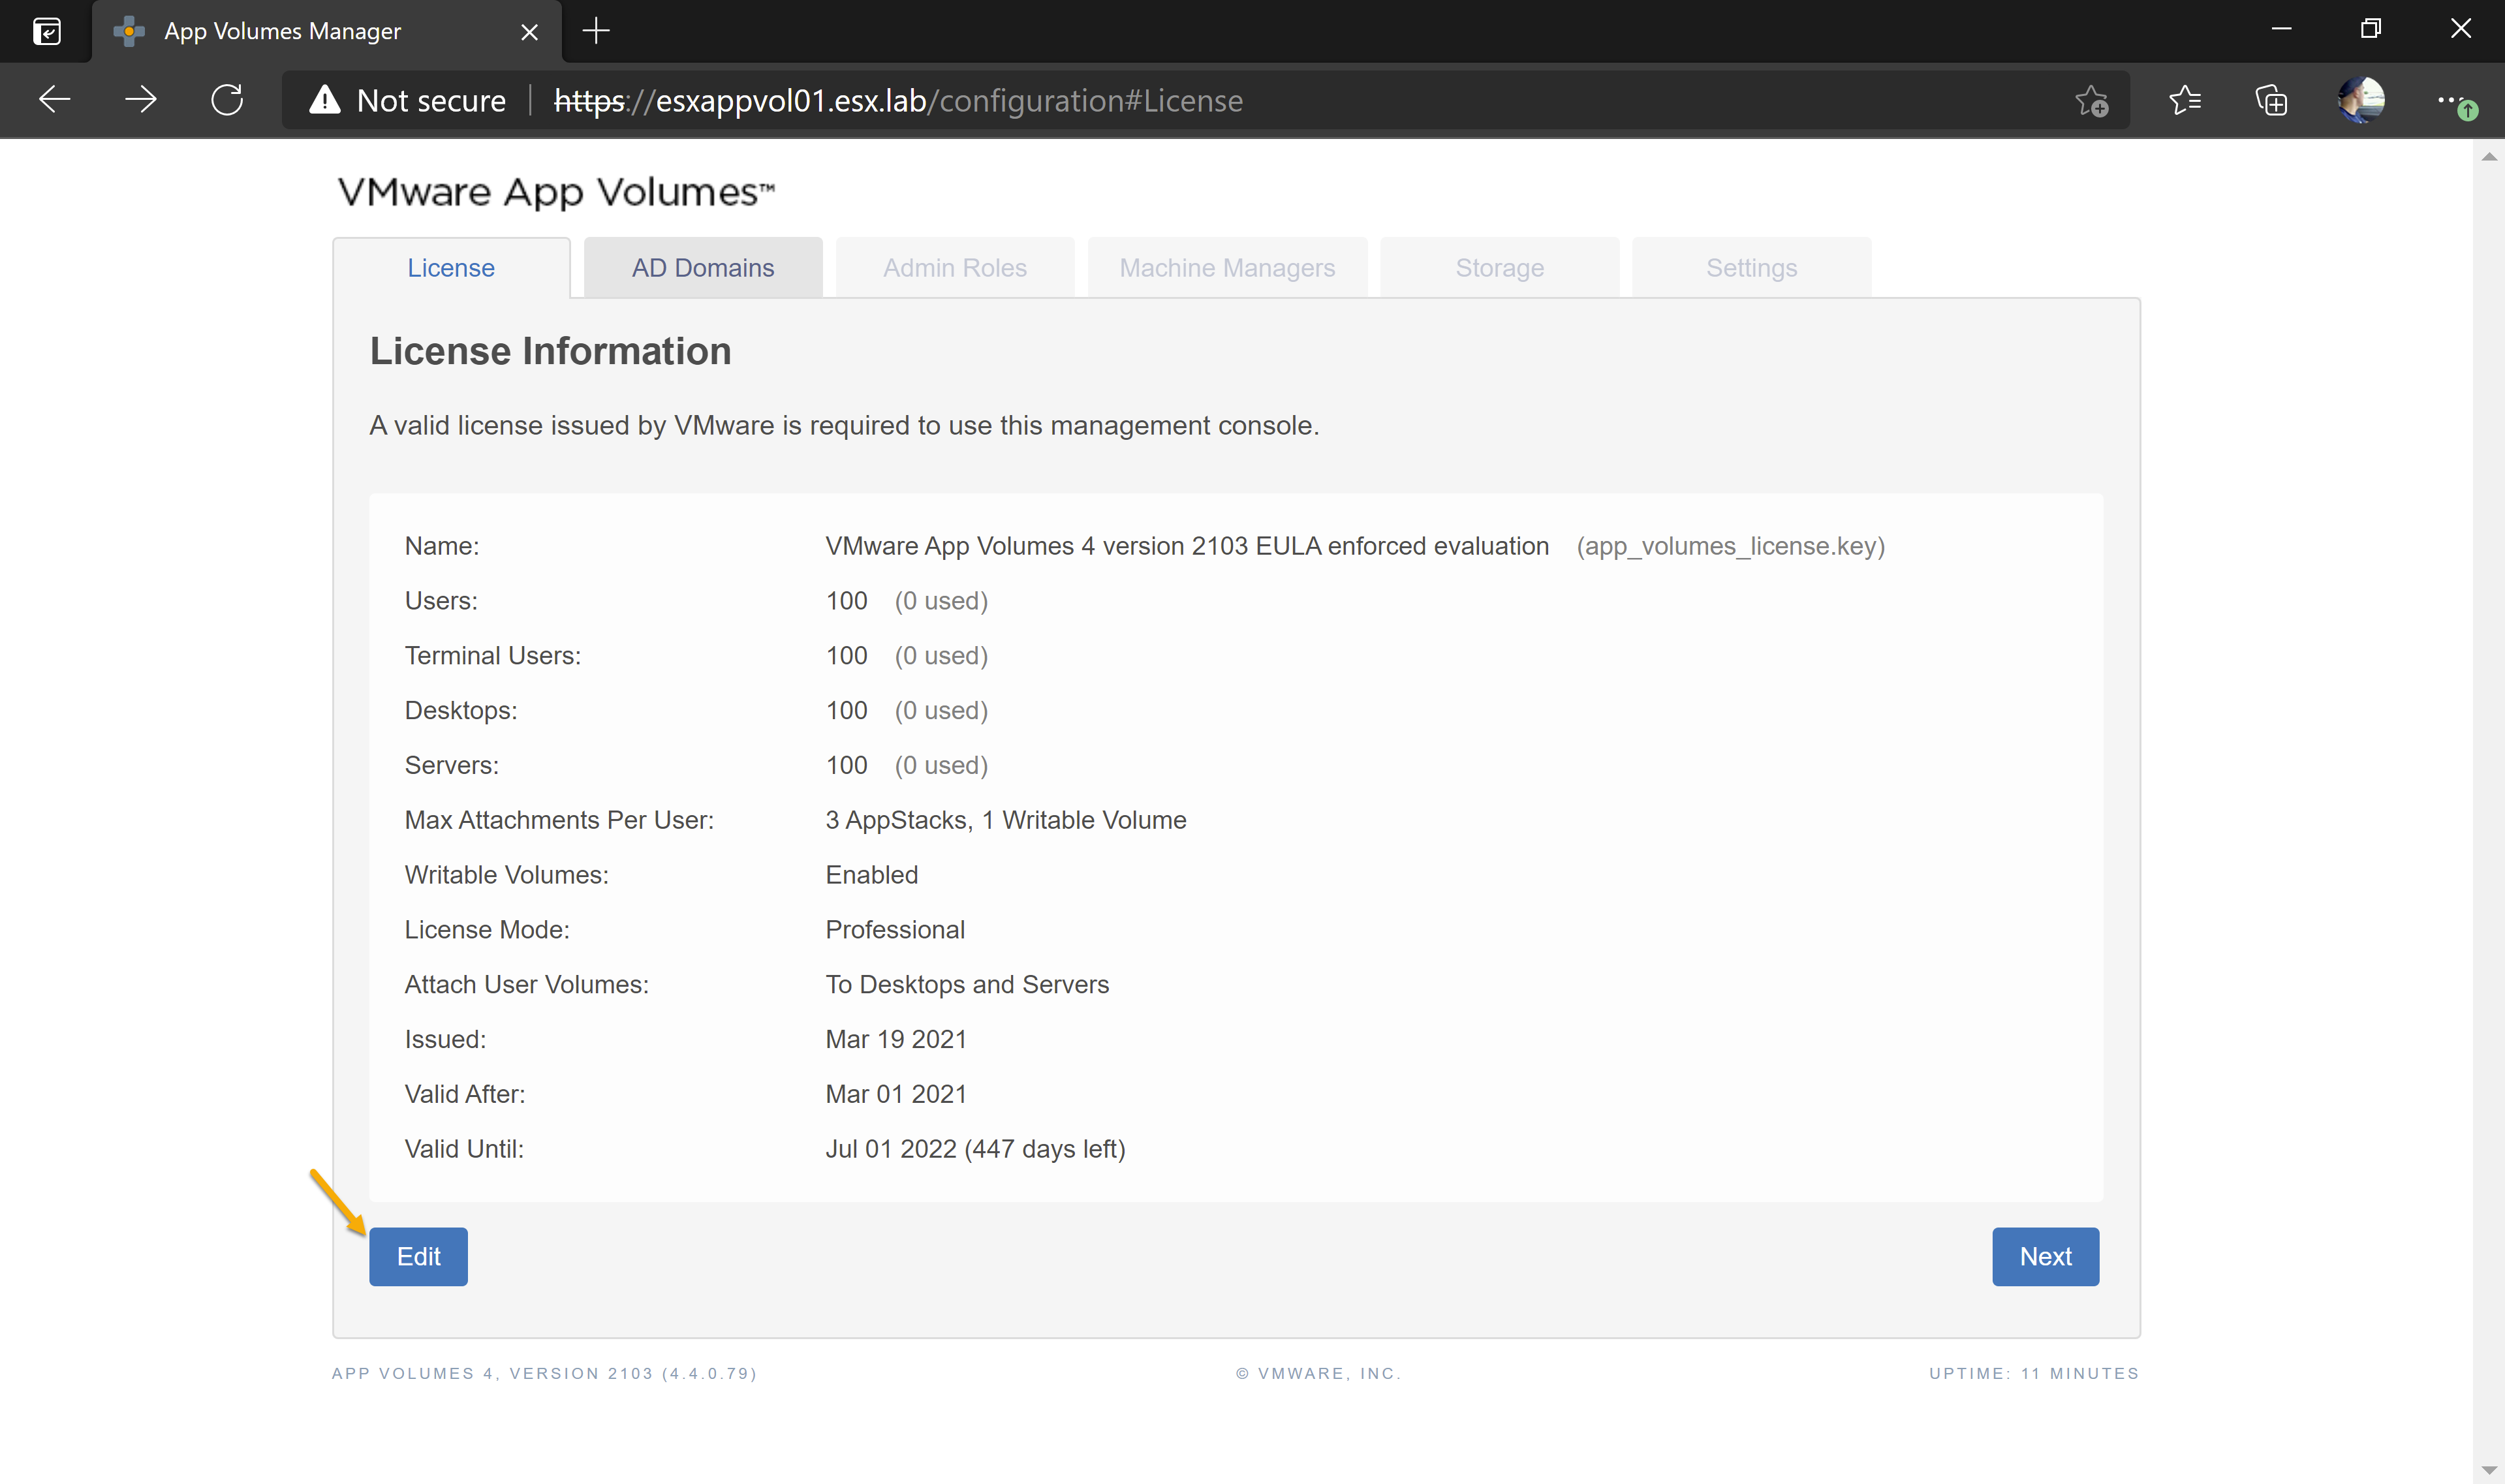
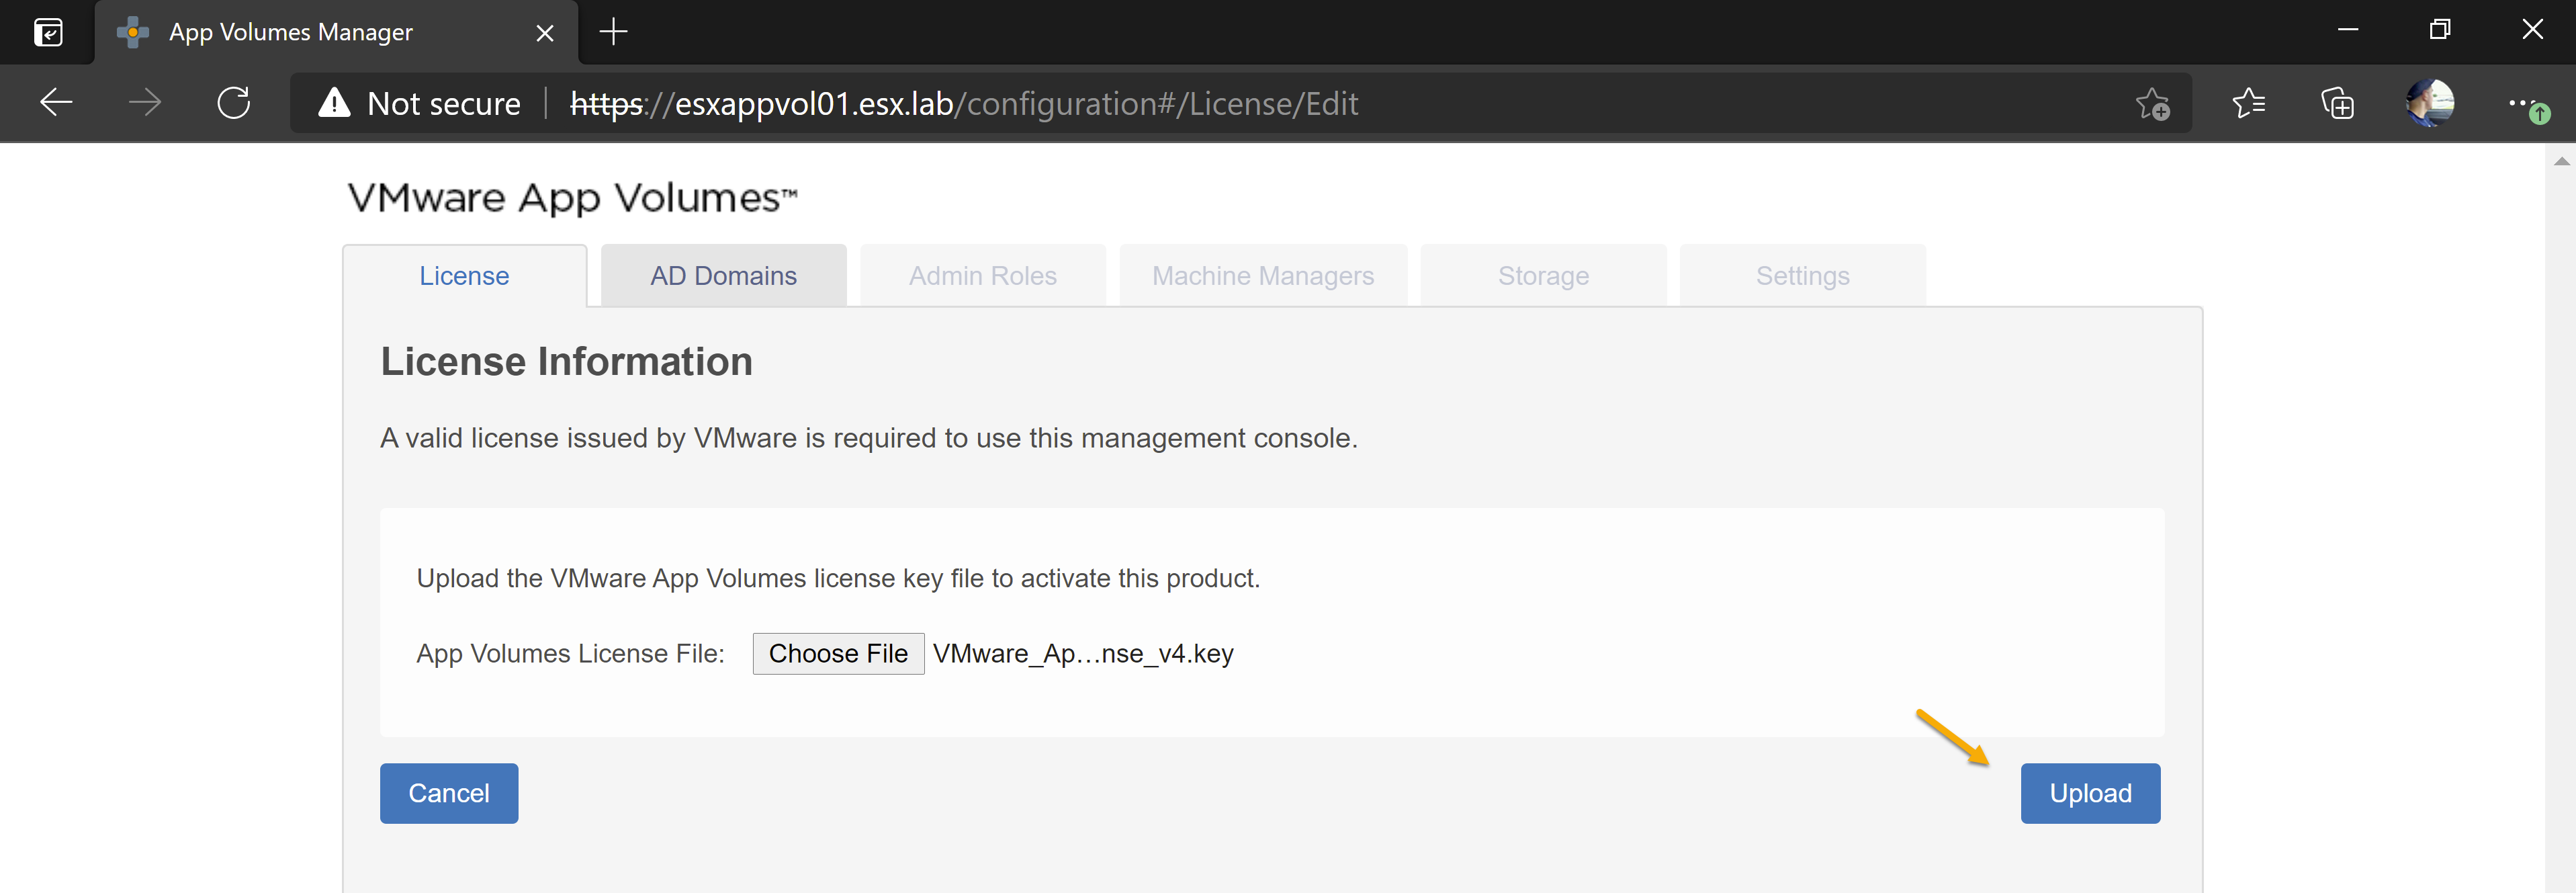
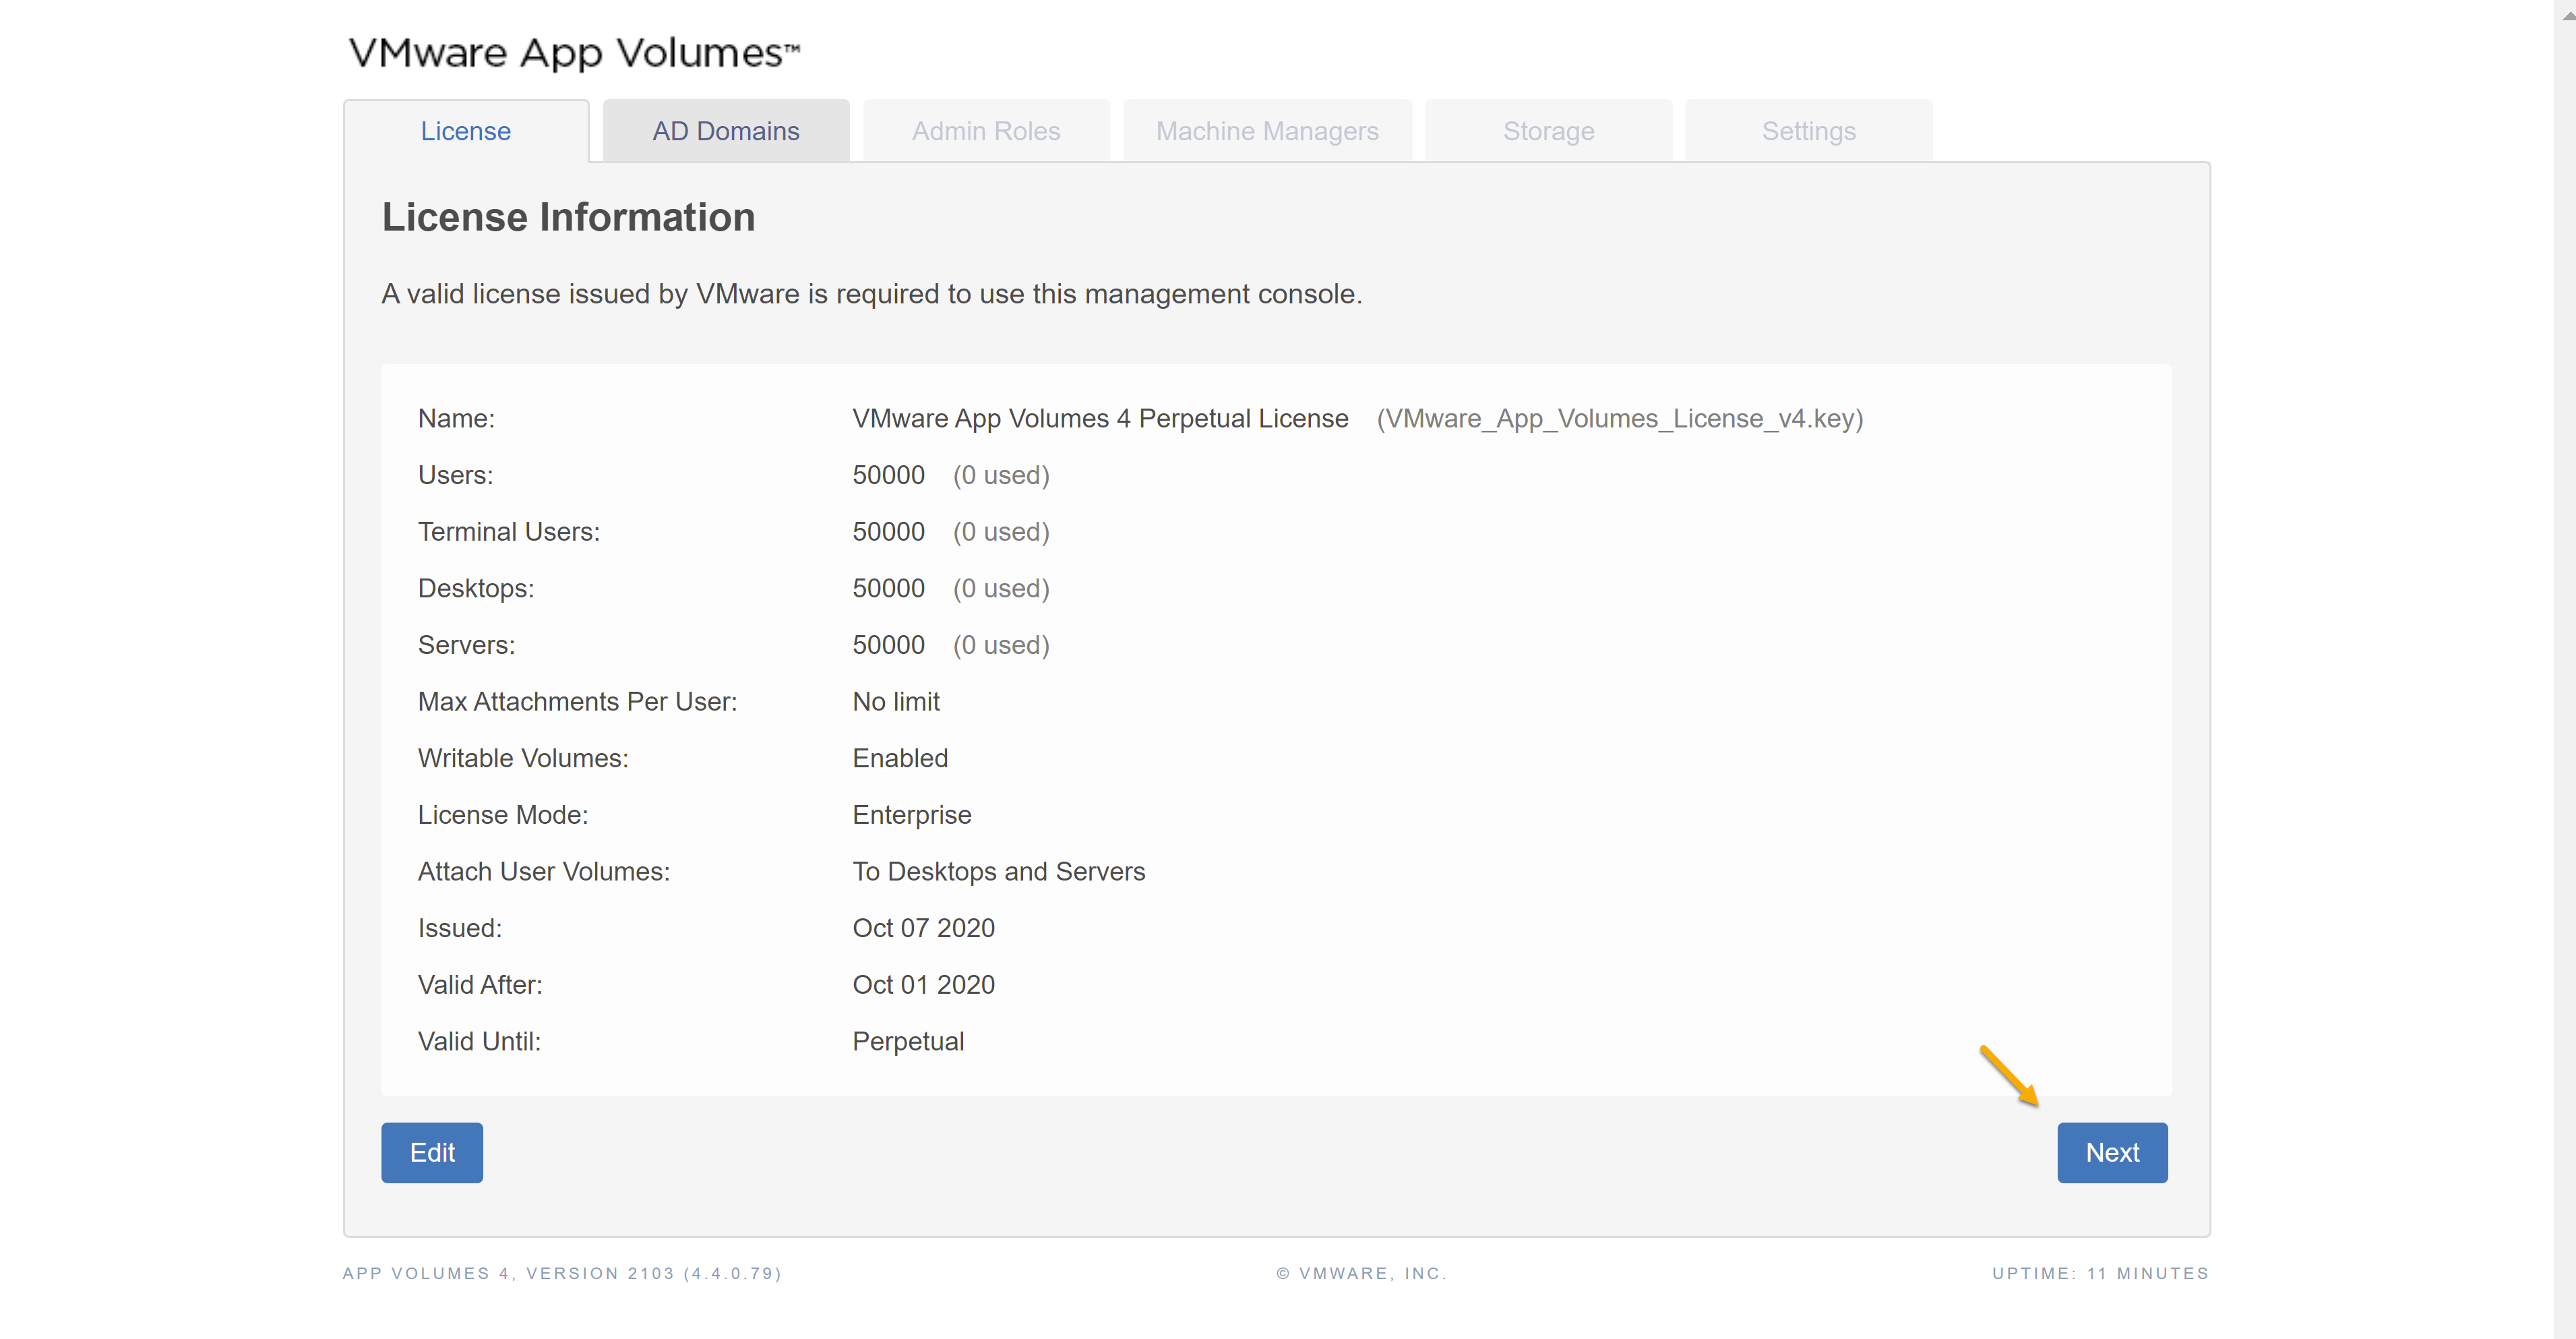
- At the license tab press edit and browse to your app volume license file. After uploading your license file press next to continue.
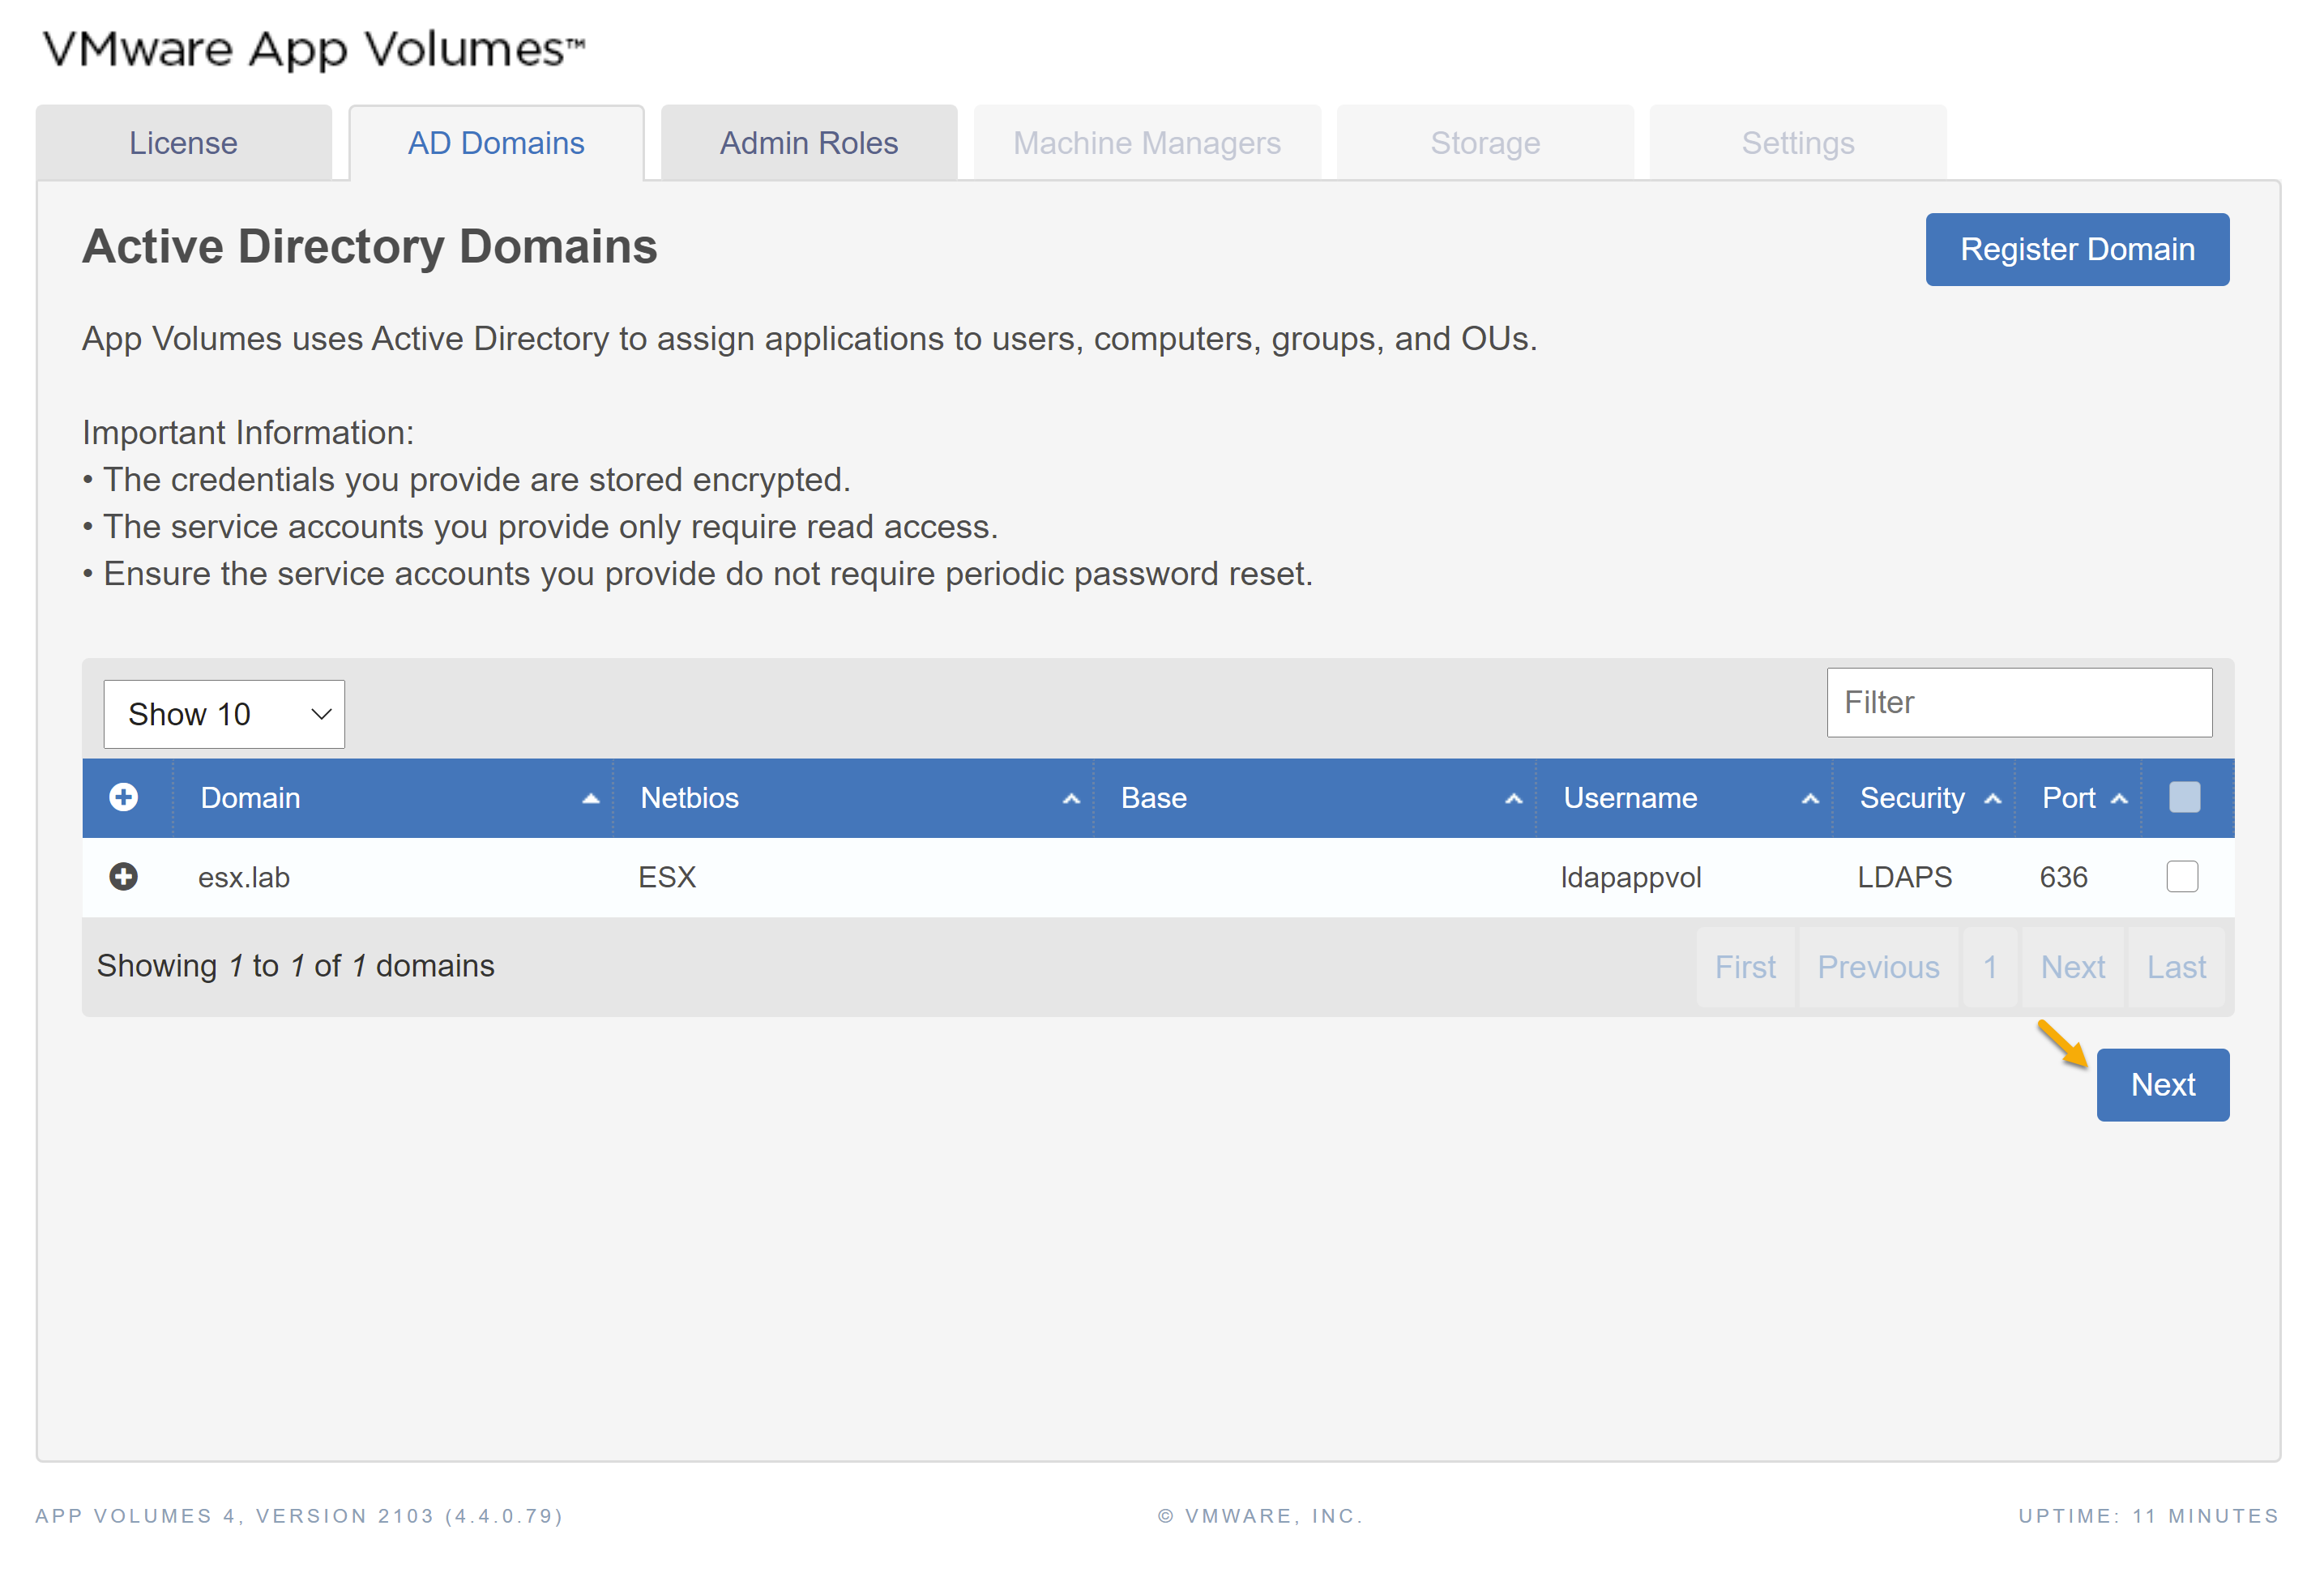
- At the AD Domains tab register your active directory domain. Configure the following:
- Active Directory Domain Name
- FQDN of your domain. (Example Contoso.com)
- Domain Controller Hosts
- FQDN or IP address of Domain Controllers in your environment.
- LDAP Base
- Configure the LDAP Base. You can limit App Volume Manager search base within your active directory. If you want App Volume Manager to query your active directory environment you can leave this setting blank.
- Username/Password
- Account that is able to query Active Directory
- Security
- Secure LDAPS
- Secure over TLS
- LDAPS (Insecure)
- Disable certificate validation (Insecure)
- You can enable this if don’t want the App Volume Manager to validate certificate for LDAPS.
- Port
- 389 or 636
Note: If you didn’t configure adCA.pem then you will need to enable “Disable certificate validation” when using LDAPS.
- Press register when your finished configuring active directory domain.

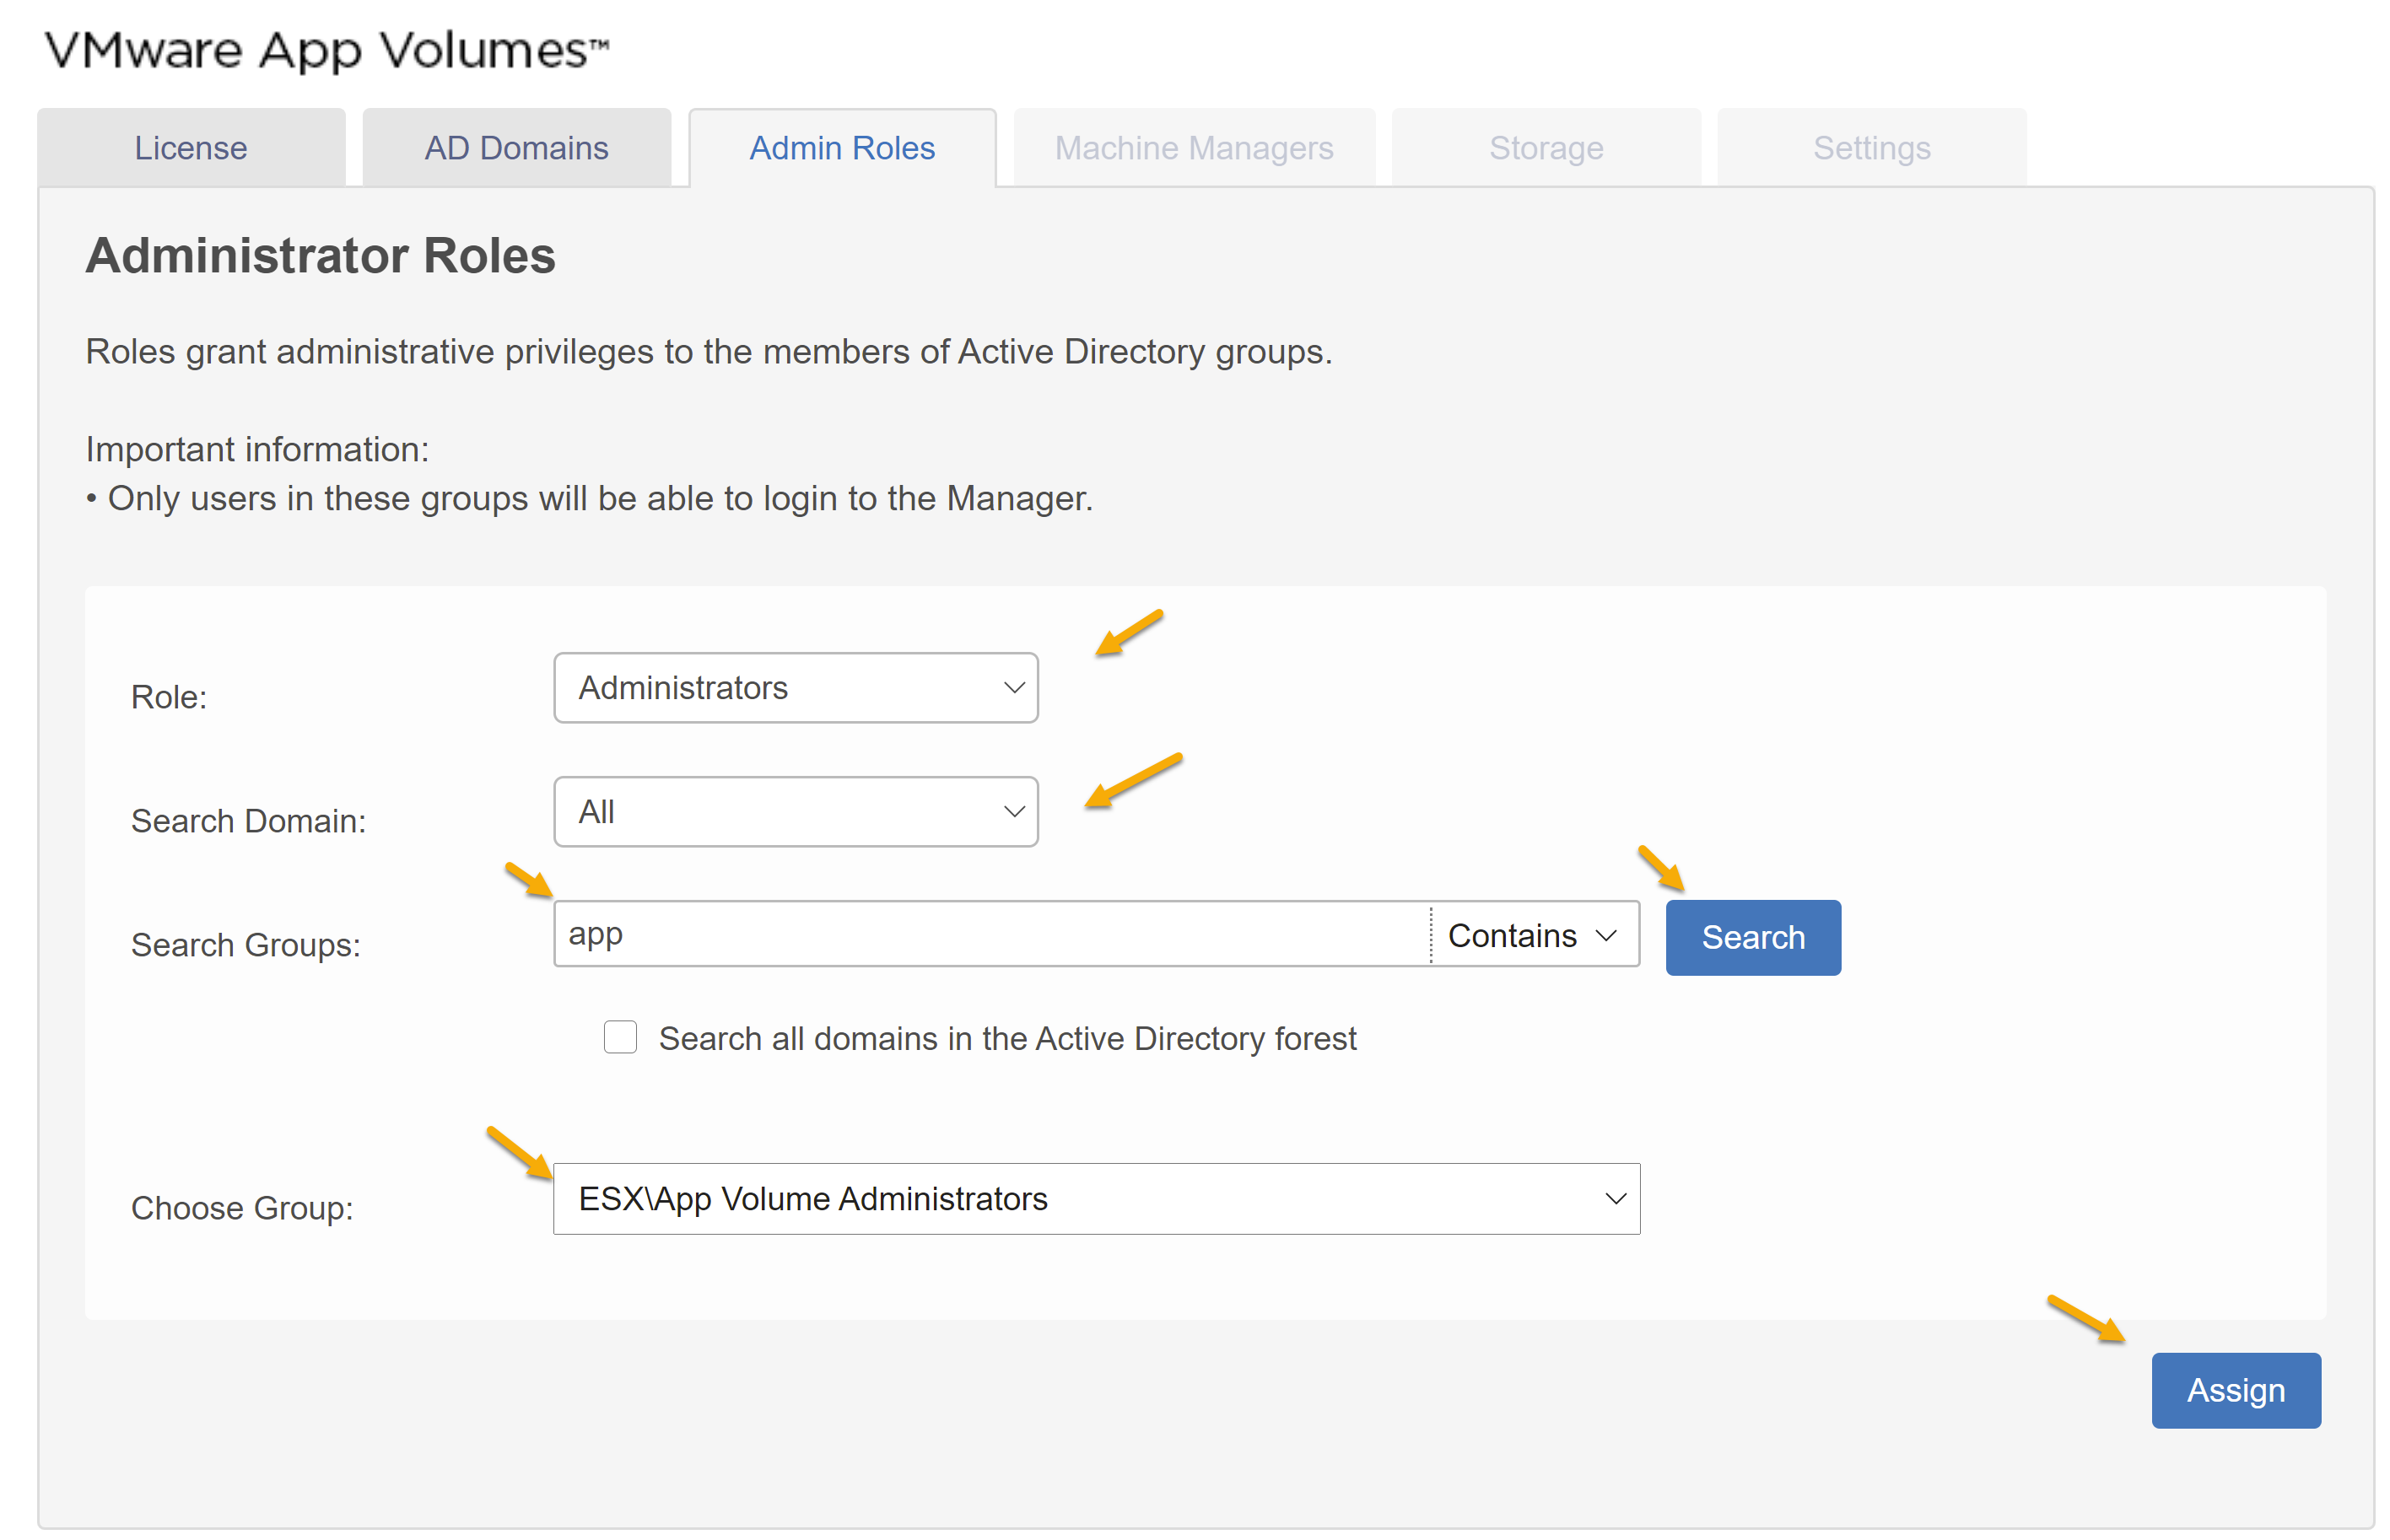
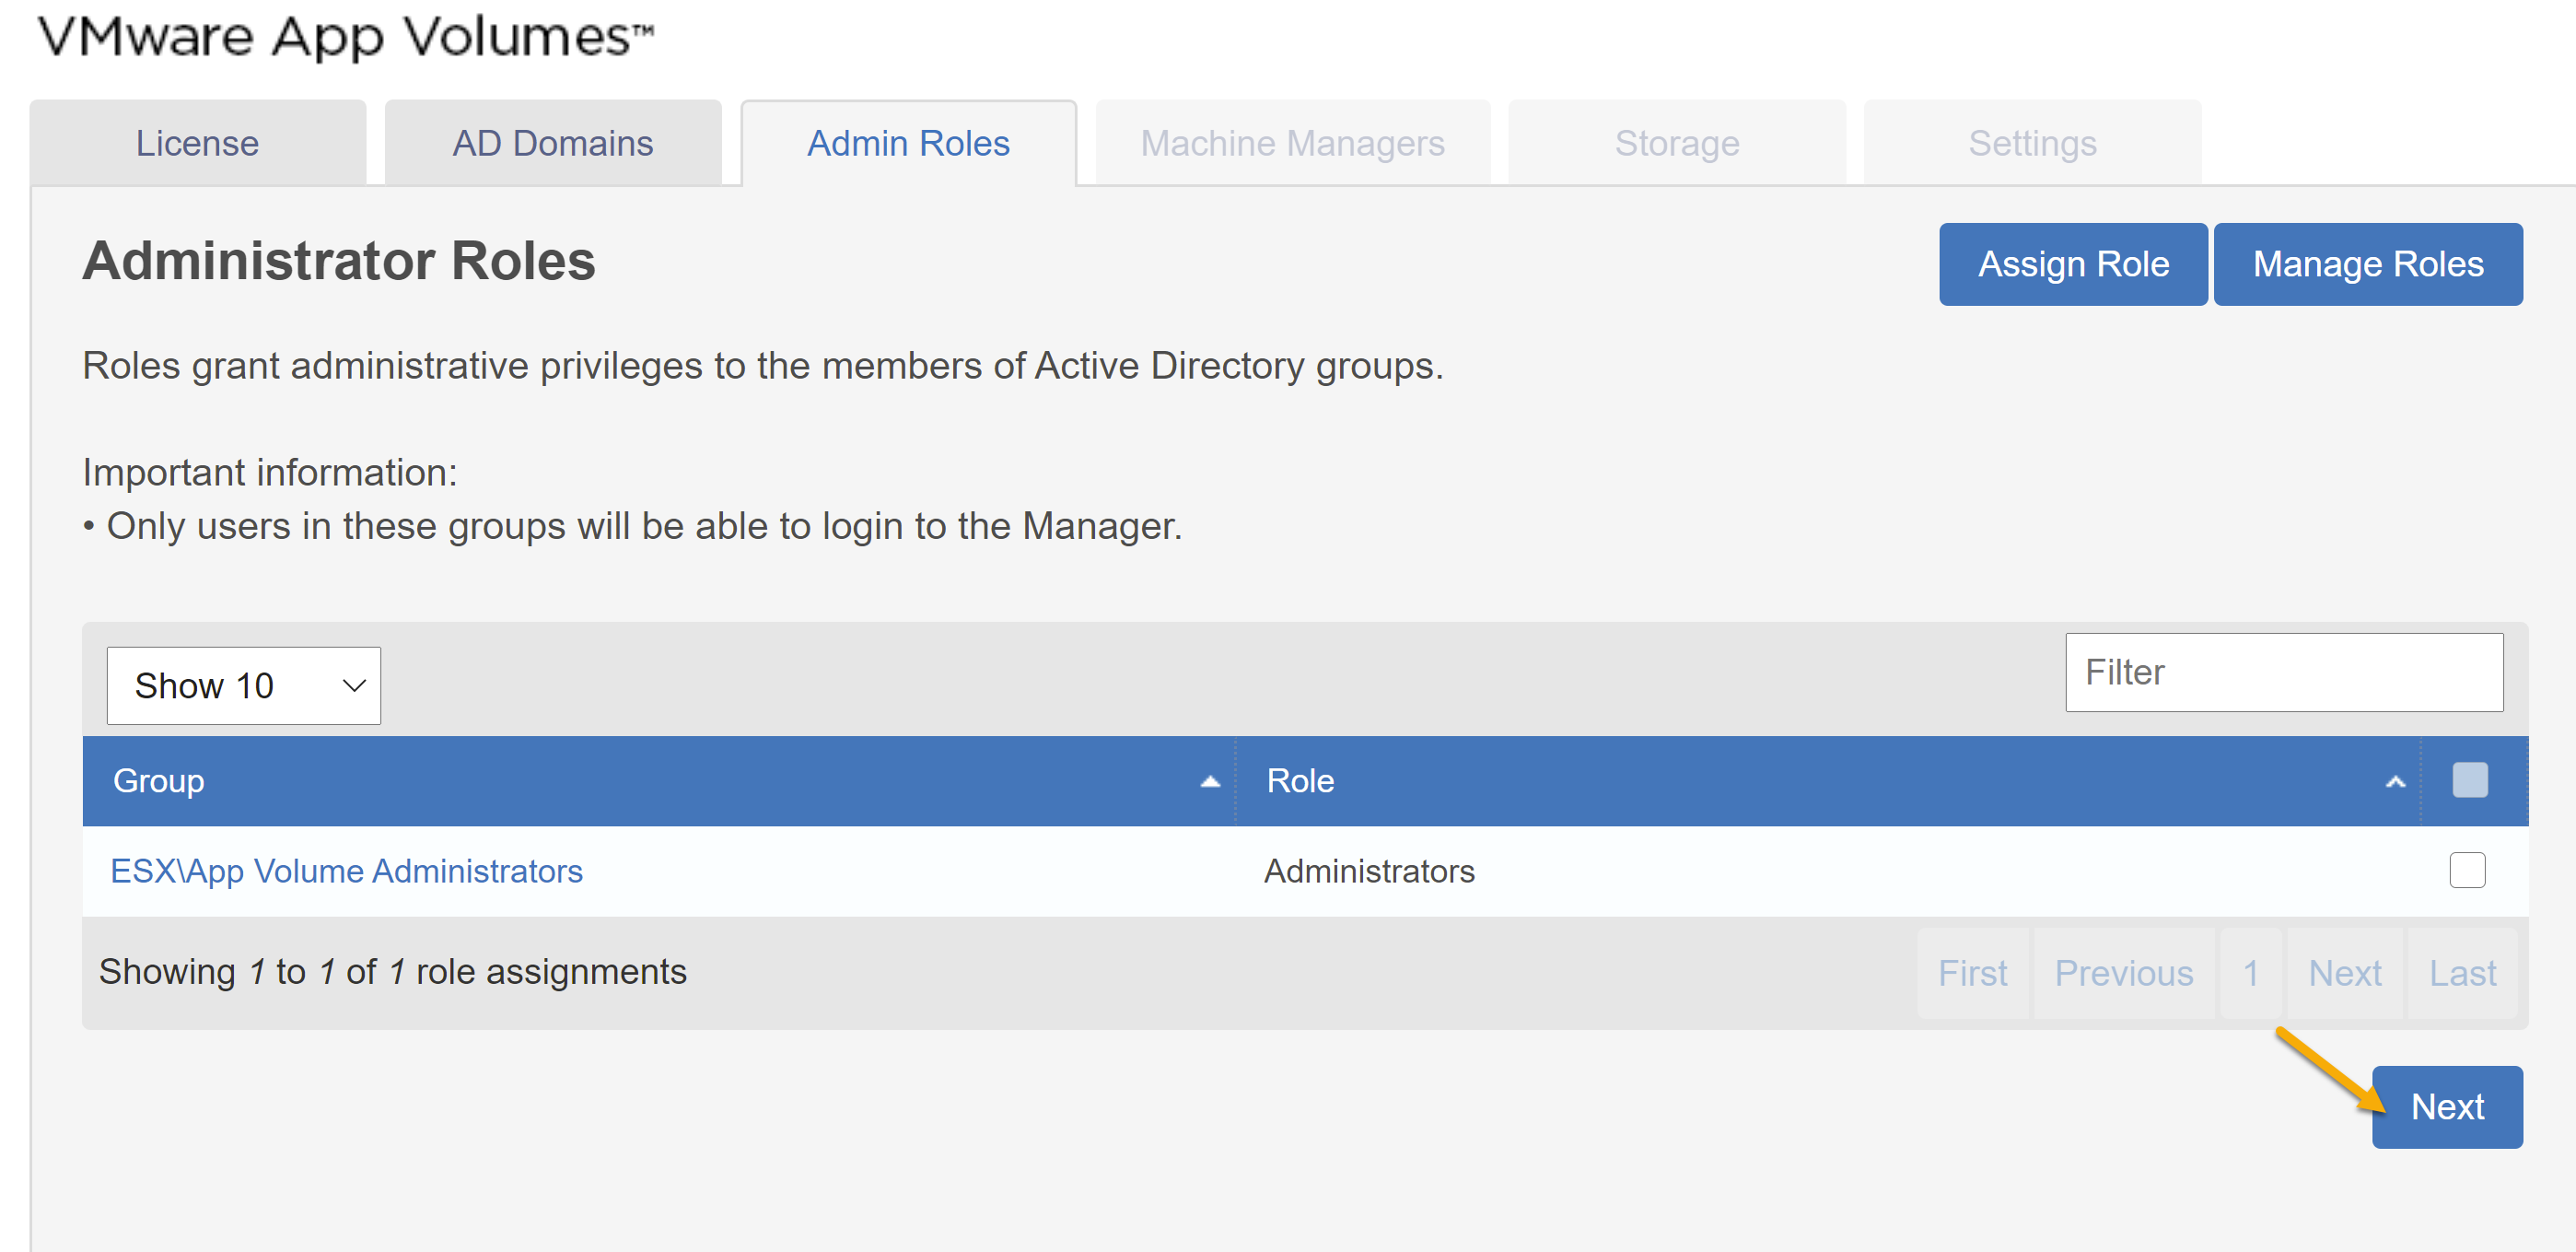
- At the Admin Roles tab configure the administrators role. I will be adding security group. Any user accounts in this security group will be granted administrators role in app volume manager. Press assign when your ready to continue.
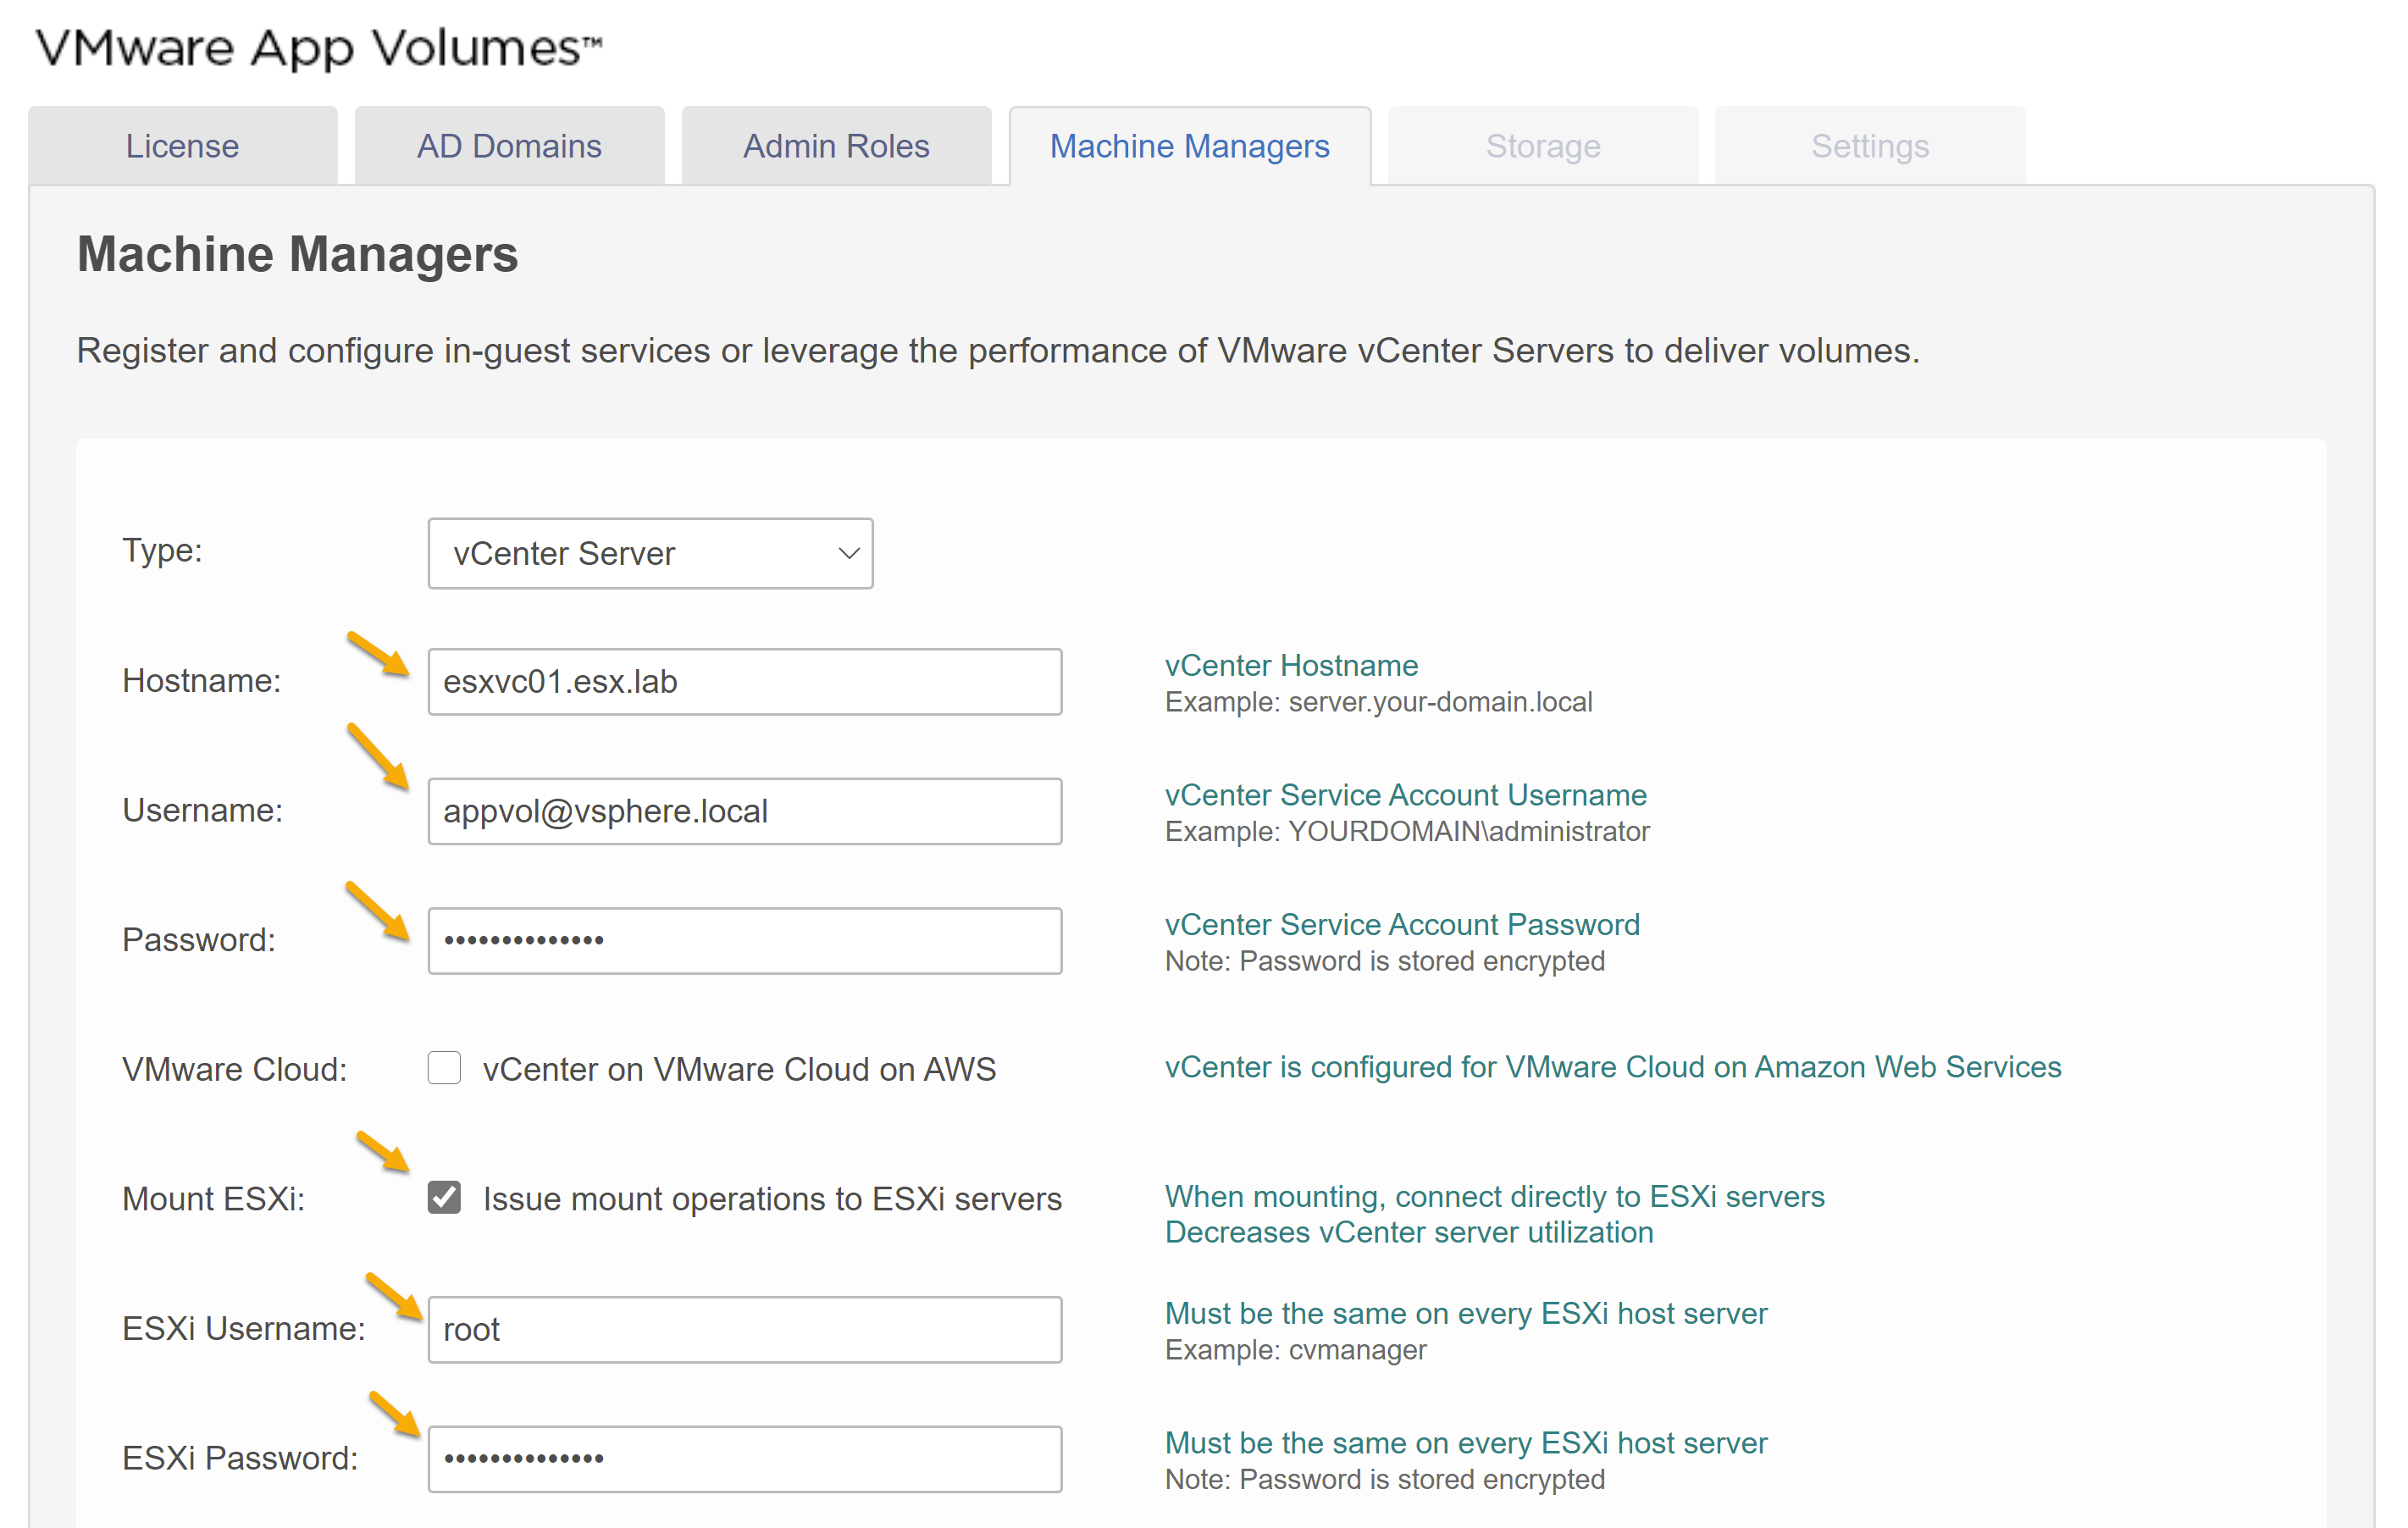
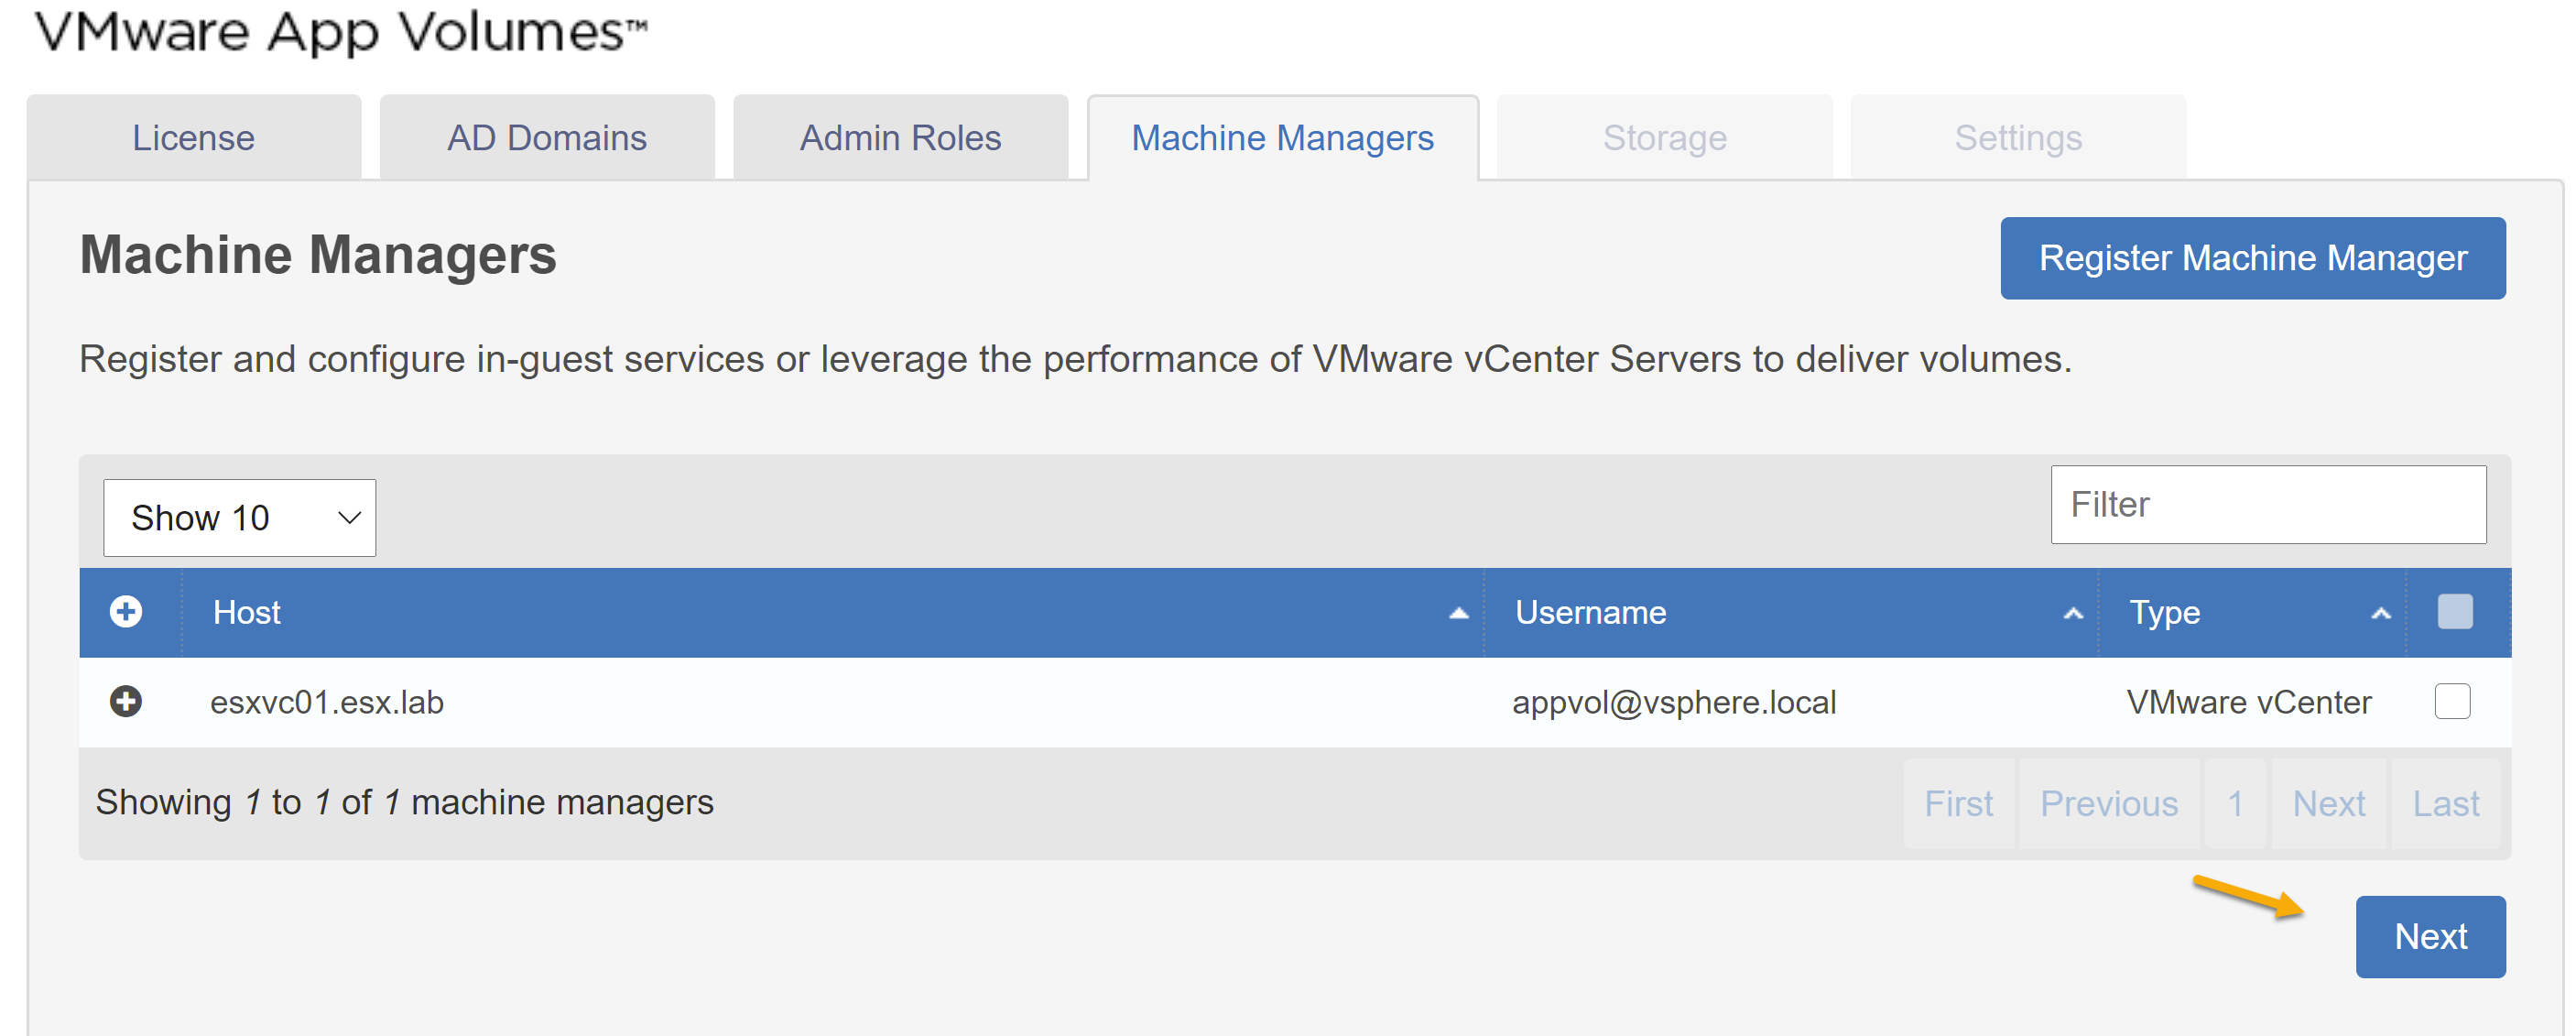
- On the machine managers tab we will be registering a vcenter server. Configure the following:
- Type
- Select “vCenter Server”
- Hostname
- Hostname of vCenter server.
- Username/Password
- This account will be used by vCenter in order to register and execute tasks within vCenter. At the bottom of the page you will notice Required vCenter Permissions. Expand this section in order to create a role in your vCenter environment. For this demo I have created the role in vCenter and vsphere.local user account. (You can user a domain account as well).
- VMware Cloud
- vCenter is in AWS
- Mount ESXi
- I recommend enabling this. However, this will require username/password for on all of the ESXi hosts.
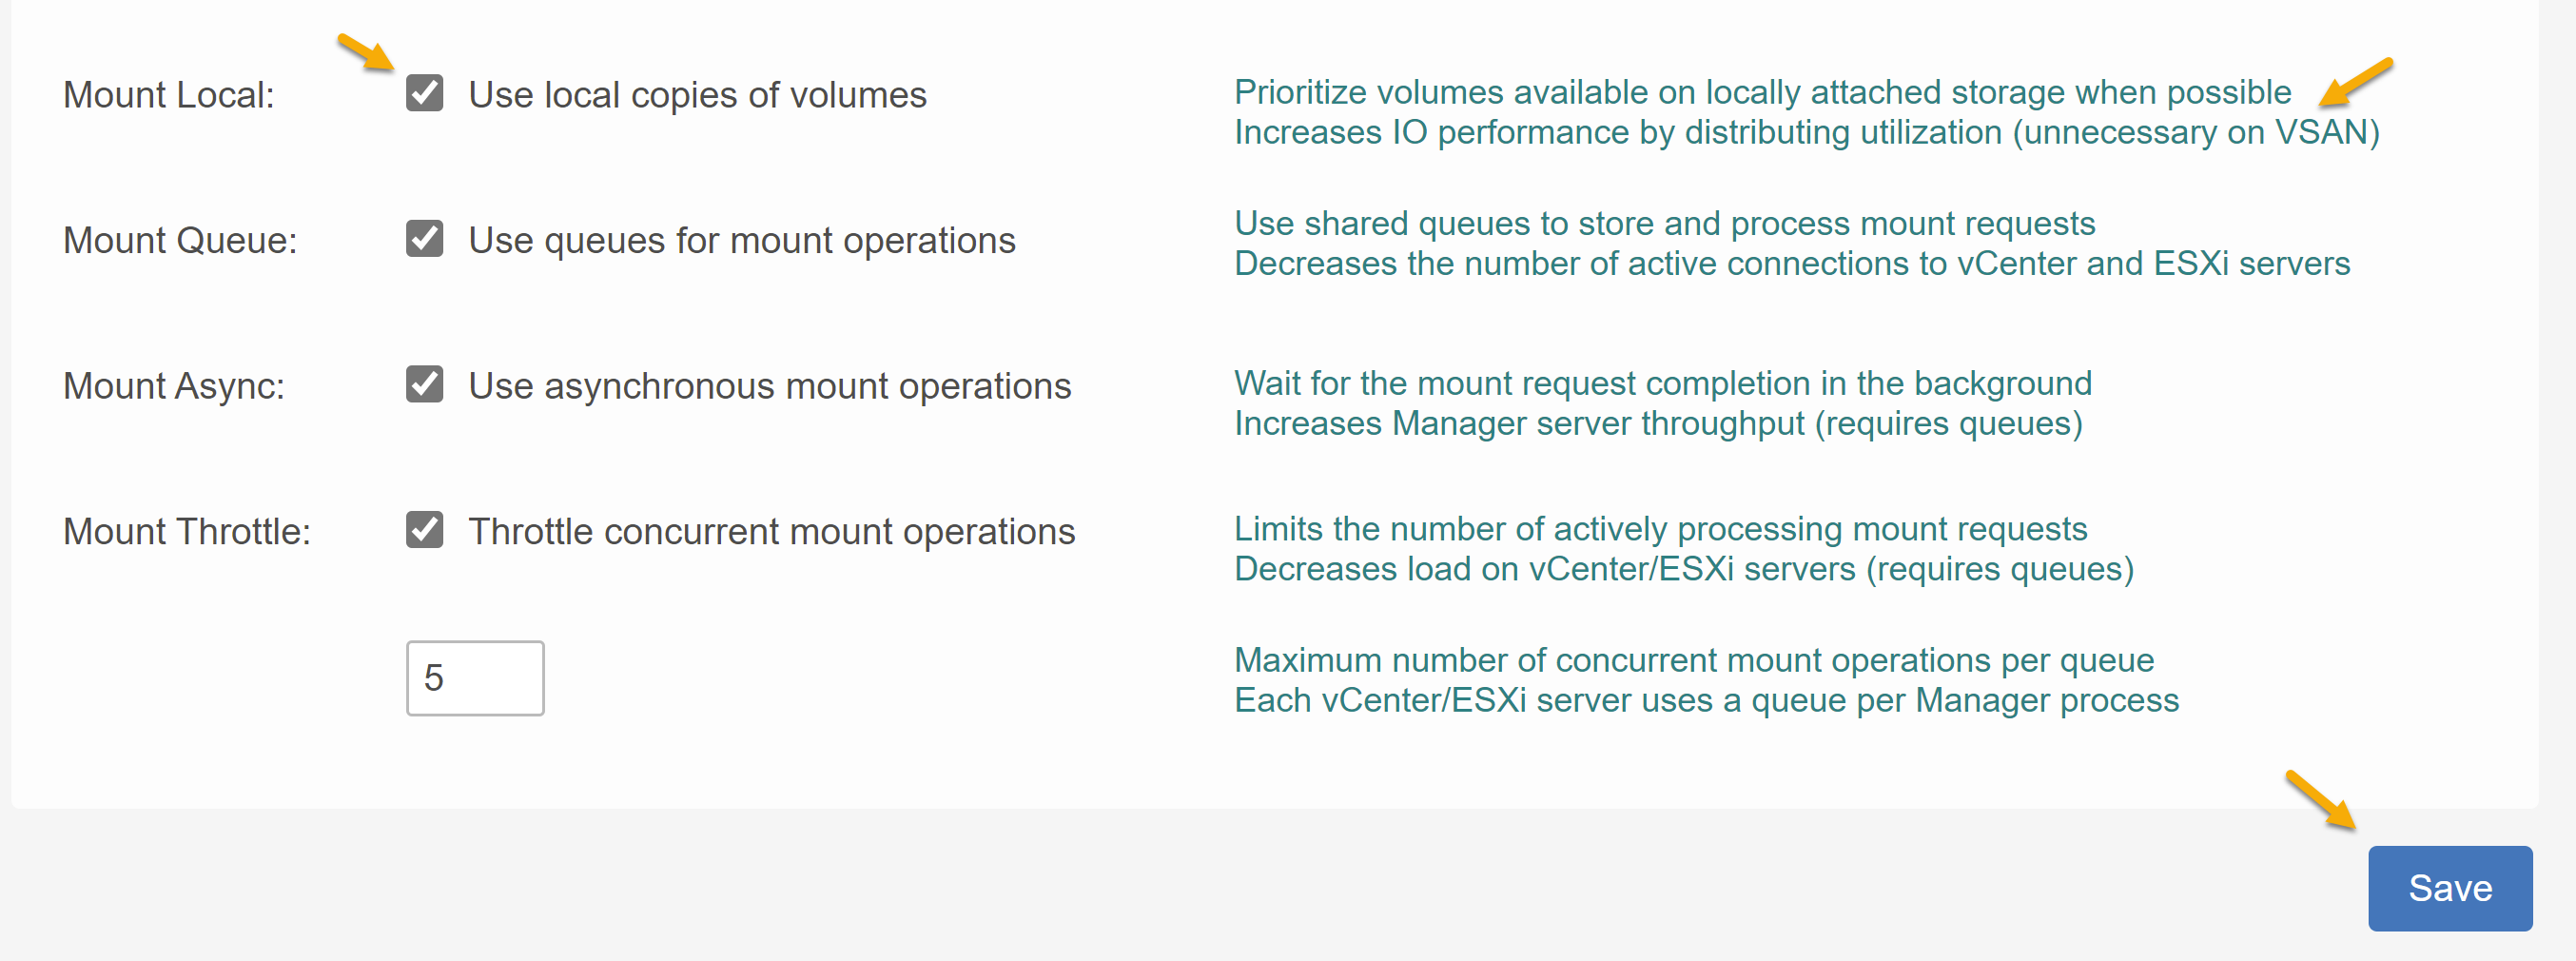
- Mount Local
- Select this option if your VM’s datastore has local copies of volumes and you want to mount the local copies.
- Mount Queue
- Select this option to queue requests to the VM host. Decreases the number of active connections to vCenter Server and ESXi. This results in increased performance and decreases the burden on the vCenter Server.
- Mount Async
- Wait for the mount request to complete in the background. Increases App Volumes Manager server throughput. Requires the Mount Queue option to be selected.
- Mount Throttle
- Limits the number of actively processing mount requests. Decreases load on the vCenter Server or ESXi servers. Requires the Mount Queue option to be selected.

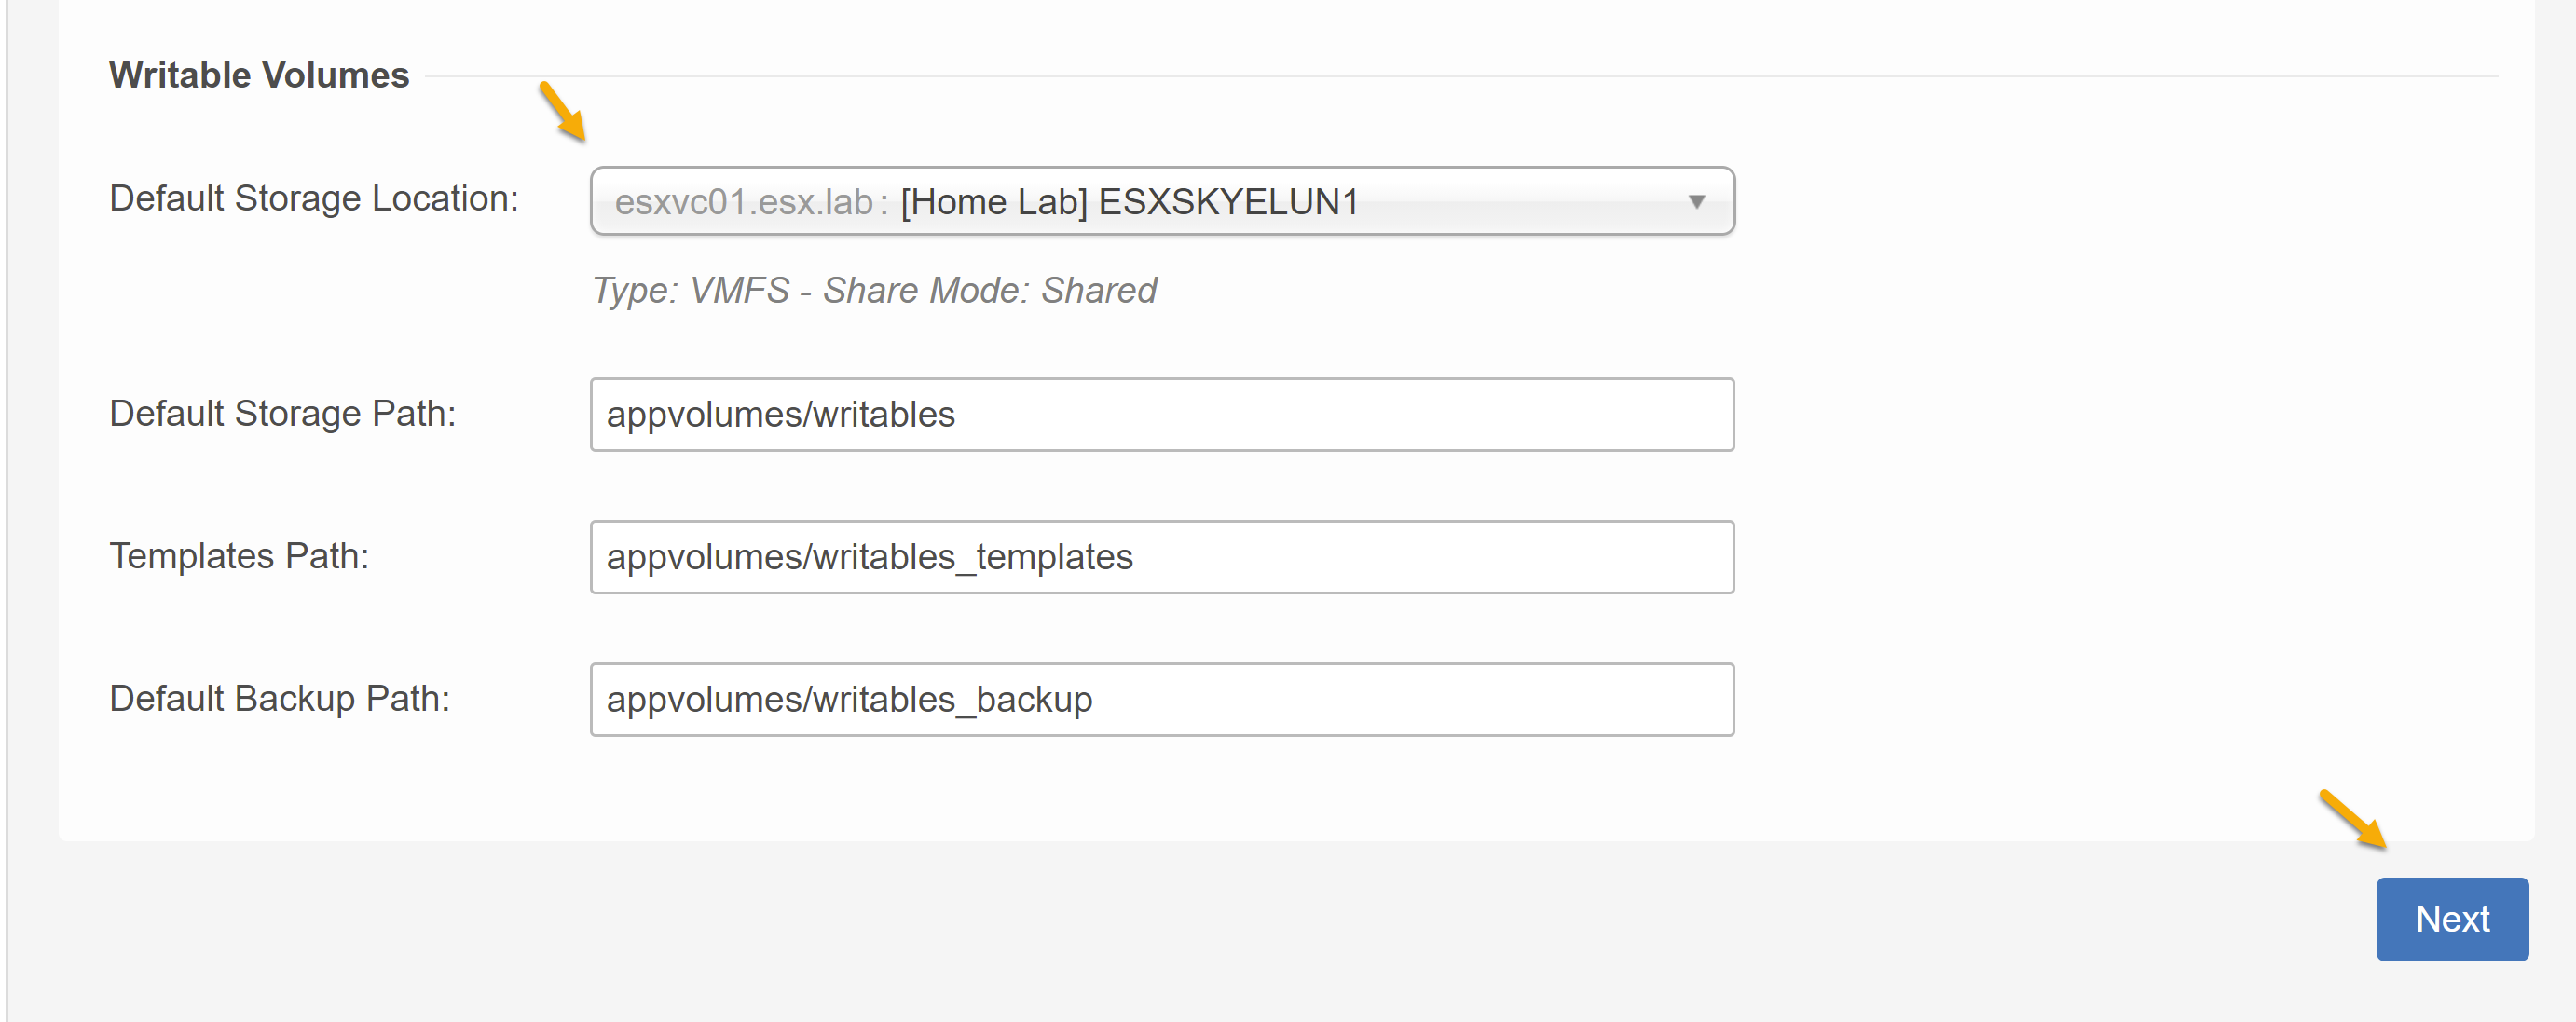
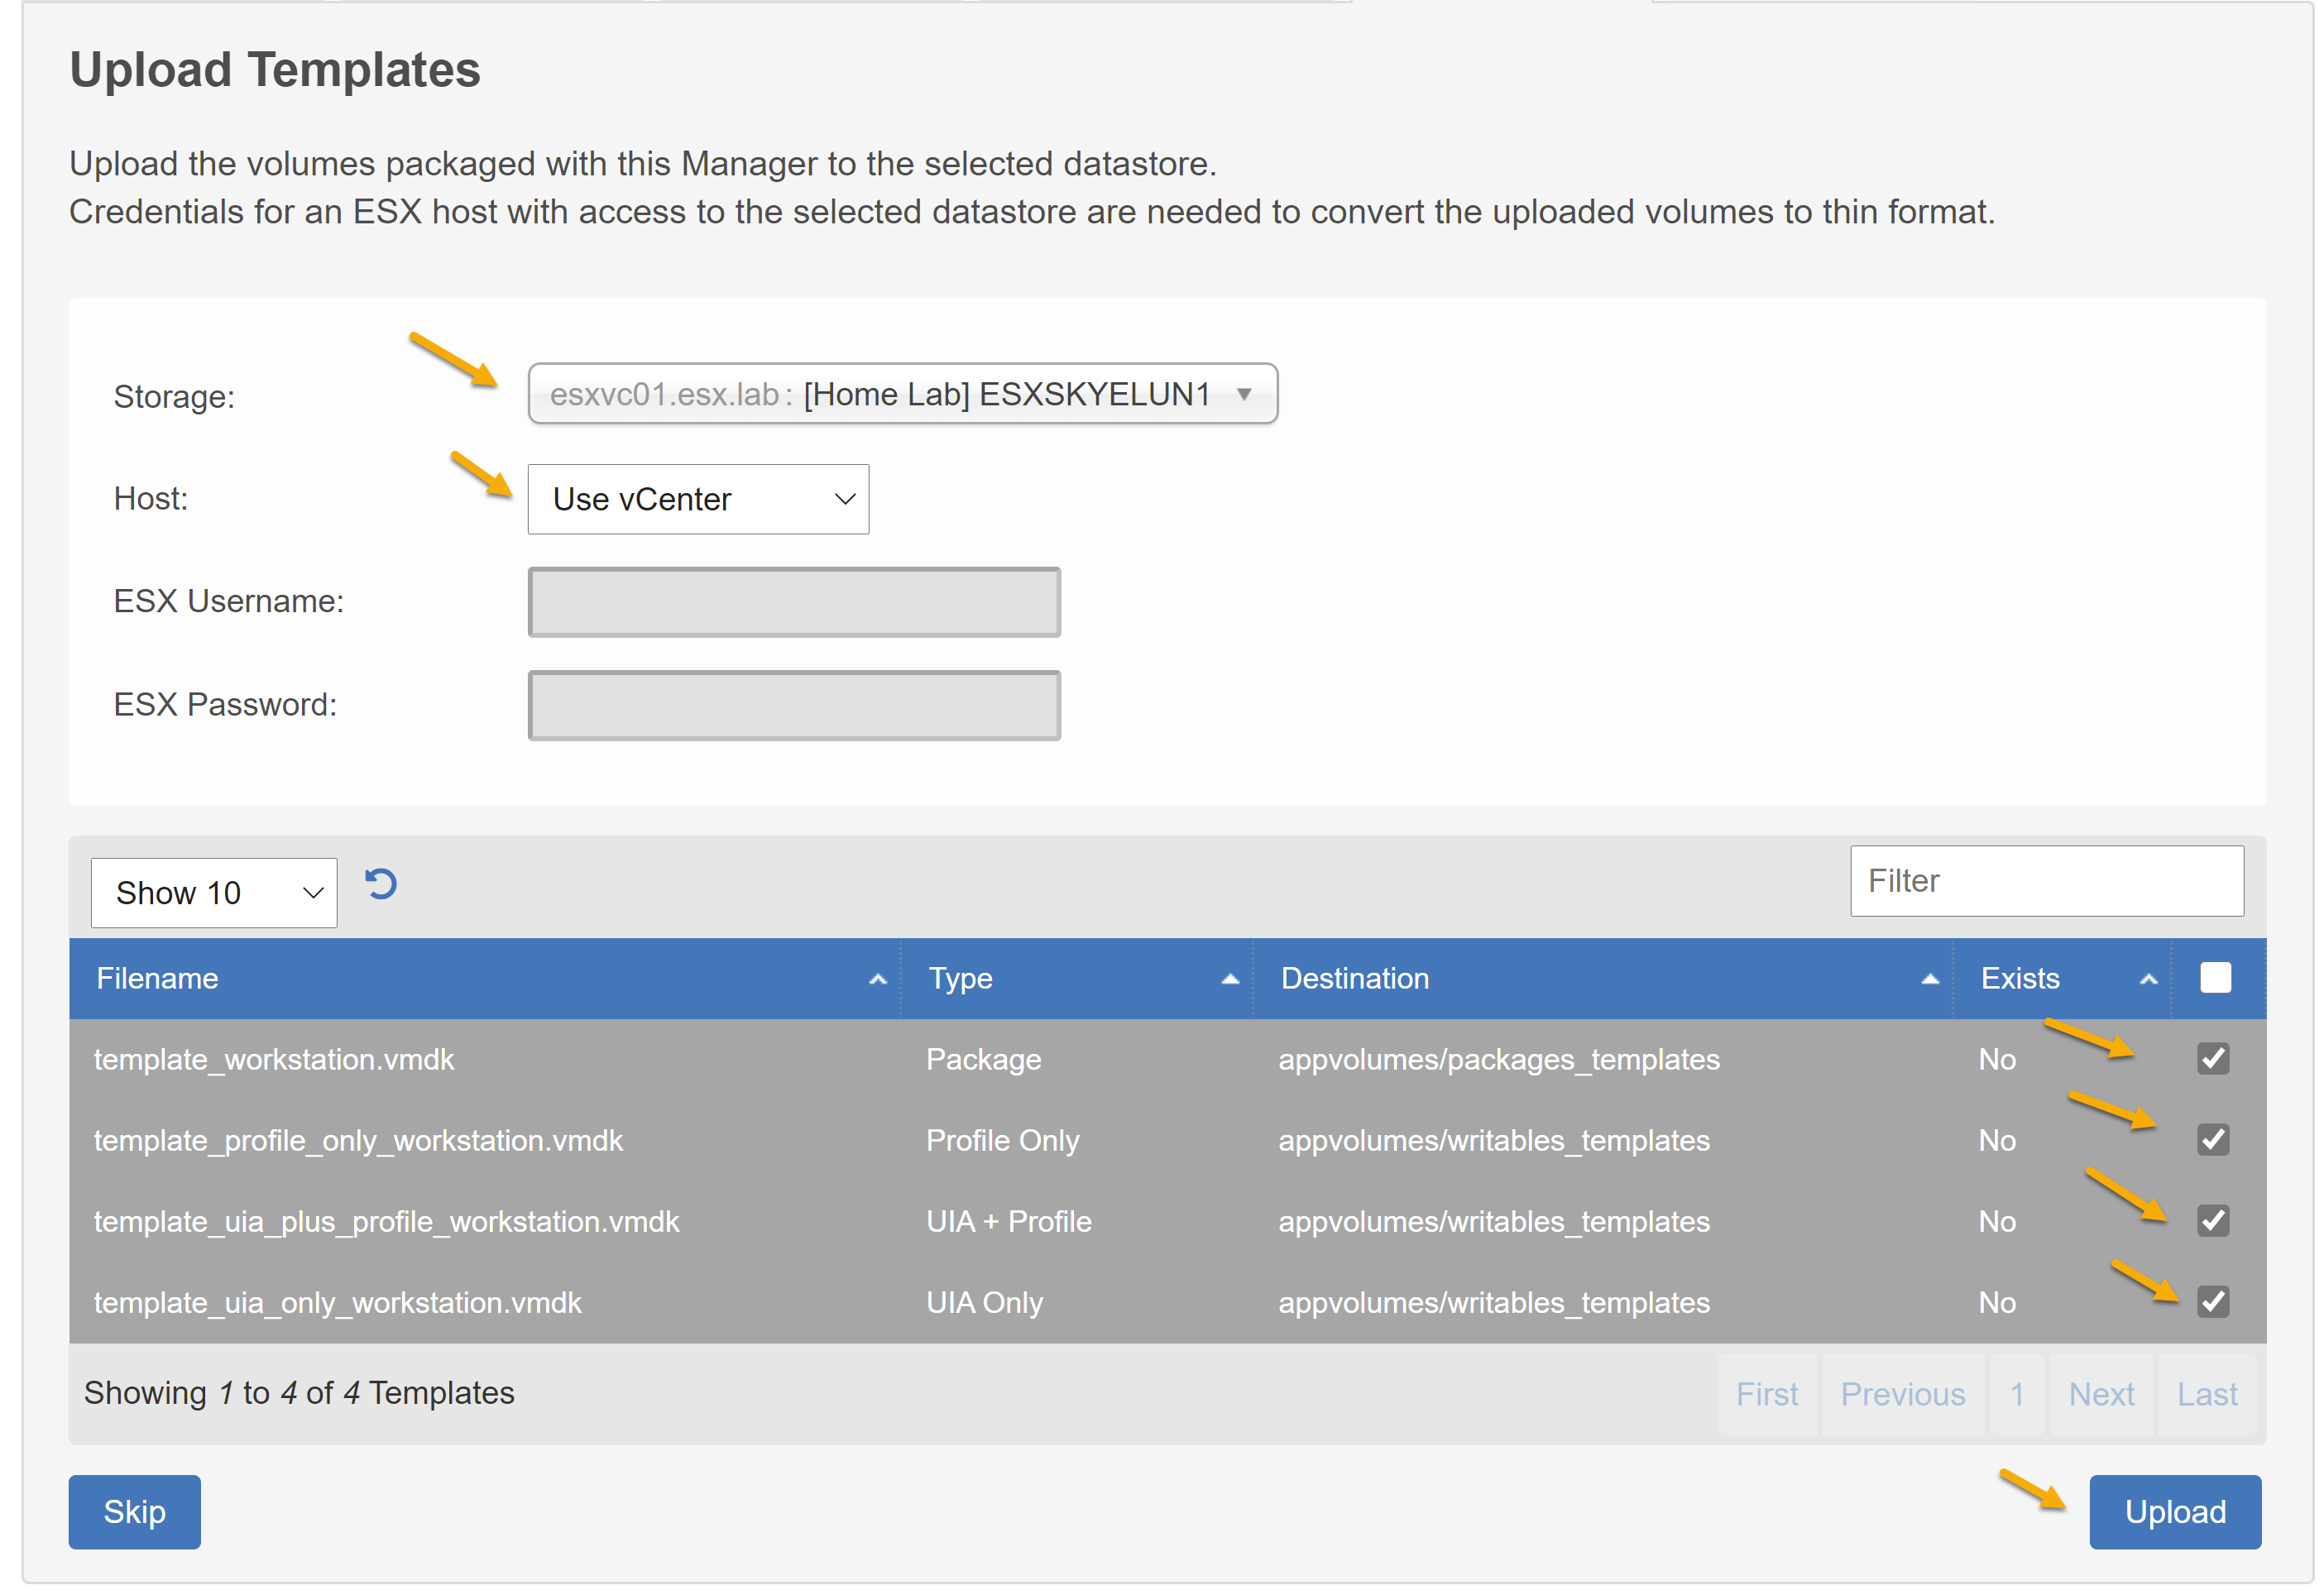
- On the storage tab we will be configuring AppStacks and Writable Volumes location. After configuring storage location press next to continue.
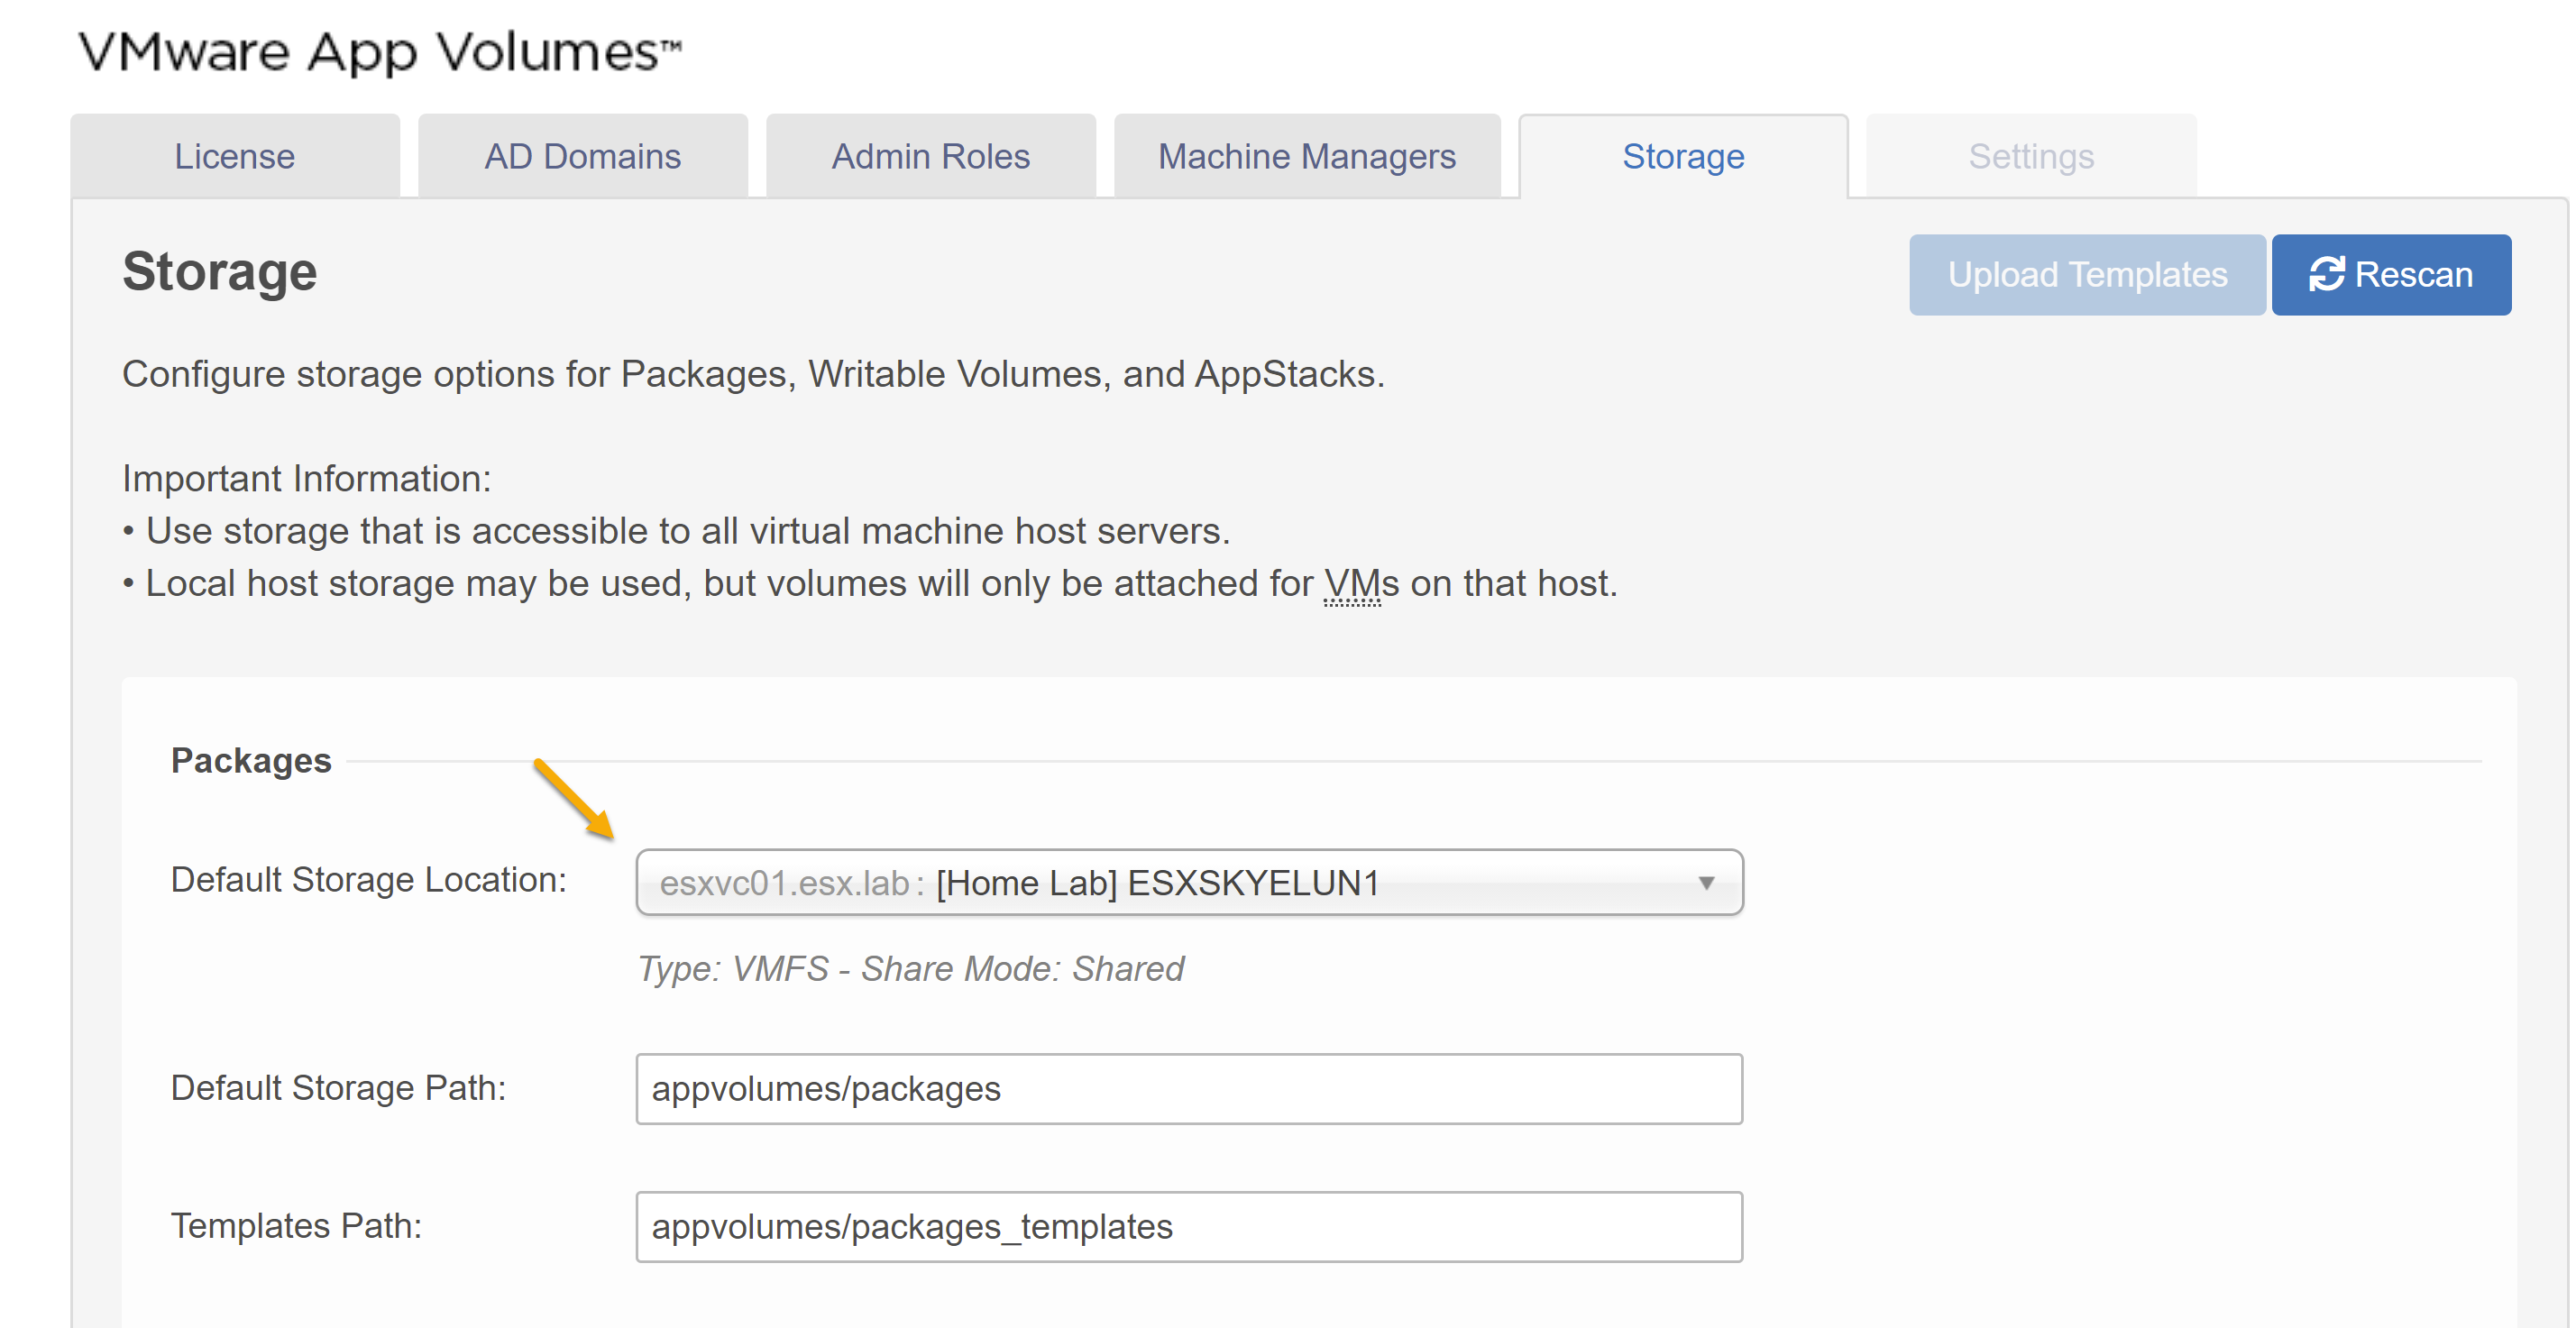
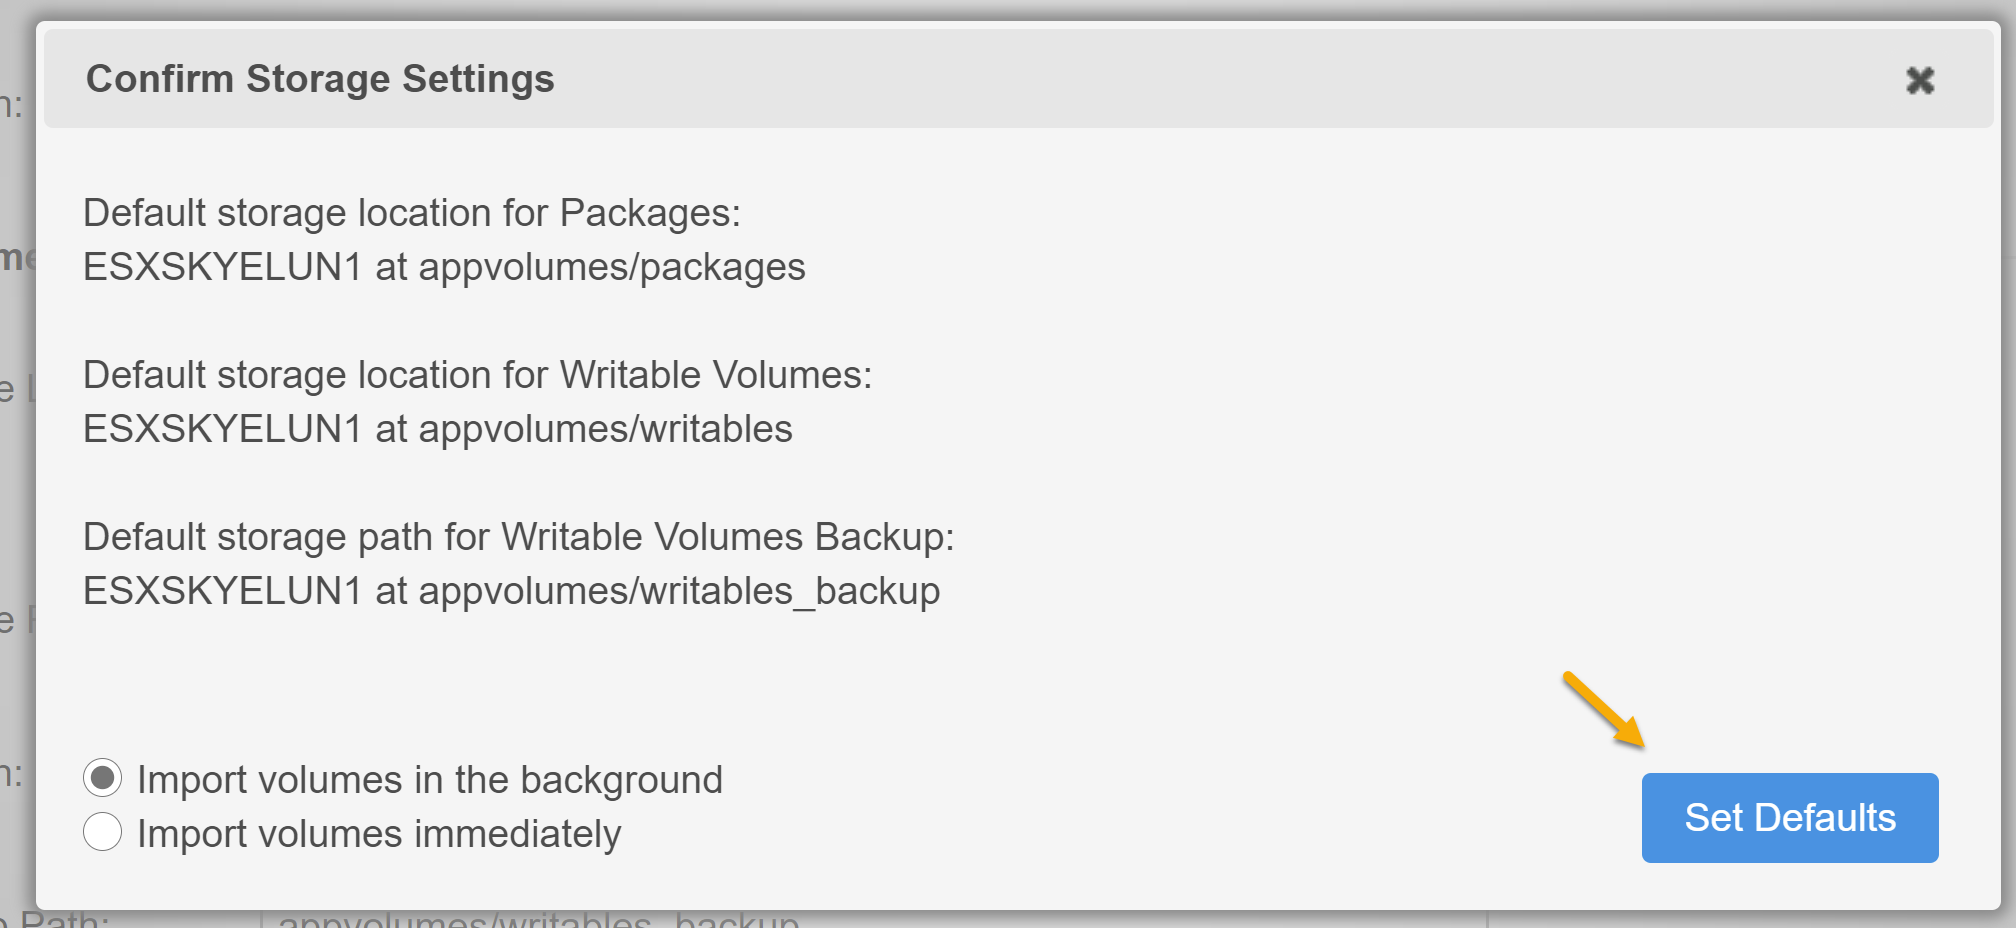
- Upload prepackaged volumes to the storage locations configured. Choose the following:
- AppStacks
- Select storage location for AppStacks
- Choose “apps_templates/template_workstation.vmdk”
- Press upload
- At the settings page review the settings and press save to finish the app volume manager start config.
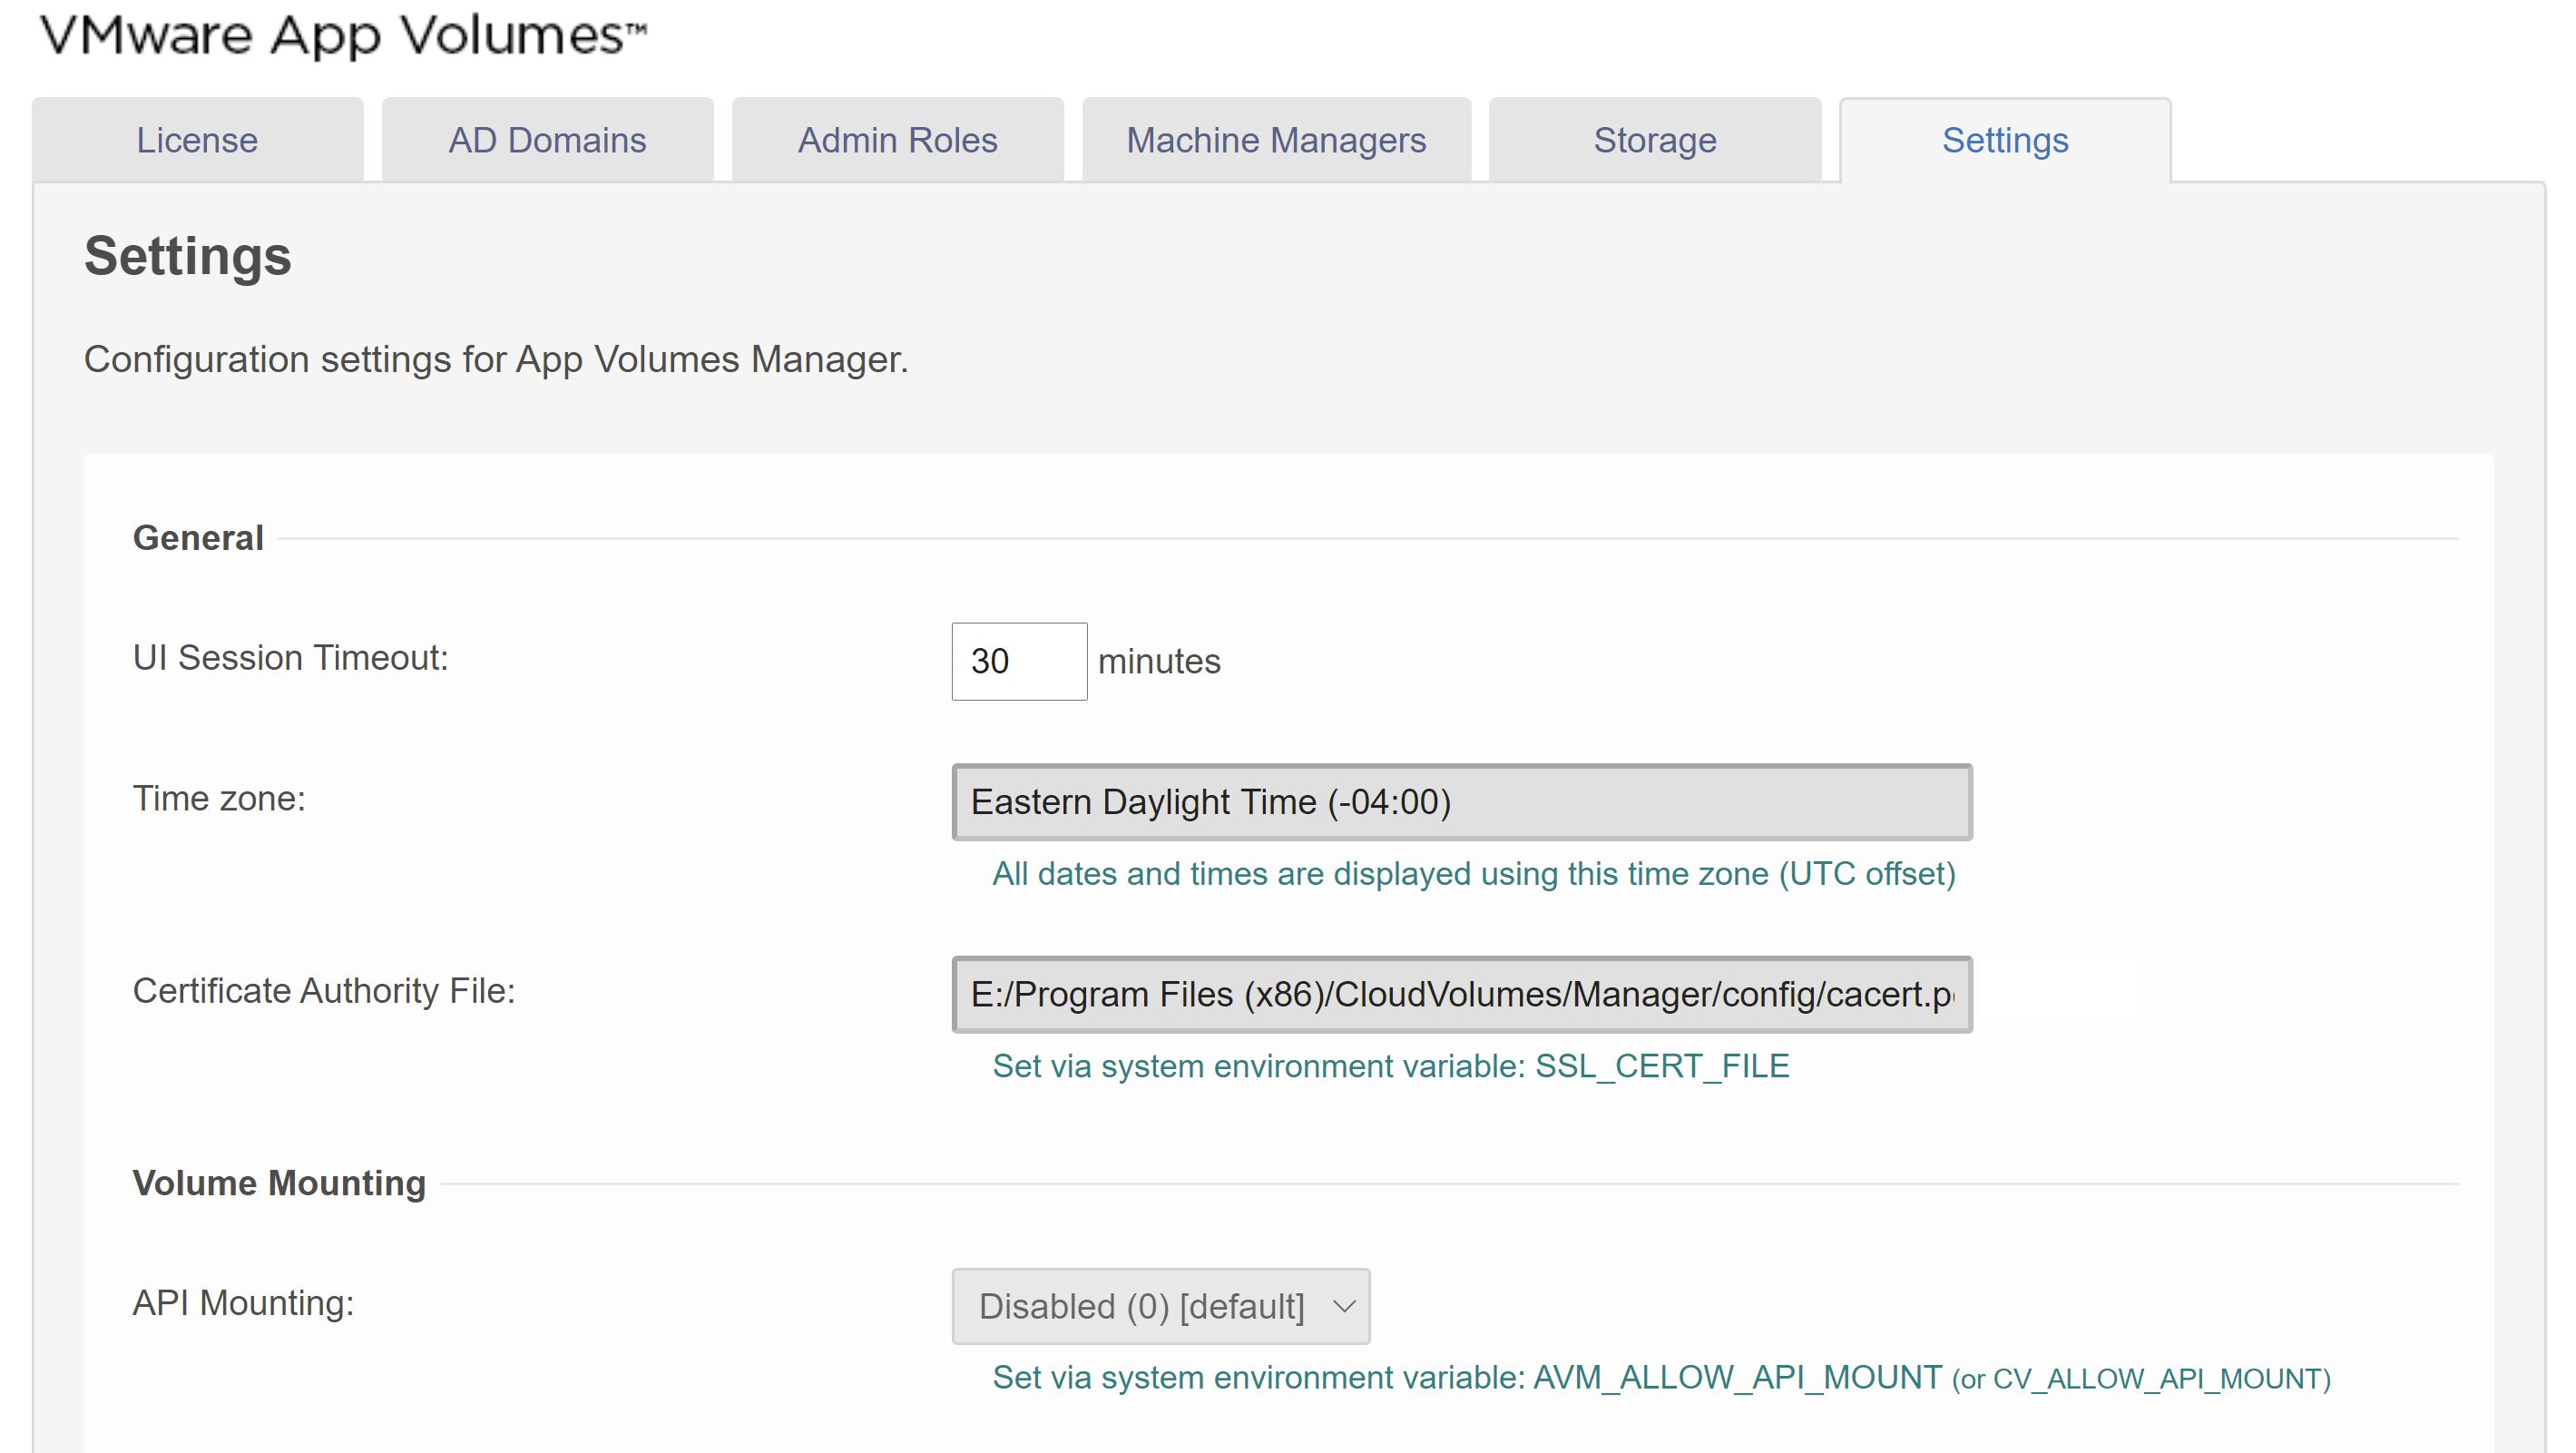
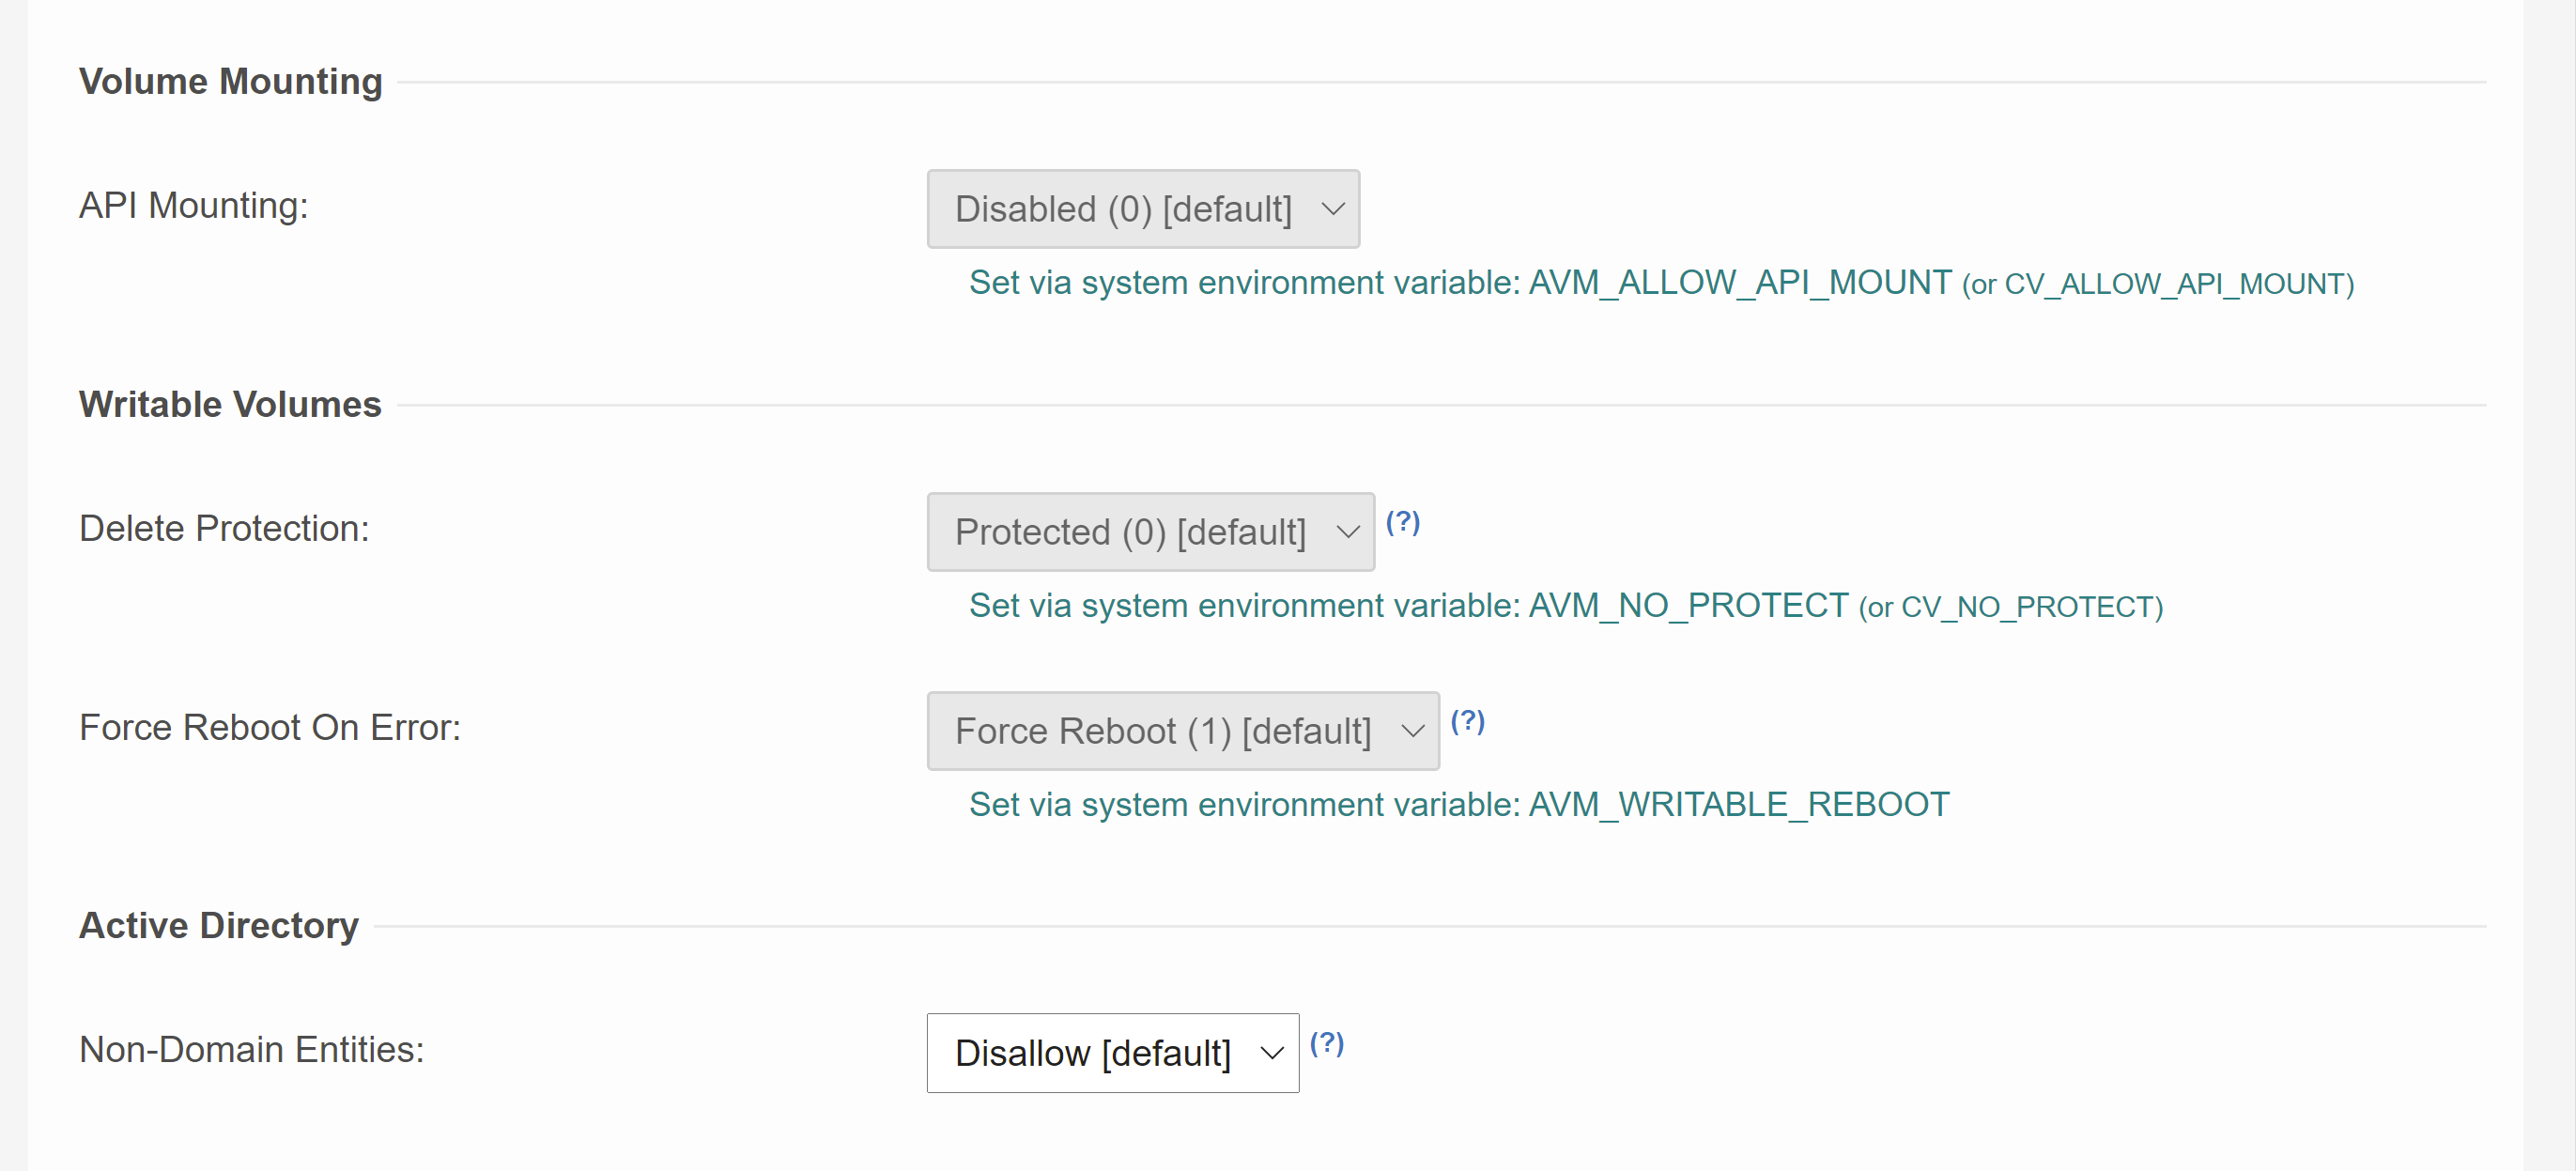
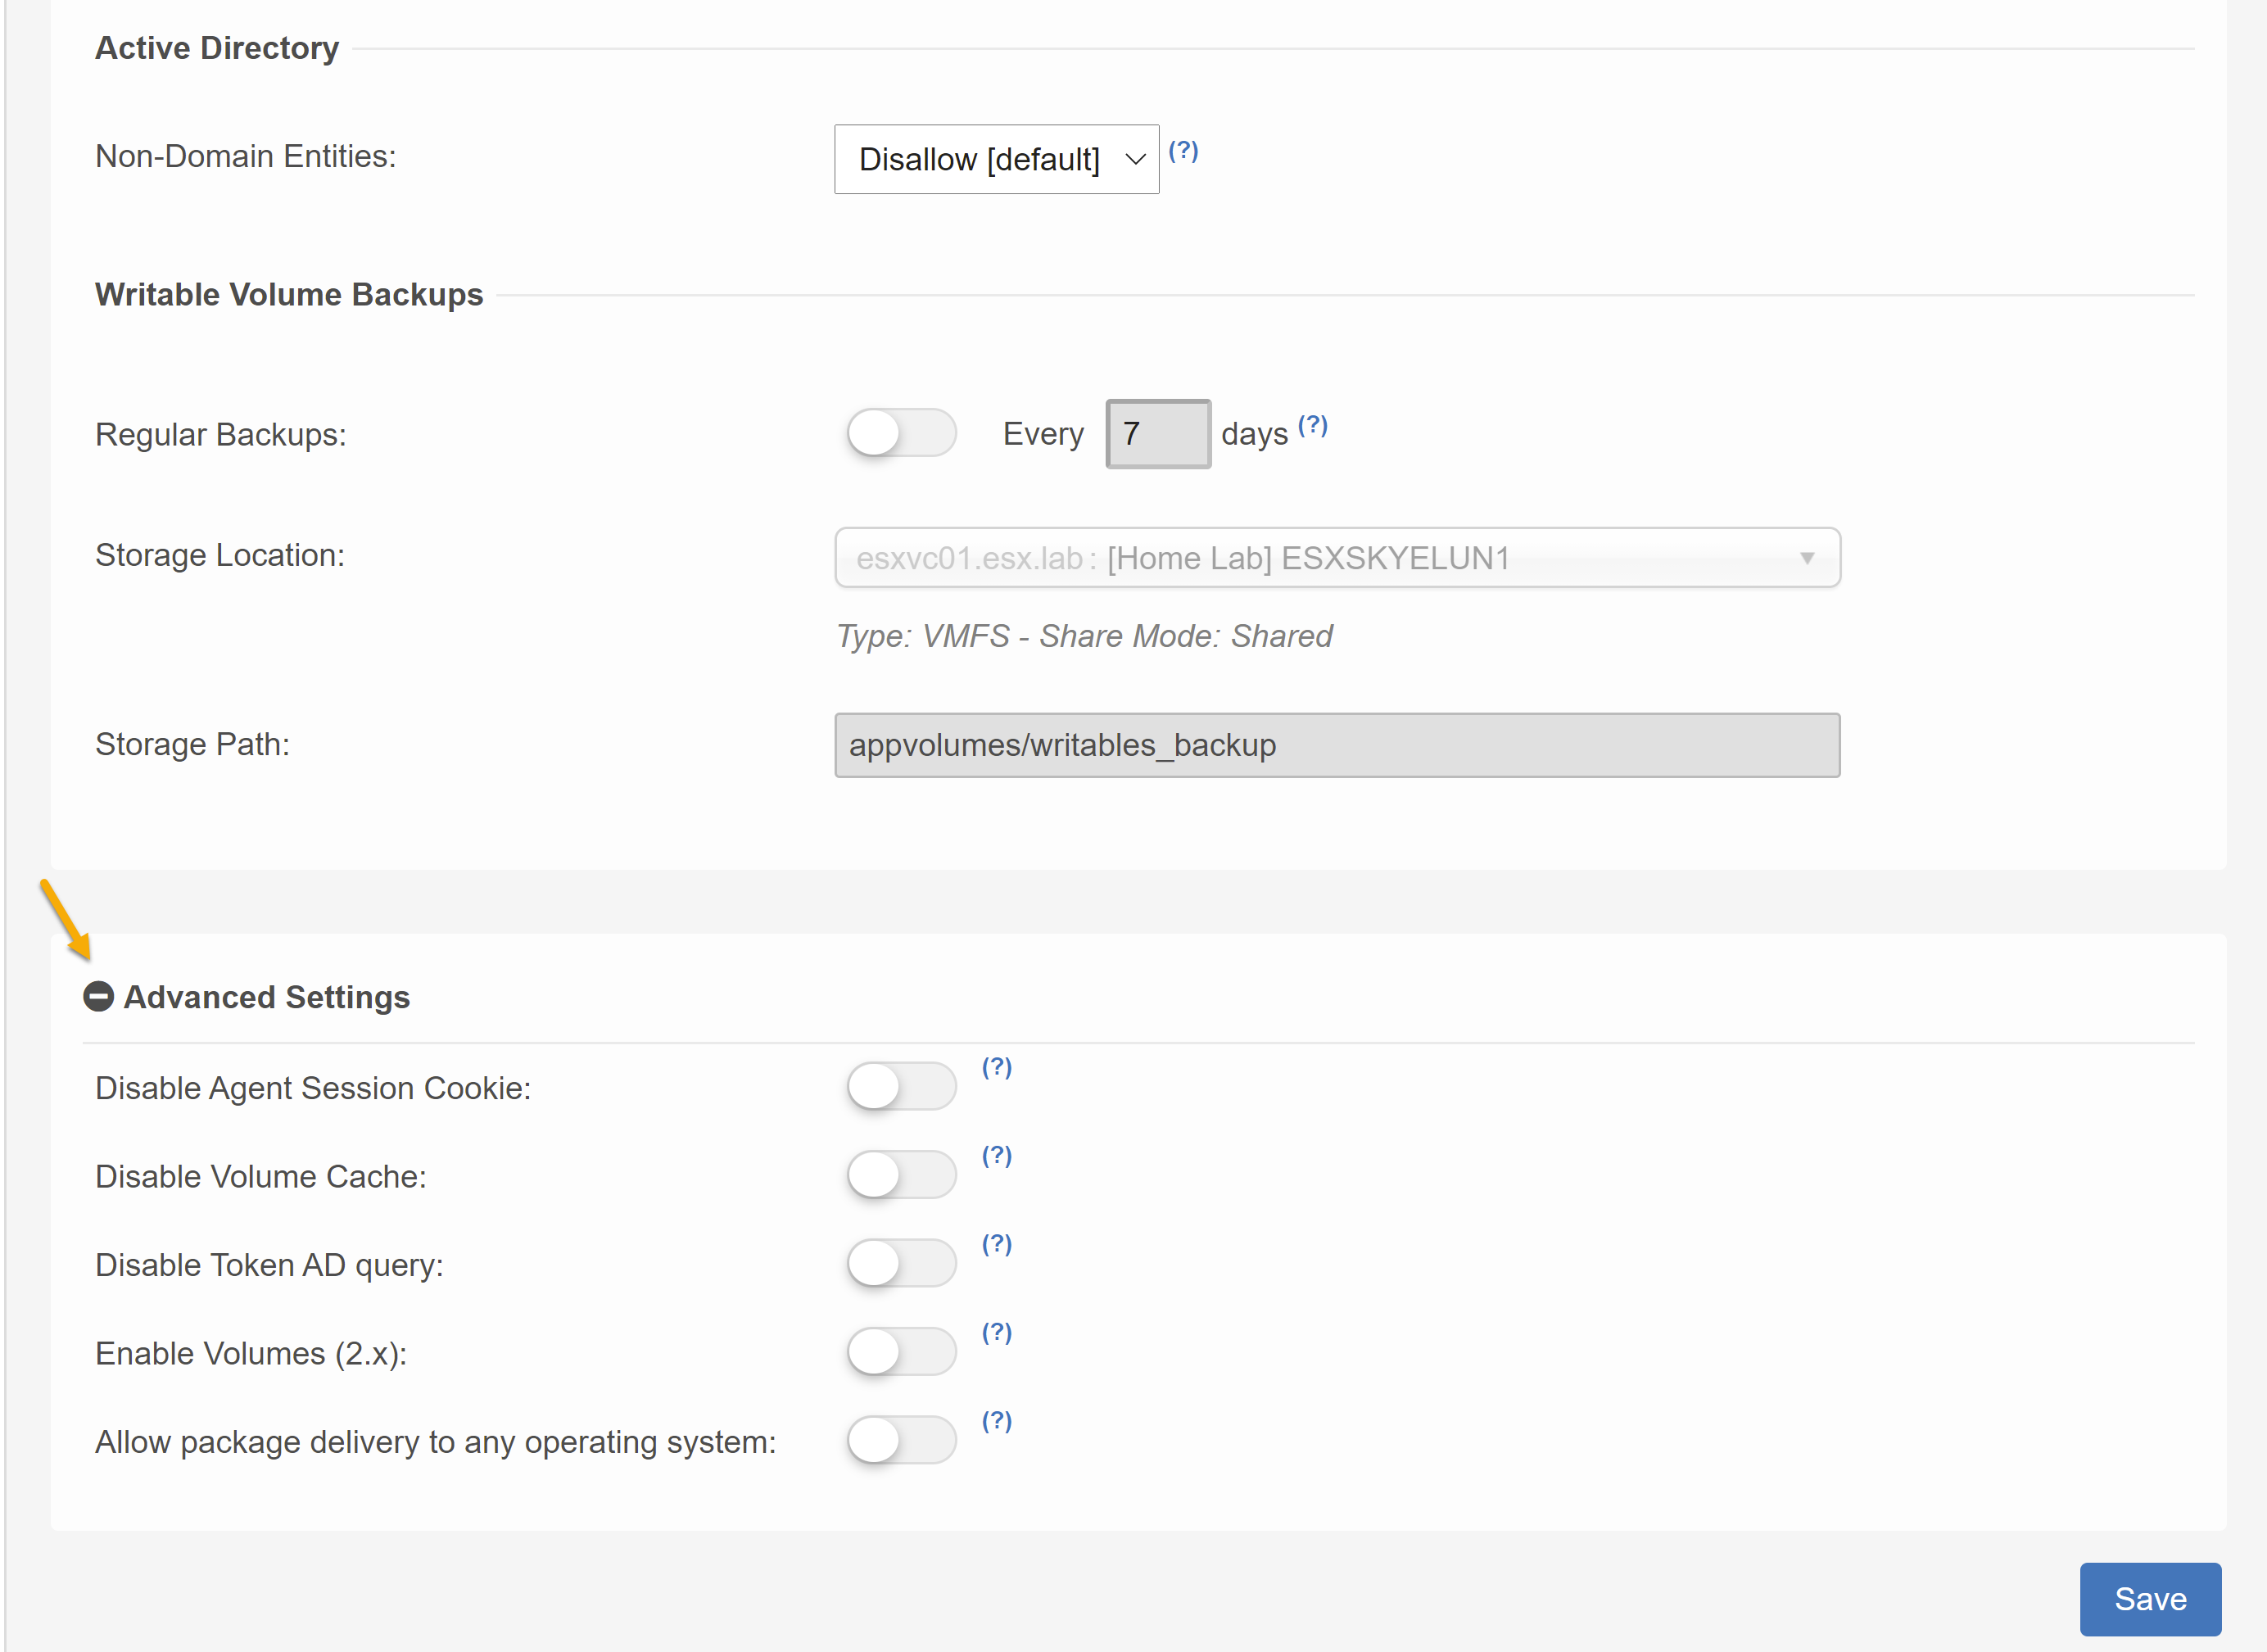
Note at the bottom of the setting page you will see “Advanced Settings”. Expanding this section will expose the following settings
- Disable Agent Session Cookie
- Toggle the slider to enable or disable Agent Session Cookie. App Volumes uses a session cookie to optimize the communication between the App Volumes Manager and App Volumes Agent. If you have Agent session issues, you can use this setting to disable the session cookies.
- Disable Volume Cache
- Toggle the slider to enable or disable volume cache. App Volumes caches AppStack or application objects to improve performance. However, if you experience increased memory usage, consider disabling volume caching.
- Disable Token AD query
- Toggle the slider to enable or disable token AD query. App Volumes queries for Active Directory group membership using cached object SIDs. Previous versions of App Volumes performed group membership queries against Active Directory domains directly and recursively. Disable token AD query to revert to the previous implementation.
- Enable Volumes (2.x)
- Toggle the slider to enable or disable the VOLUMES (2.X) tab. VOLUMES (2.X) tab is for working with AppStacks and Writable Volumes along with App Volumes Agent 2.x. For upgraded deployments, this setting can be disabled after the AppStacks and Writable Volumes are completely migrated.
Vist this VMware Doc for more info.